
GRS Build-A-Cade
I have a few 1/6th scale arcade machines that are nice little mementos of my childhood. They are fun to fire up and play for a while, and it’s also something my kids enjoy messing with every now and then. GRS has been delivering arcade quality products at very reasonable prices and I’ve used a few of their products to upgrade my bartop machine. And today, we have their GRS BUILD-A-CADE to look at and its aim to deliver a fun machine at a small scale with some unique features.
The GRS BUILD-A-CADE is a build-it-yourself 1/6th scale arcade machine that offers interchangeable controls. We’ll get to that unique part of the BUILD-A-CADE in a bit. The kit comes with all the parts needed to build a small scale arcade machine except for a single board computer and a power supply. The BUILD-A-CADE is compatible with a Raspberry Pi 3A, 3B, or a Raspberry Pi 4. To get the most out of the BUILD-A-CADE, I suggest a Raspberry Pi 3B as that will let you use both USB ports on the back as well as the HDMI out.
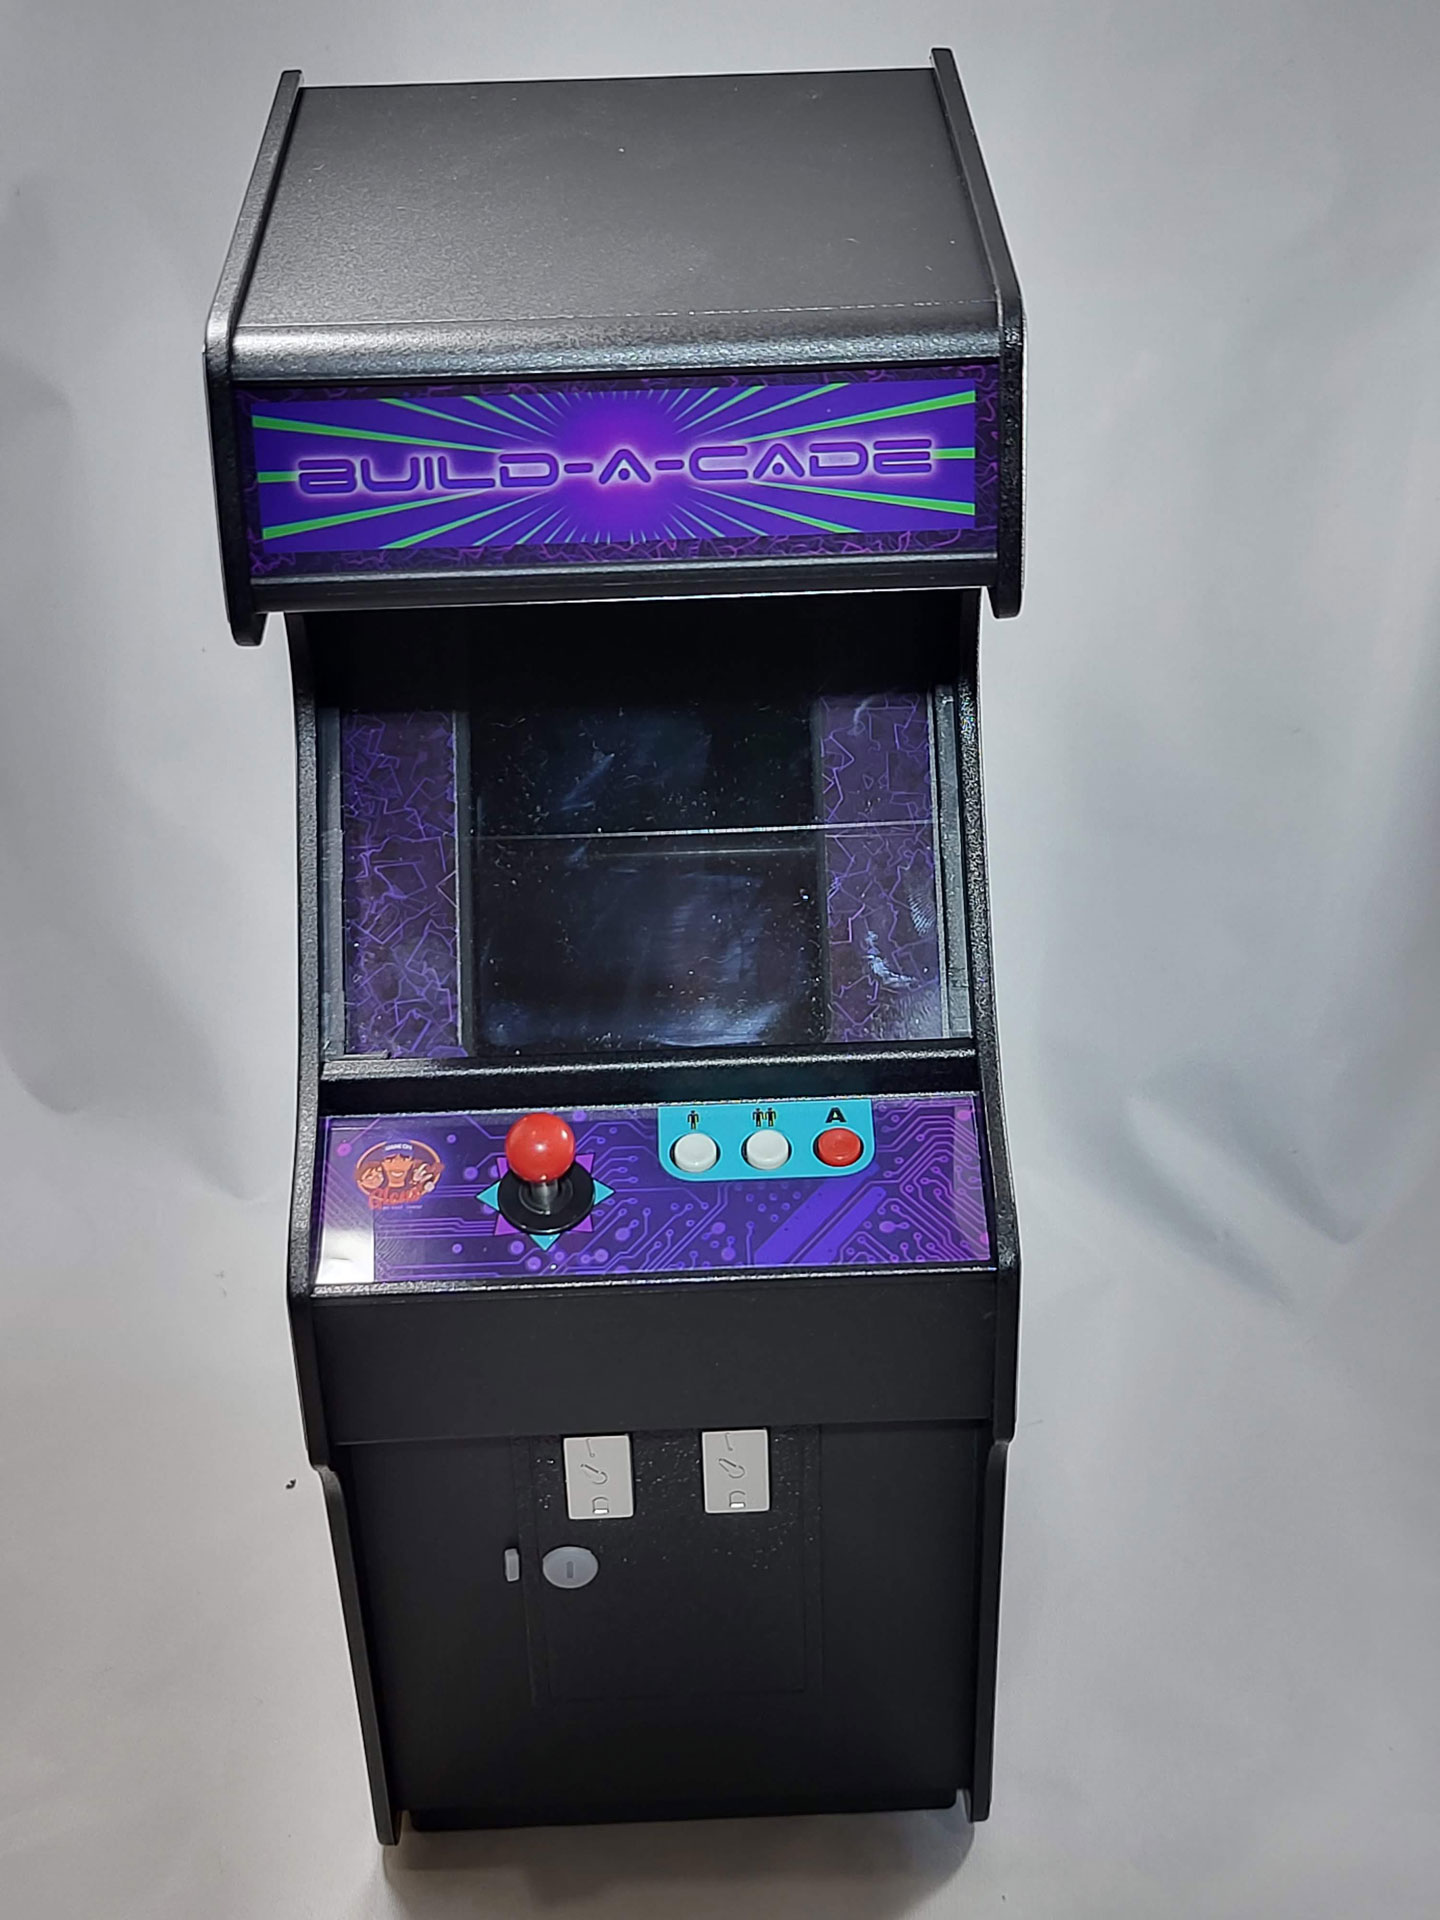
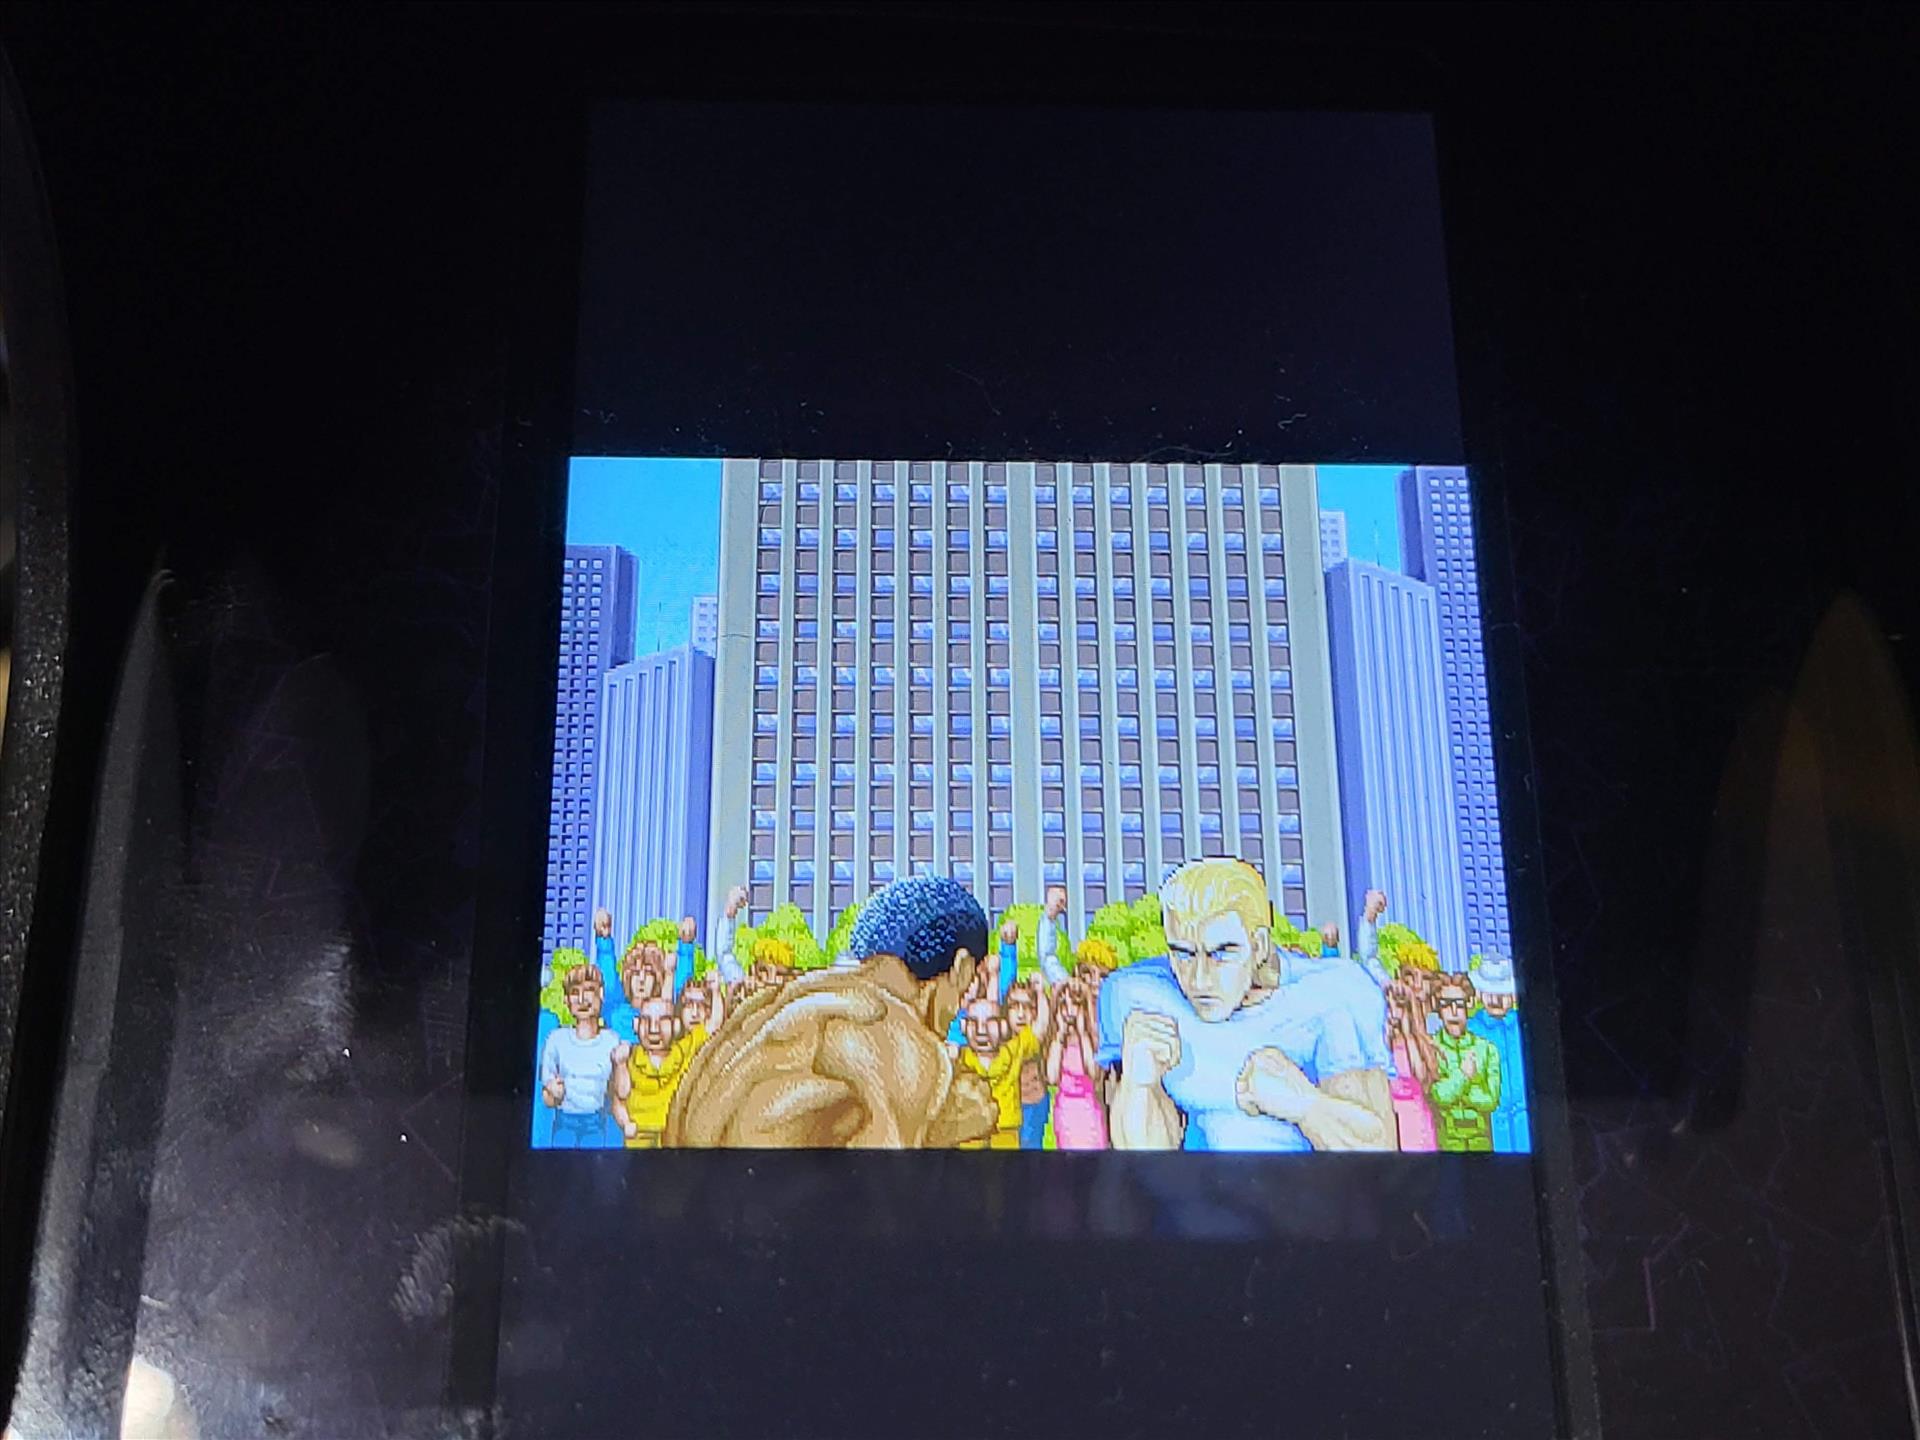
All of the pieces are made of very tough plastic that feel like the machine is built to last. It’s got a good feel and definitely feels solid once all the pieces are put together. The included screen is a nice IPS LCD screen in a vertical orientation. Colors are good and you get some good viewing angles. It’s bright and has very good color replication. I was really surprised at how clear and bright the LCD display got. For a small 7” display, it does a great job at showing off your old school games in a tiny form factor.
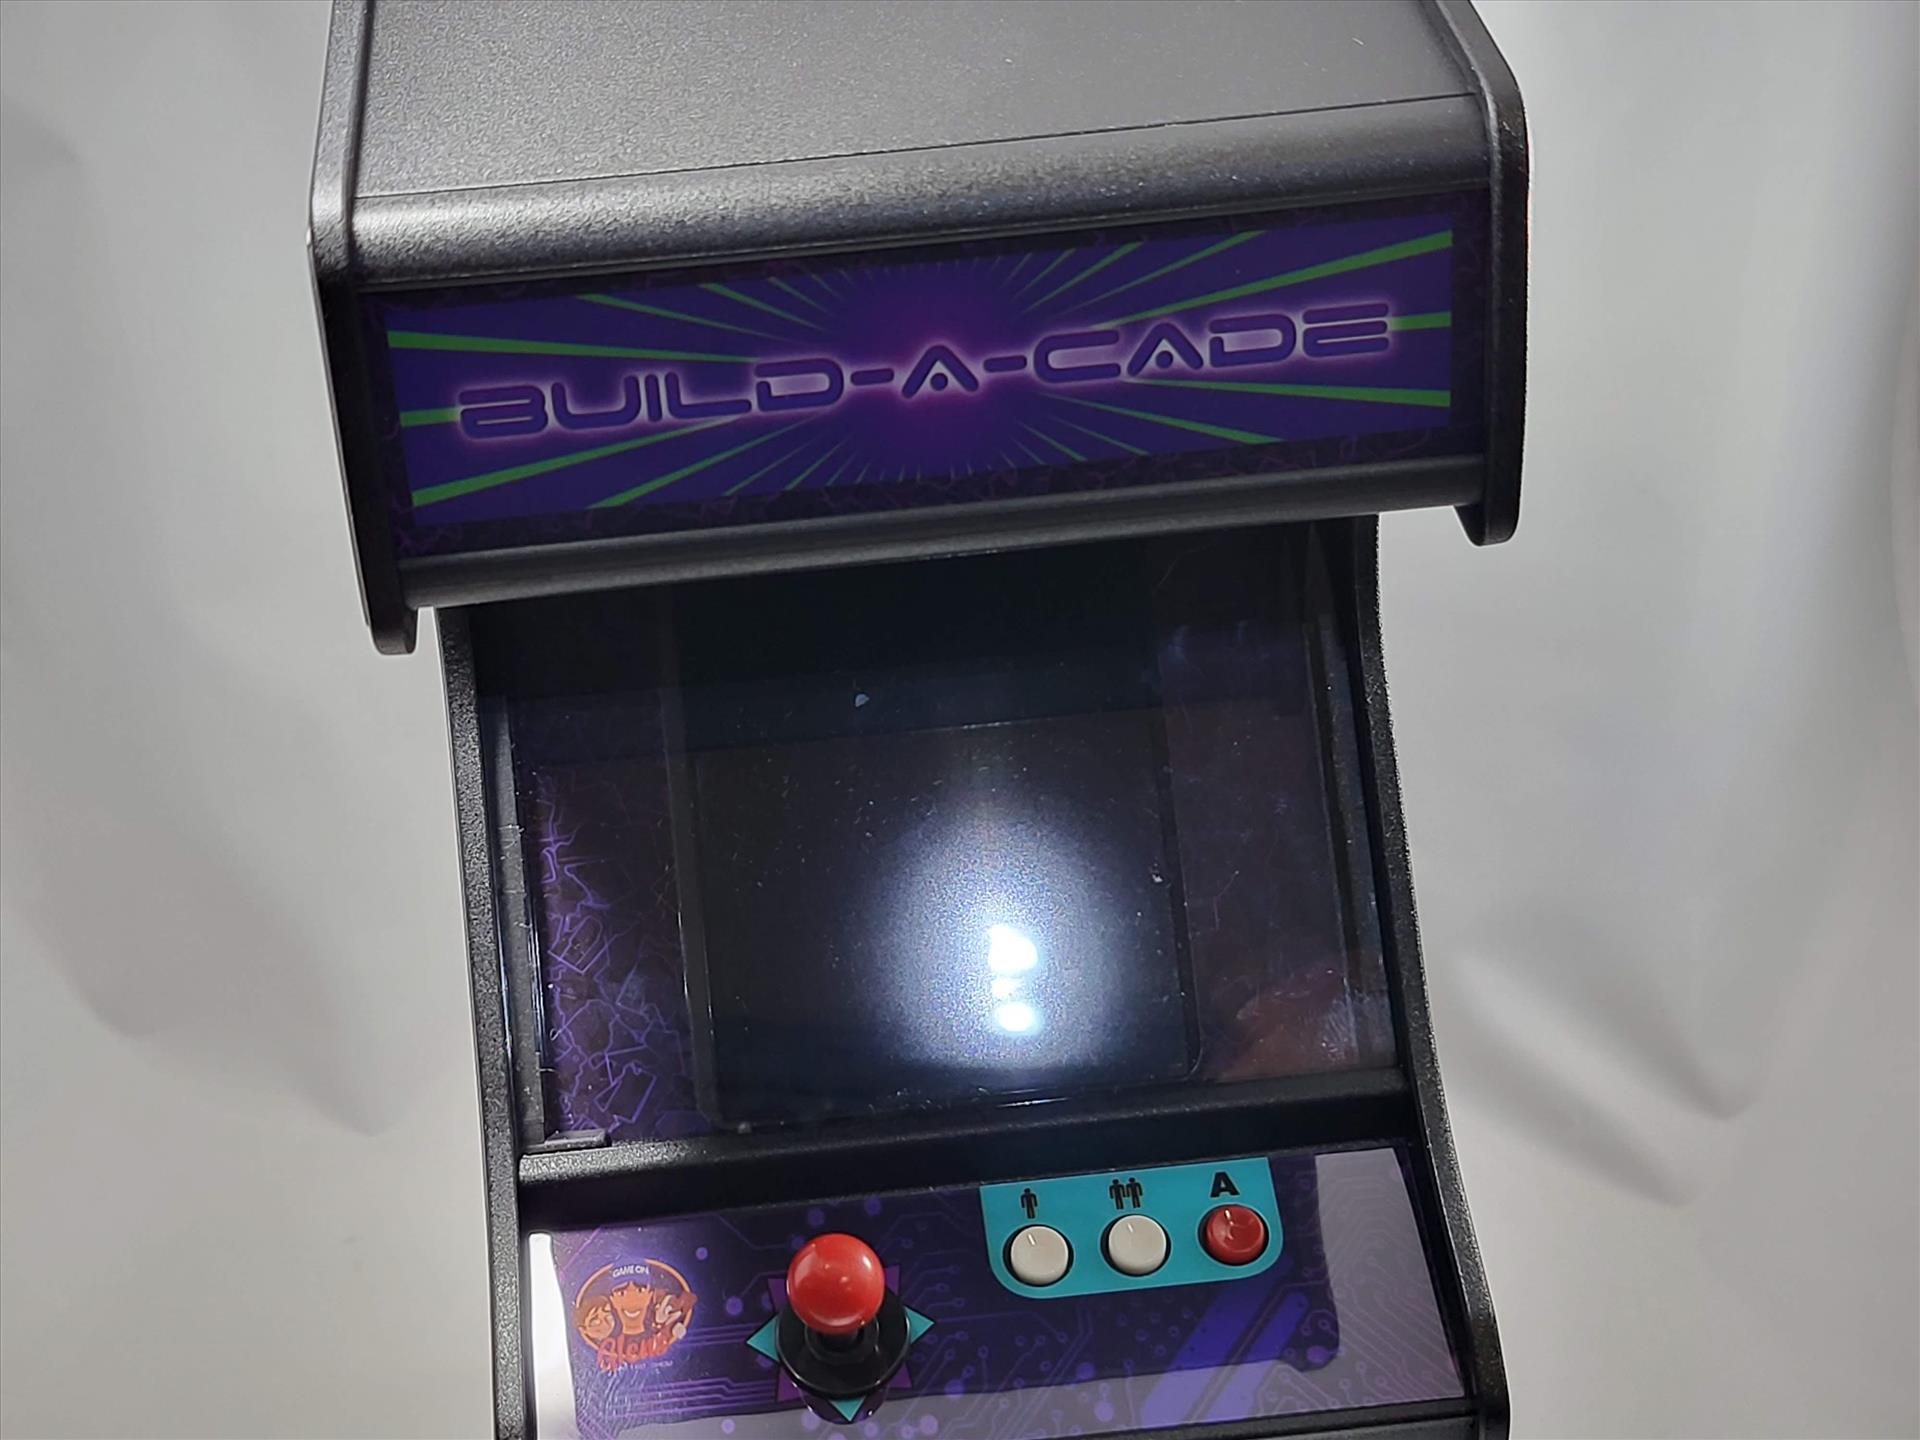
Above the LCD screen is the light-up marquee. Included is a frosted plexiglass that helps spread the LCD light behind it to be more evenly distributed across the marquee. It’s a neat little feature and while the kit includes a marquee decale for you to use, you can get something custom made for you if you prefer.
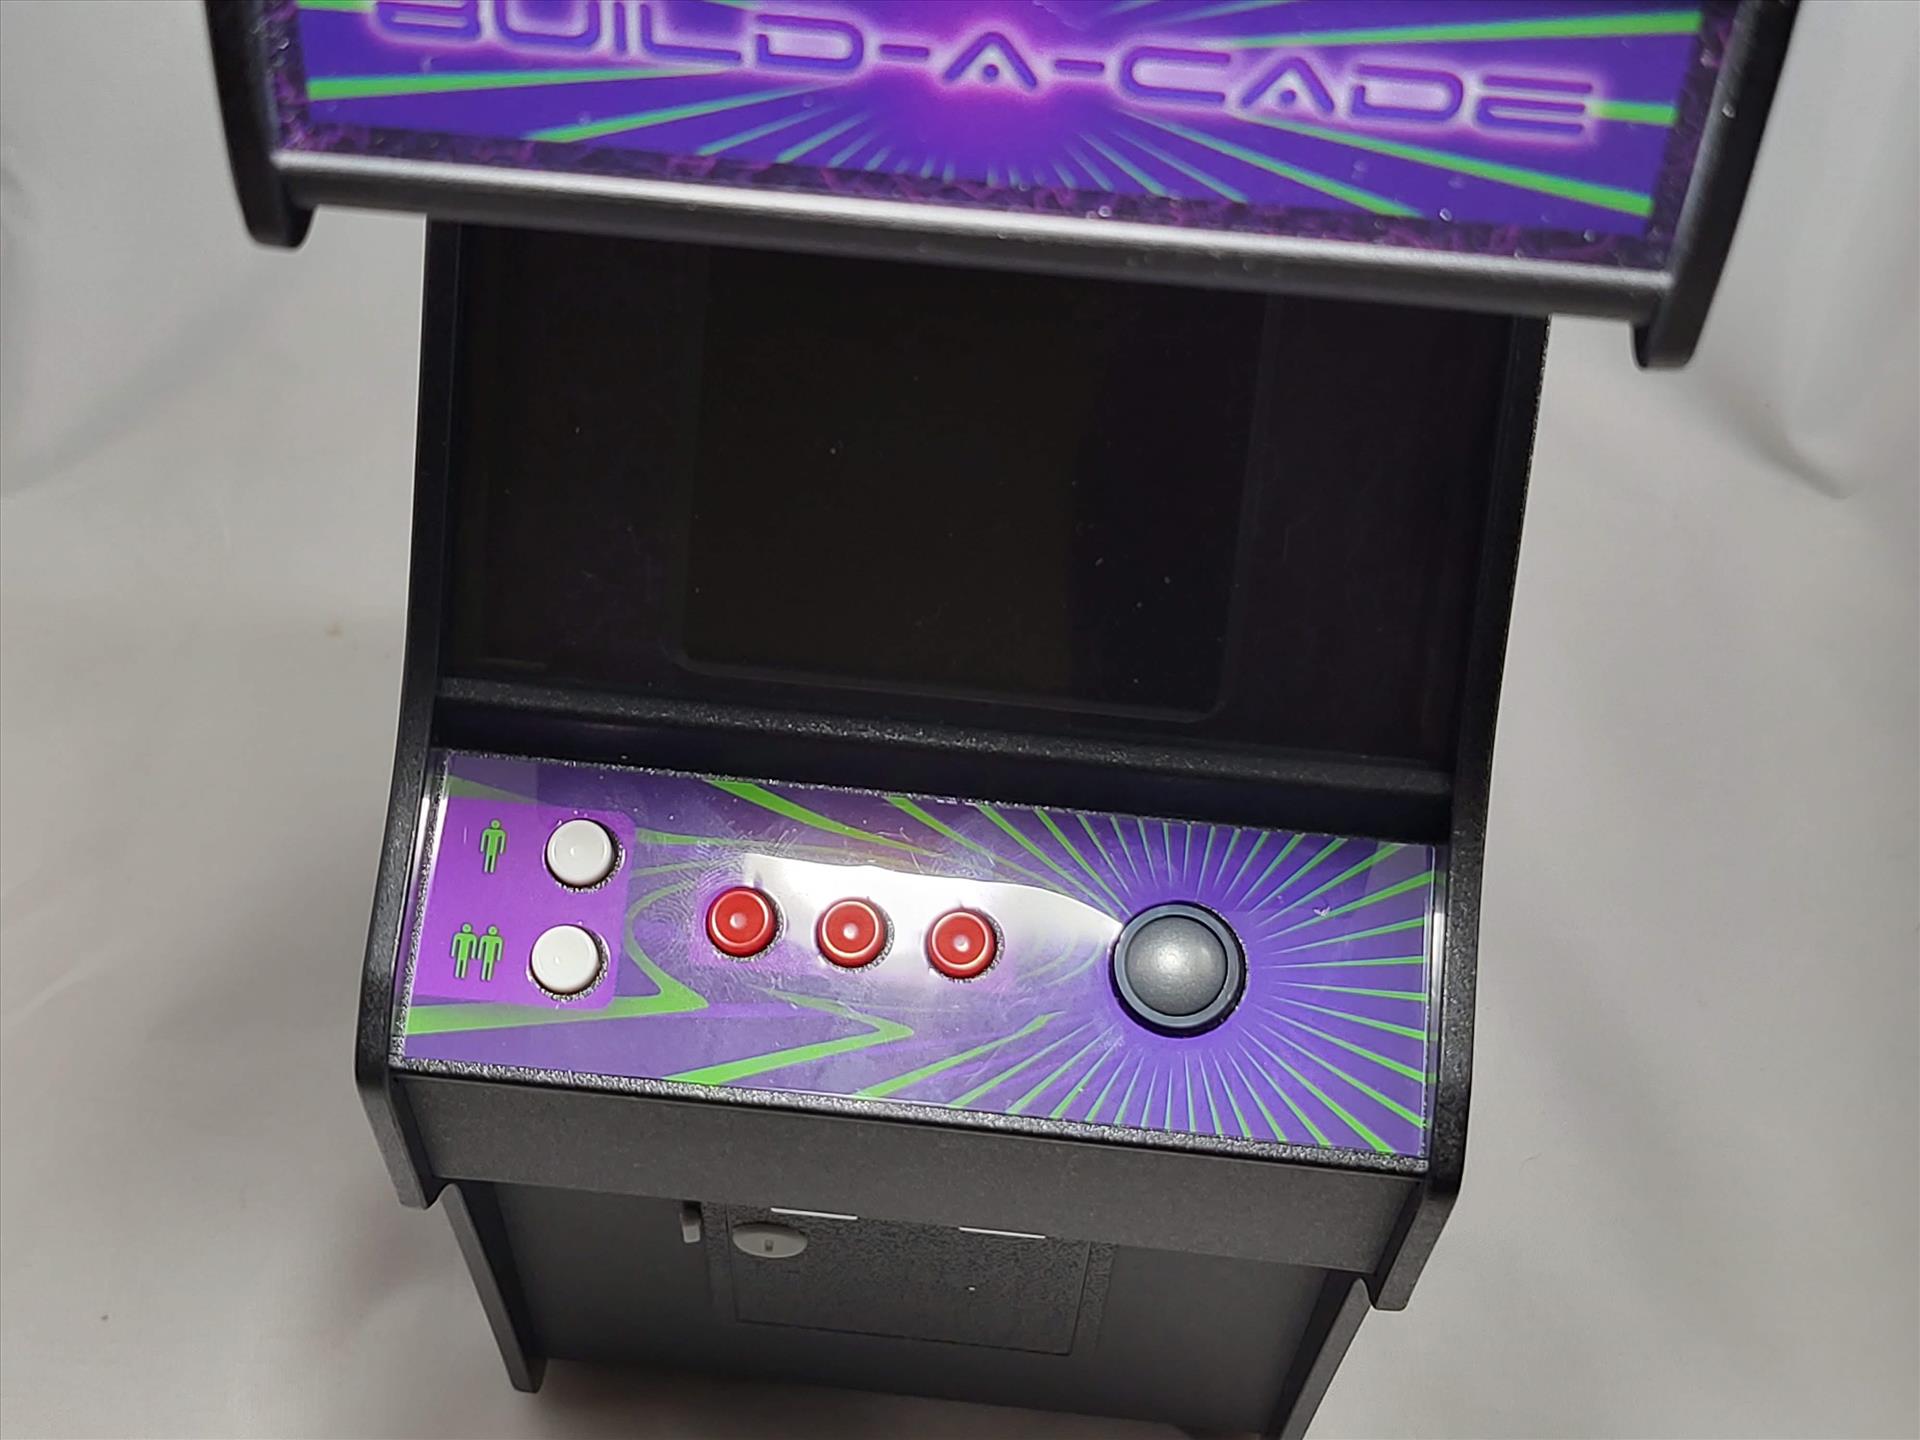
The control setup included in the BUILD-A-CADE is a single joystick with a three button setup consisting of a player one, player two, and an action button. Essentially, this is made for single button games like Dig Dug or Donkey Kong. It’s a solid four-way controller and has a nice satisfying click when pressing in a direction. On top is a ball that you stick on and GRS is nice enough to include some spares just in case you lose them. Diagonals are not too hard to register as well, but I did find it a little difficult to pull off moves like fireballs in Street Fighter 2 when facing right, but a much easier time when facing left. Also, because I place my fingers on the ball top to do moves, my fingers started to get fatigued from grasping a tiny top after a few rounds. In games like 1943, I was able to fly diagonally without too many problems so it’s really game-dependent on how good the diagonal direction is. The buttons have a strong clicking sound and good actuation. It’s a little more force than I’m used to pushing, but when pressed they didn’t miss a beat. For being so small though, they do the job, but I wouldn’t count on playing a long time on them unless they are more simple games like Pac-Man or Donkey Kong. Anything with a great deal of quick movement made my fingers tired in a short amount of time.
Underneath the control panel are two coin doors and a “lock”. One of the really cool designs of the BUILD-A-CADE is that each coin door can be pushed to simulate dropping in a quarter. That’s nice attention to detail. Another really cool piece is that if you remove the cover over the lock, it’s a 3.5mm headphone jack. So if you want to plug in some headphones to not bother people when playing, it’s easily accessible in the front of the machine and nicely hidden when not in use. Again, very good attention to detail here.
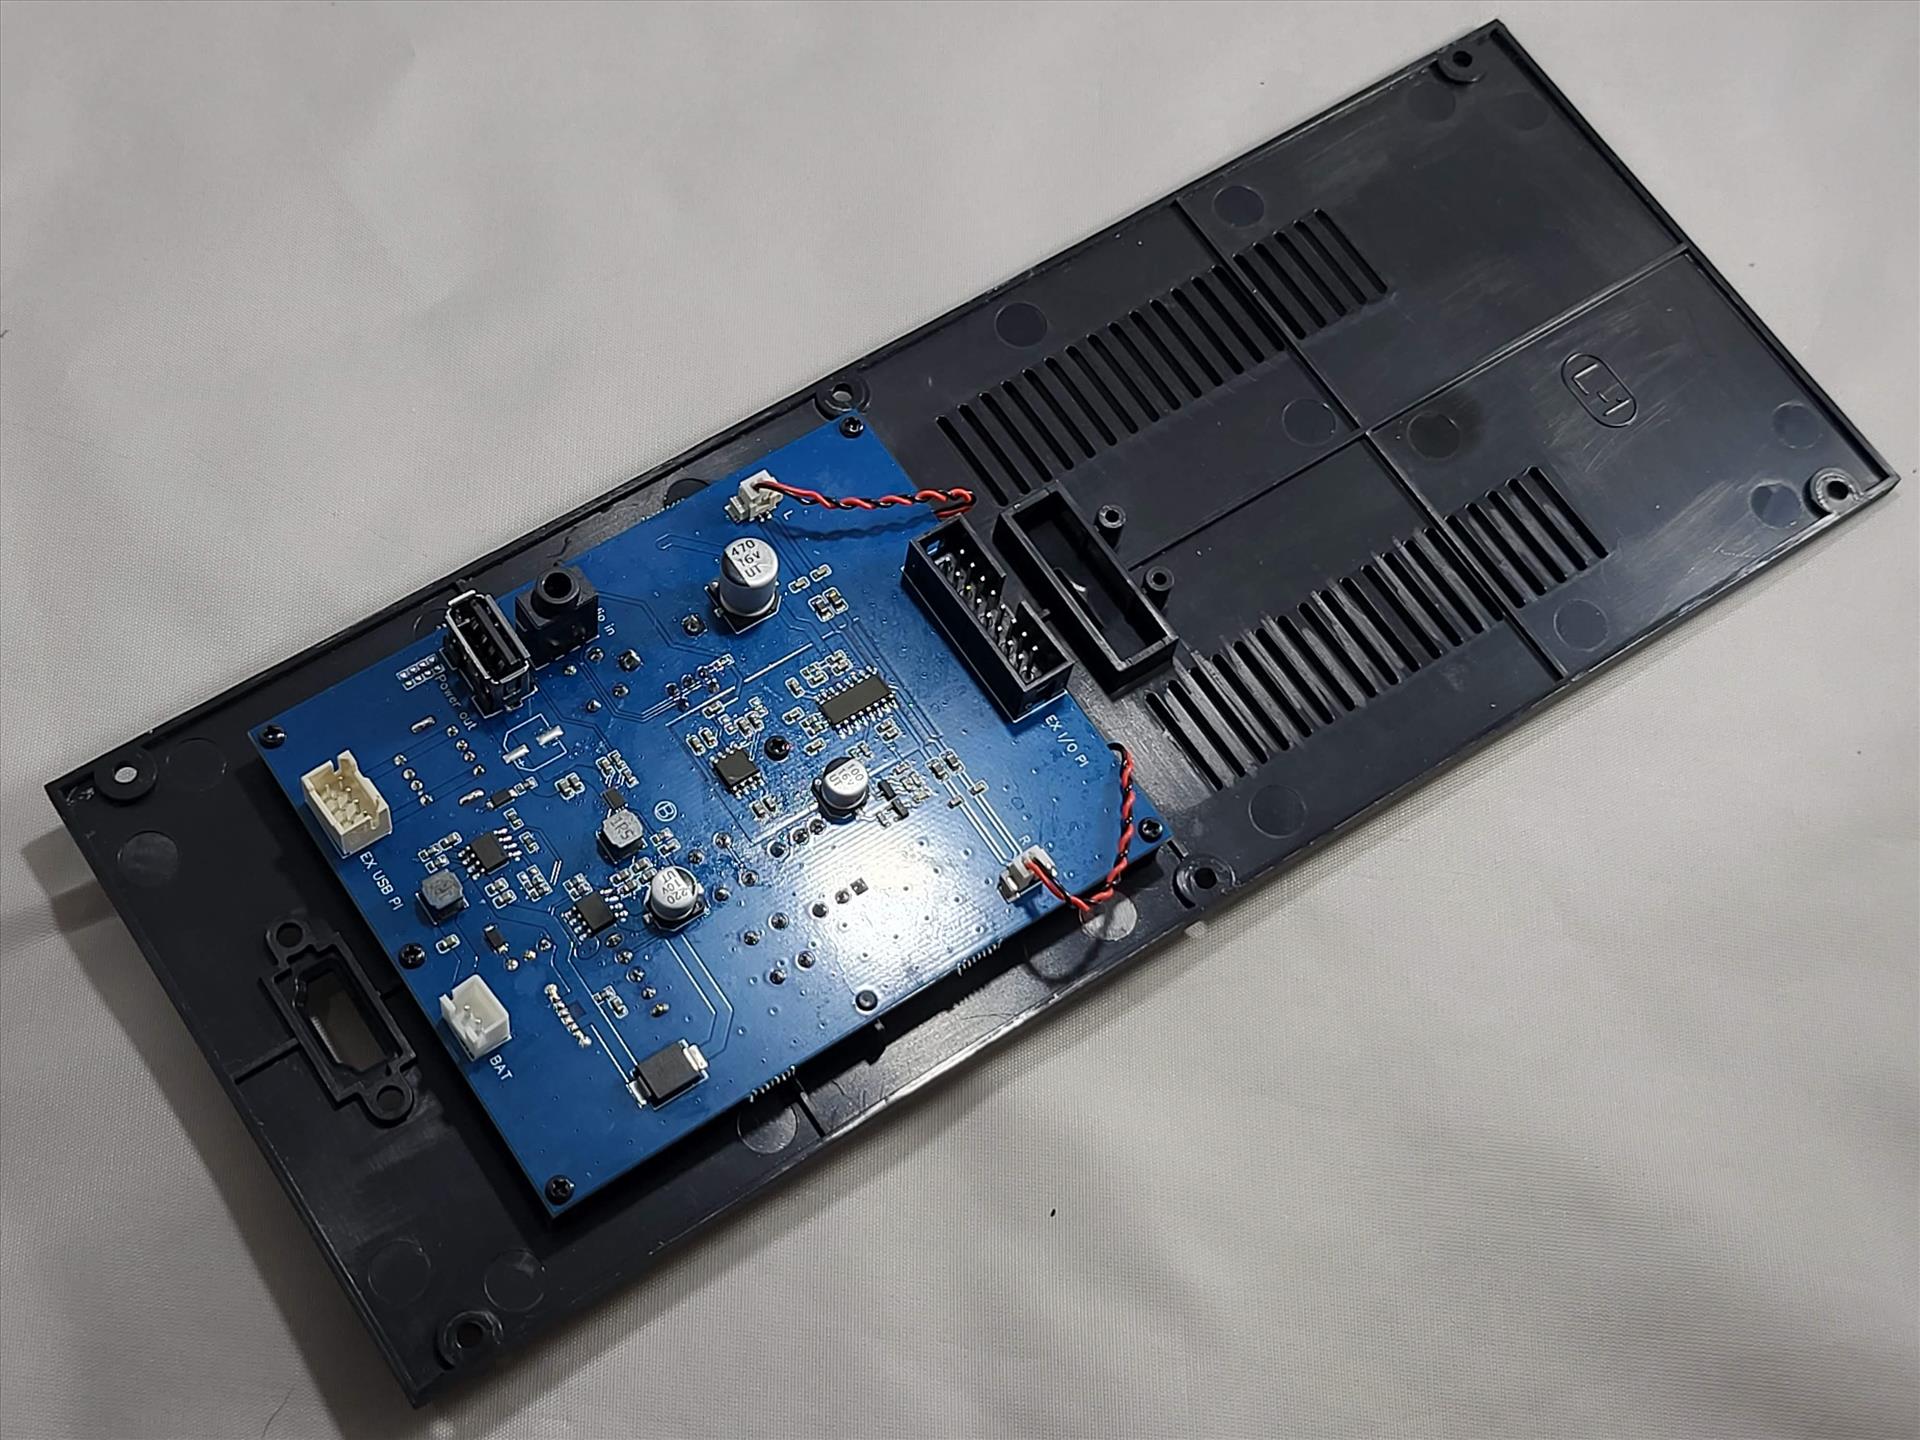
On the back are a plethora of I/O and a spare joystick. Why a spare joystick? Well, this goes hand in hand with the interchangeable controllers. Say you change out the joystick with the trackball control panel. How would you move around in the menus? Well, rather than relying on a user to plug in a USB joystick, the designers were smart enough to attach a small joystick on the back to let you move around in the menus. That’s slick.
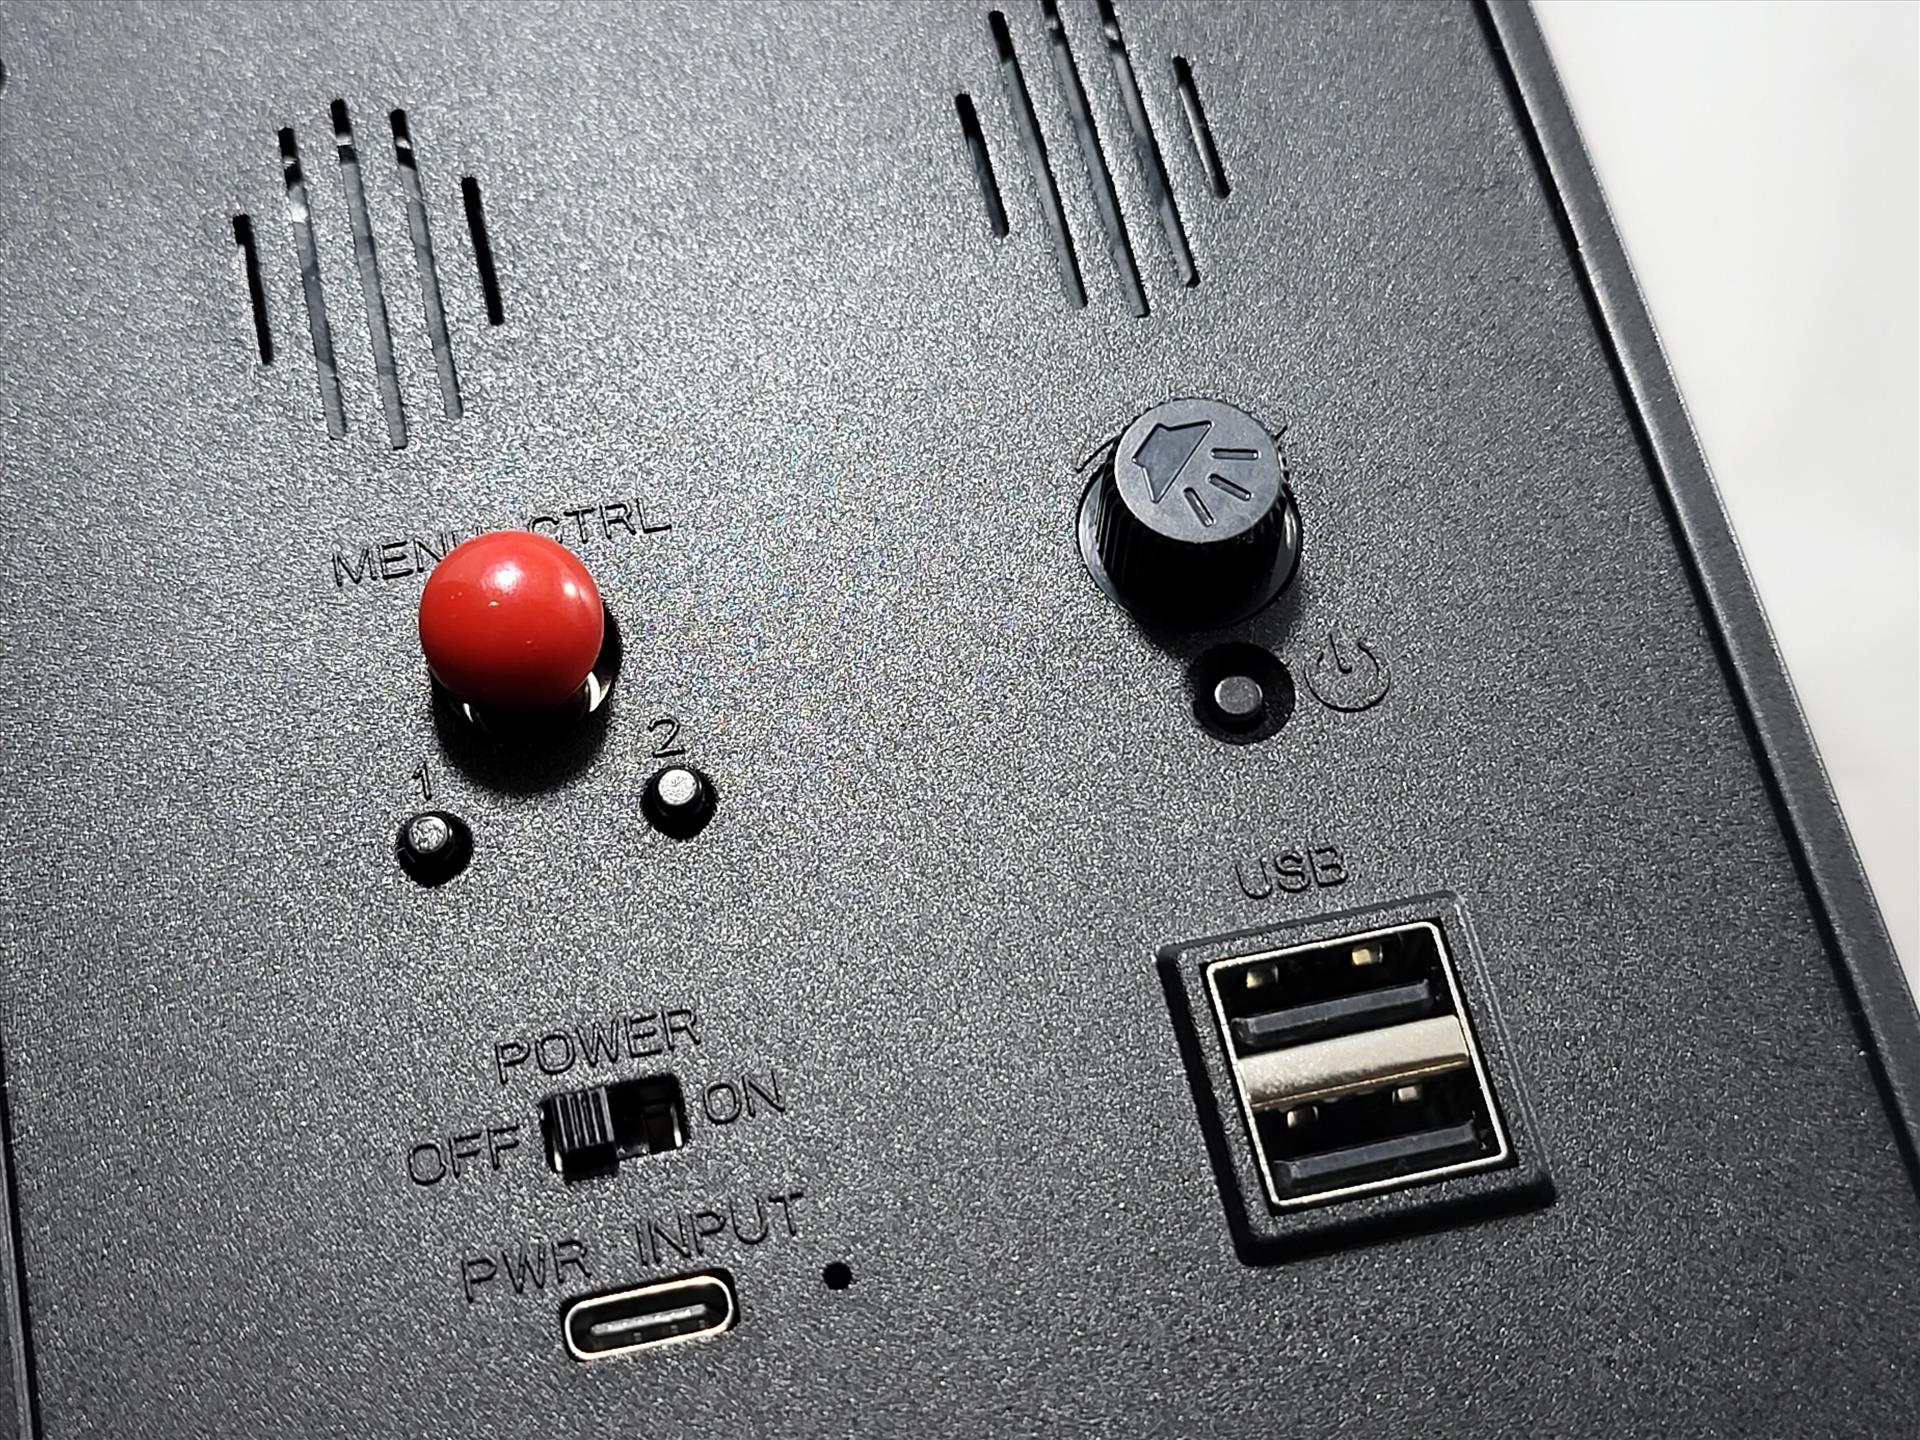
You have a slot to put in a micro SD card so if you want to change to a different Retropie build, you can easily do so. Below that are two speakers that do a good job for its size. You won’t be blasting arcade sounds loudly with it, but they are clear and produce good audio. A control knob for the volume is also back here to let you easily adjust the loudness of the speakers. Even at the max volume setting, the speakers aren’t distorted so if you are inclined to, you can crank it up all the way and still hear the game sounds clearly. Two small buttons acting as ESC and Enter are underneath the joystick so again, you have options to interact with menus no matter what control panel you have installed into the BUILD-A-CADE. Under the volume knob is a soft power button that lets you turn on and off the BUILD-A-CADE without having to go into the Emulation Station menu to do so.
For power, there’s a nice little power switch and a USB-C power connector. Even if you use a Raspberry Pi 3, which has a microUSB power plug on it, the final setup changes that to a USB-C port, which is a lot nicer and makes it so you don’t have to fumble around with what orientation the USB plug is when plugging in a power adapter cable. To the right of the USB-C connector are two USB-A ports letting you plug in things such as gamepads, full size control panels, flightsticks, and pretty much any USB compatible product. Finally, if you are using a Raspberry Pi 3B, there’s an HDMI out port that can be used to project your arcade onto a larger screen or even say microOLED glasses. I’ll expand on that in a bit as well.
Speaking of power, the kit includes a nice sized 5000 mAh battery that should run the BUILD-A-CADE for about four hours from what GRS estimated. It’s nice to be able to run this unit without having to plug it into the wall, making it a nice portable solution for gaming. When I tested it, it didn’t quite hit the four hour mark, turning off at around 3 hours and 42 minutes but that’s still a long time to run on battery. It also might depend on the game you’re running as well, but I feel the amount of time it can run on battery to be pretty good.
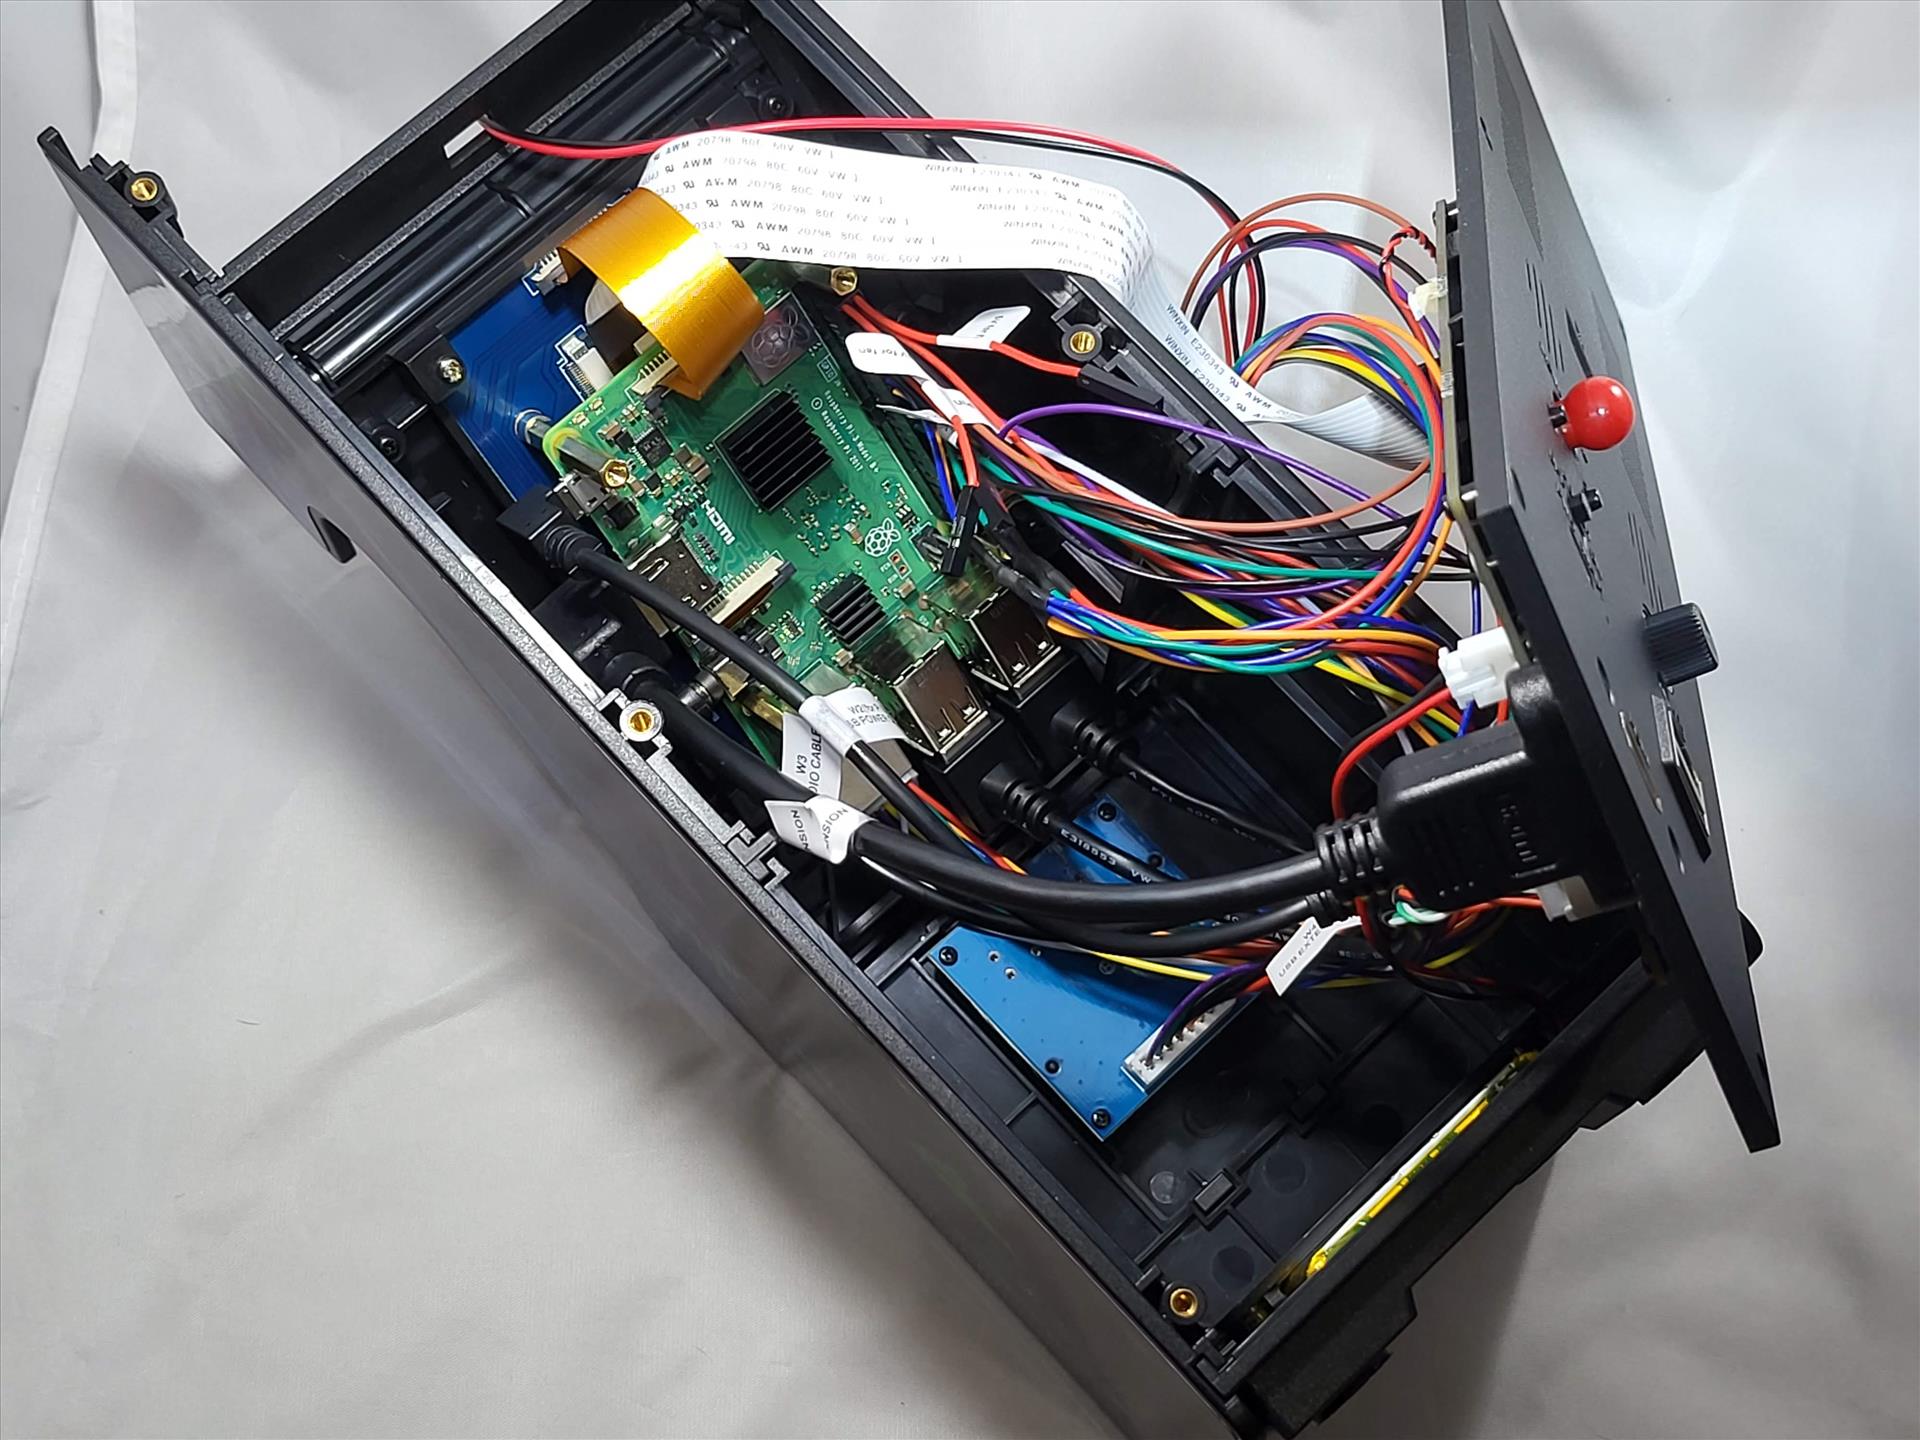
Putting the BUILD-A-CADE together took about an hour or so, and I used a combination of Glen’s video as well as the instructions that it comes with. I love how all the cables and the bags of parts are labeled, making it really easy to know which things go where. You don’t see many companies label the wires and GRS does a great job in doing this. They’ve done it with all their items that I’ve picked up and I wish more companies would do as good of a job that GRS does in this department. The instruction manual is also very detailed and nicely illustrated making it easy to follow as well.
I didn’t run into too many issues putting the BUILD-A-CADE together even with the tight tolerances. I do suggest using gloves as I accidentally got the screen dirty with my fingerprints and it wasn’t until I had it all almost together before I resigned myself to taking it apart as you can’t get to the LCD screen easily with the plexiglass covering above the screen installed. Attaching the Raspberry Pi 3B to the back of the LCD screen wasn’t too difficult and if you follow the instructions in the order it’s presented, you shouldn’t have too much trouble with the wiring either. I did experience a screen that wouldn’t turn on and I would say the ZIF connectors for the display on both the LCD and the Raspberry Pi 3B were the trickiest to put in for me at least. I had them oriented the right way, but it took a few tries for me to push them in far enough for it to finally work. So I would say before you close everything up, make sure it turns on and the screen turns on with the micro SD card inserted in.
Included in the kit are some decals that give the BUILD-A-CADE A little pizzazz. The purple and blue lightning design with green Space Invader like aliens gives off some nice 80’s vibe. You can order custom decals though in case you want a specific look for your BUILD-A-CADE, but it’s nice to have these included. They are high quality decals and feel very rigid.
Also, kudos to the designers for also leaving some connections for fans. Since there’s a harness that goes on the GPIO pins of the board, you’d have to do some splicing if it wasn’t for the availability of fan connectors to power a fan should you choose to put in one. The BUILD-A-CADE relies on natural air flow to cool the inside, but you can install a fan if you would like and having those connections available is a nice touch by the BUILD-A-CADE design team.
While most of the screw holes are just plastic receptacles, the six screw holes on the back of the BUILD-A-CADE are reinforced with brass so you can screw and unscrew these six a lot more without wearing down the plastic. Seeing as you’ll need to take off the back to change out the controls, it’s nice of the designers to reinforce these six to make it last a long time.
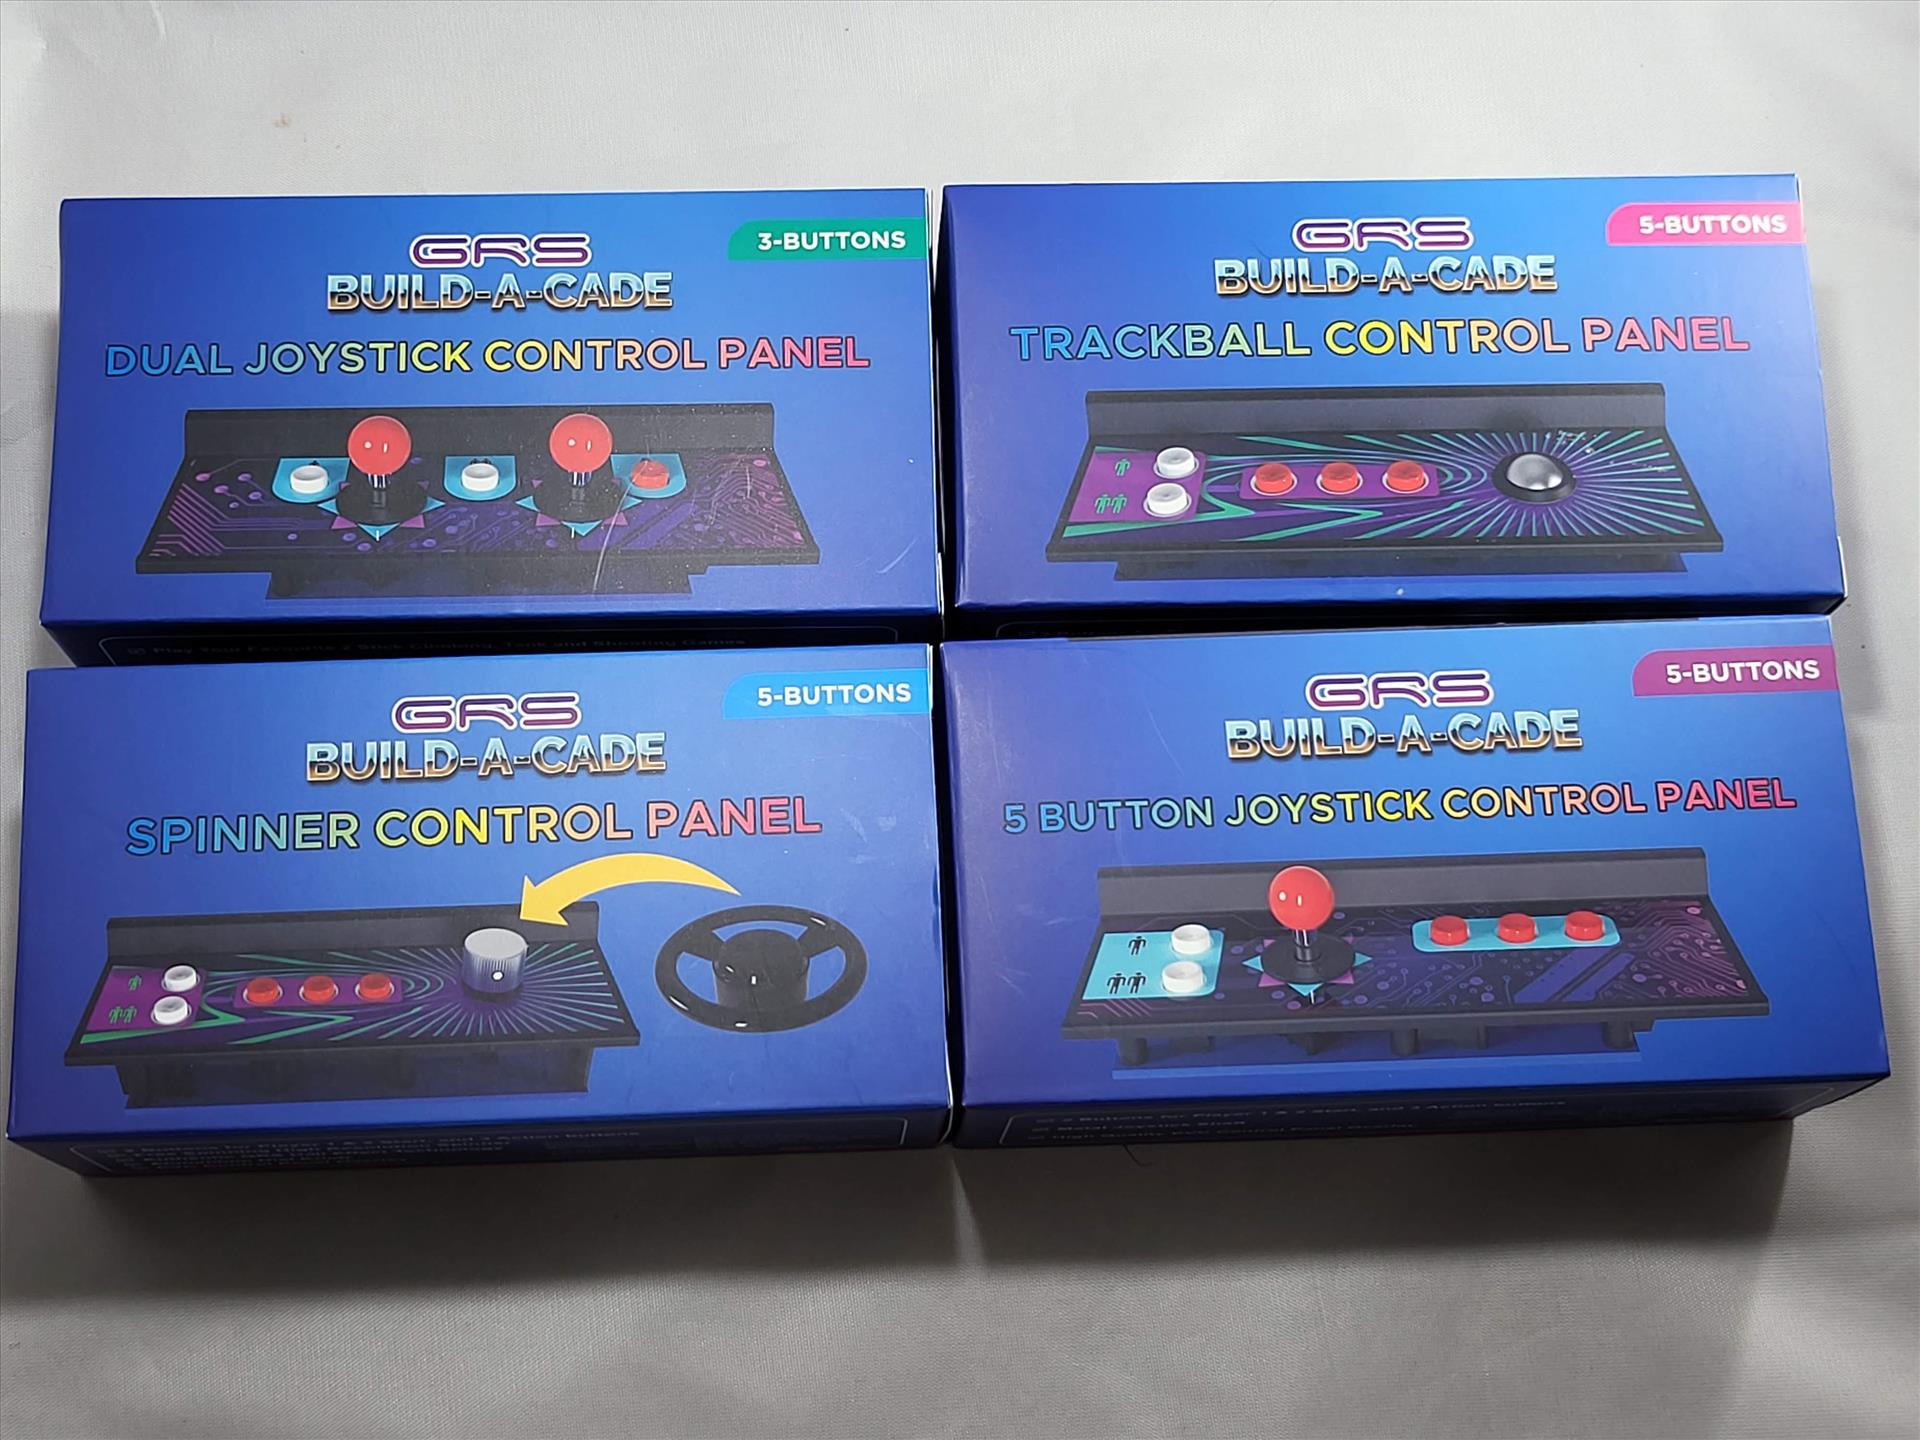
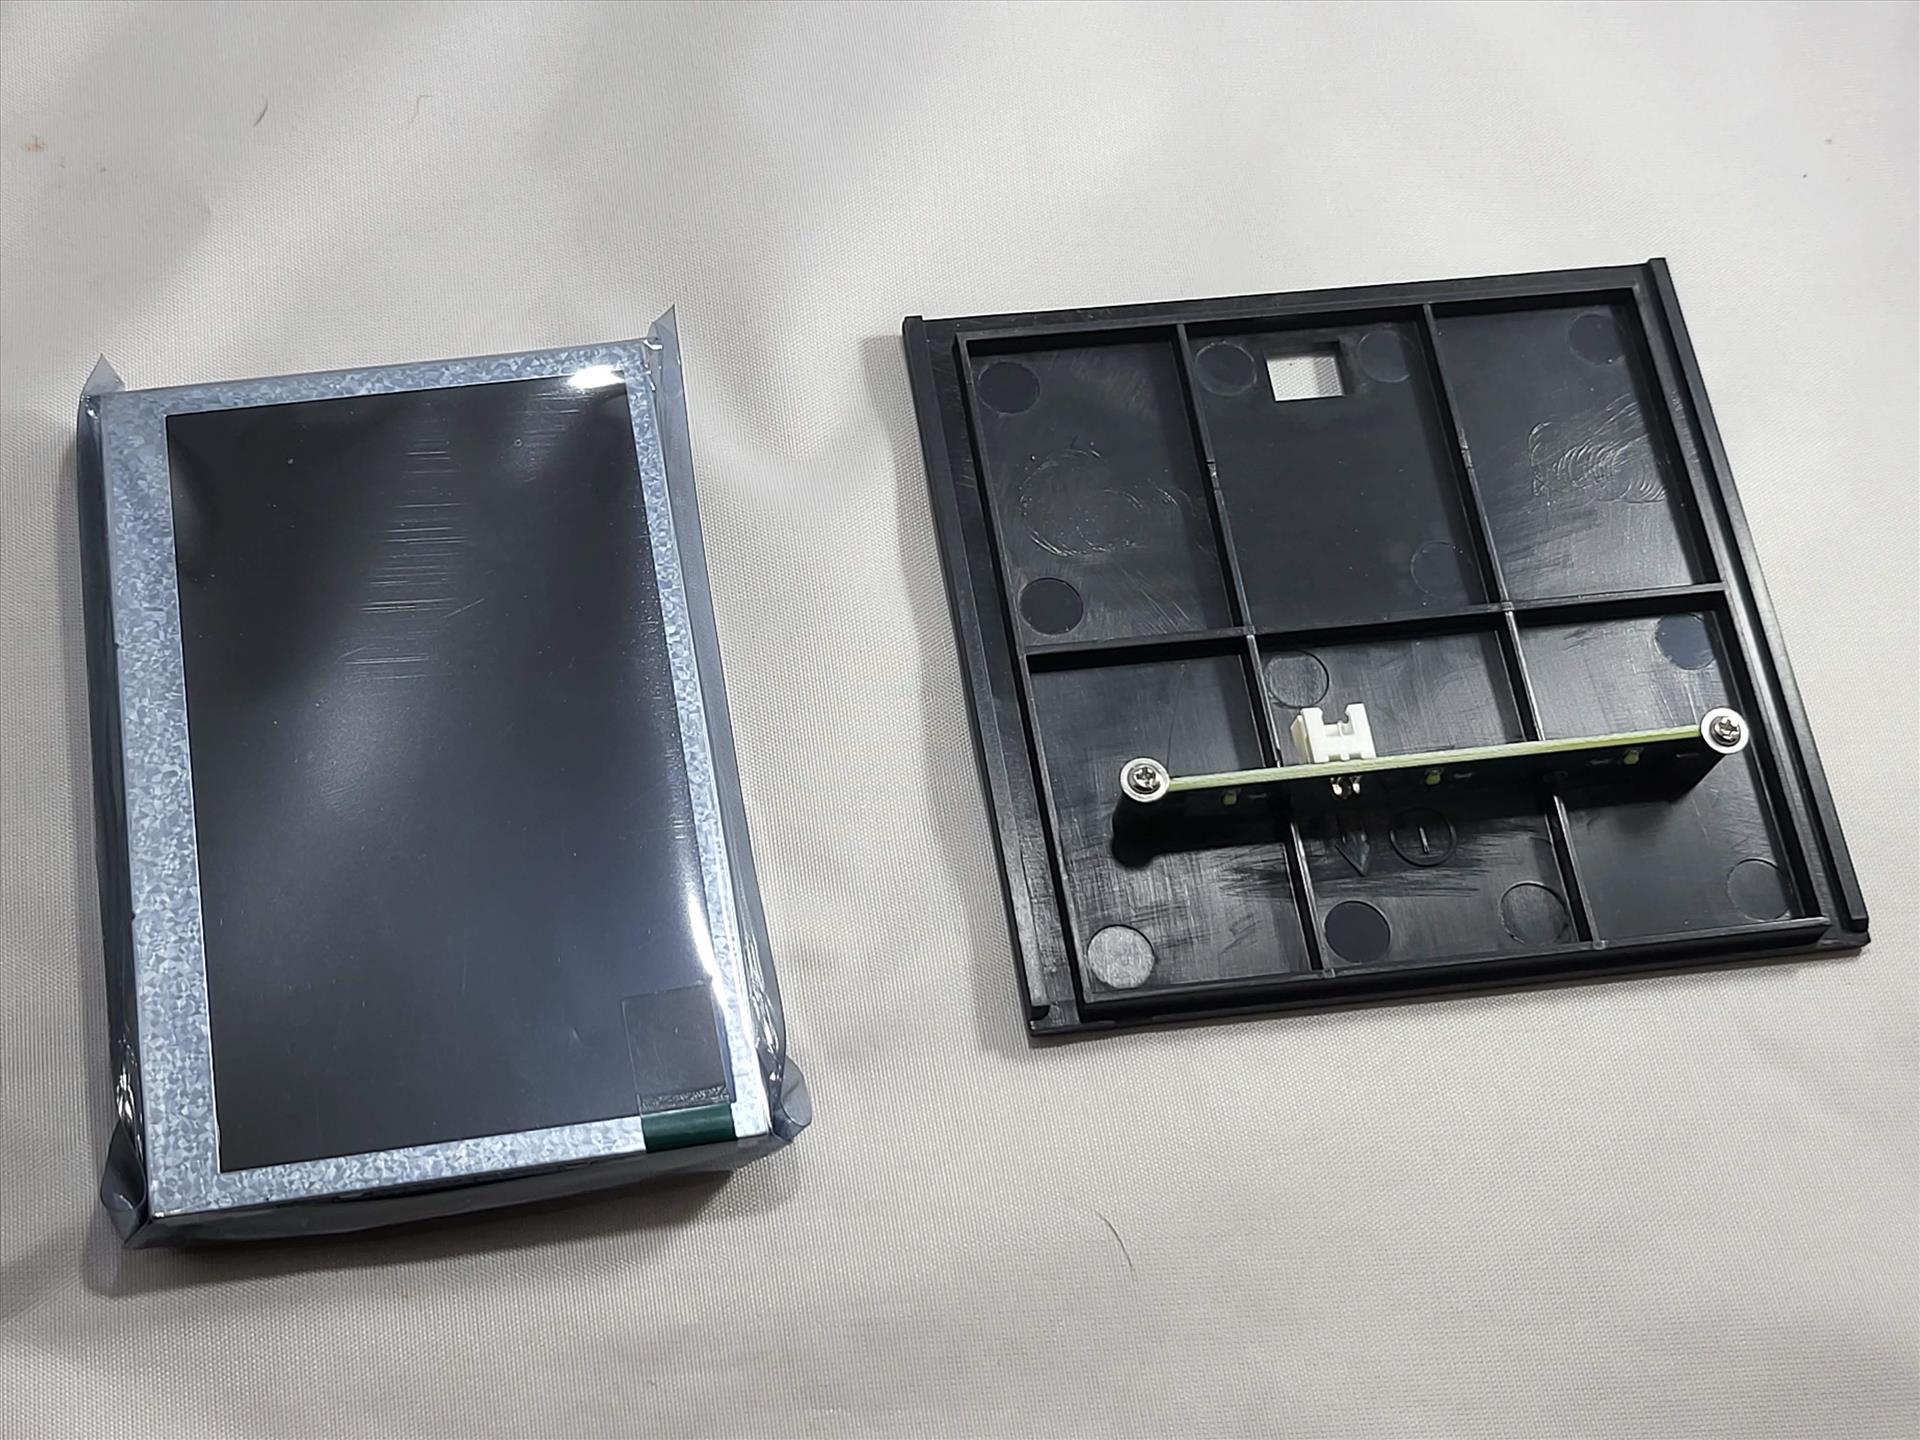
As mentioned earlier, one of the unique features of the BUILD-A-CADE is the ability to change out the control panels. GRS has four other different types of controls that you can pick up for the BUILD-A-CADE. Dual stick for games like Robotron and Crazy Climber, a trackball, a spinner with a fun little wheel attachment, and a joystick with five total buttons. You can purchase them individually or in a four pack. Thunderstick Studios was kind enough to send me all four and I put them through their paces as well.
Switching out the control panels can be a little cumbersome. You have to unscrew the back, pull out the bottom about halfway, pull out the middle brace a little, push the side panels apart, unplug the current jst connector for the controls, and then slide it out. Pulling the sides apart is a little tricky, but the trickiest part is sliding a new control set in. There’s a little lip you have to catch and if you don’t do it right, it’ll look like the controls are at an angle. It took me about 10 tries before I started to get the hang of it and unless you get everything in just right, the middle bracket you slide out can get caught when you try to slide it back in, making it stick out the back. Also the trackball and spinner have an addition jst to USB connector that you’ll need to plug in.
Out of the four, the dual joysticks and joystick with the five buttons work as you would think. They do enhance some of the games you play and I actually enjoyed the dual sticks for Crazy Climber and Krull. The sticks and buttons look and feel the same as the included three button controller and you only need to plug in the single jst connector to get those to work.
The trackball is OK and I found it to be useful in some but unusable in other games. Since it’s so small, it doesn’t have that roll with momentum like you would on real size trackballs should you do a strong spin with your hand. That means games like Golden Tee are unplayable as the trackball only spins a small amount, not even enough to go far on a back swing. Even with the sensitivity turned all the way up, I wasn’t able to play golf games this way. I was able to use it in Centipede without issues, and for Capcom Bowling I turned it up about 200% sensitivity in order for me to roll the ball down the lane with any amount of speed. Instead of a full roll, I sort of flicked the ball forward across the foul line, but it worked.
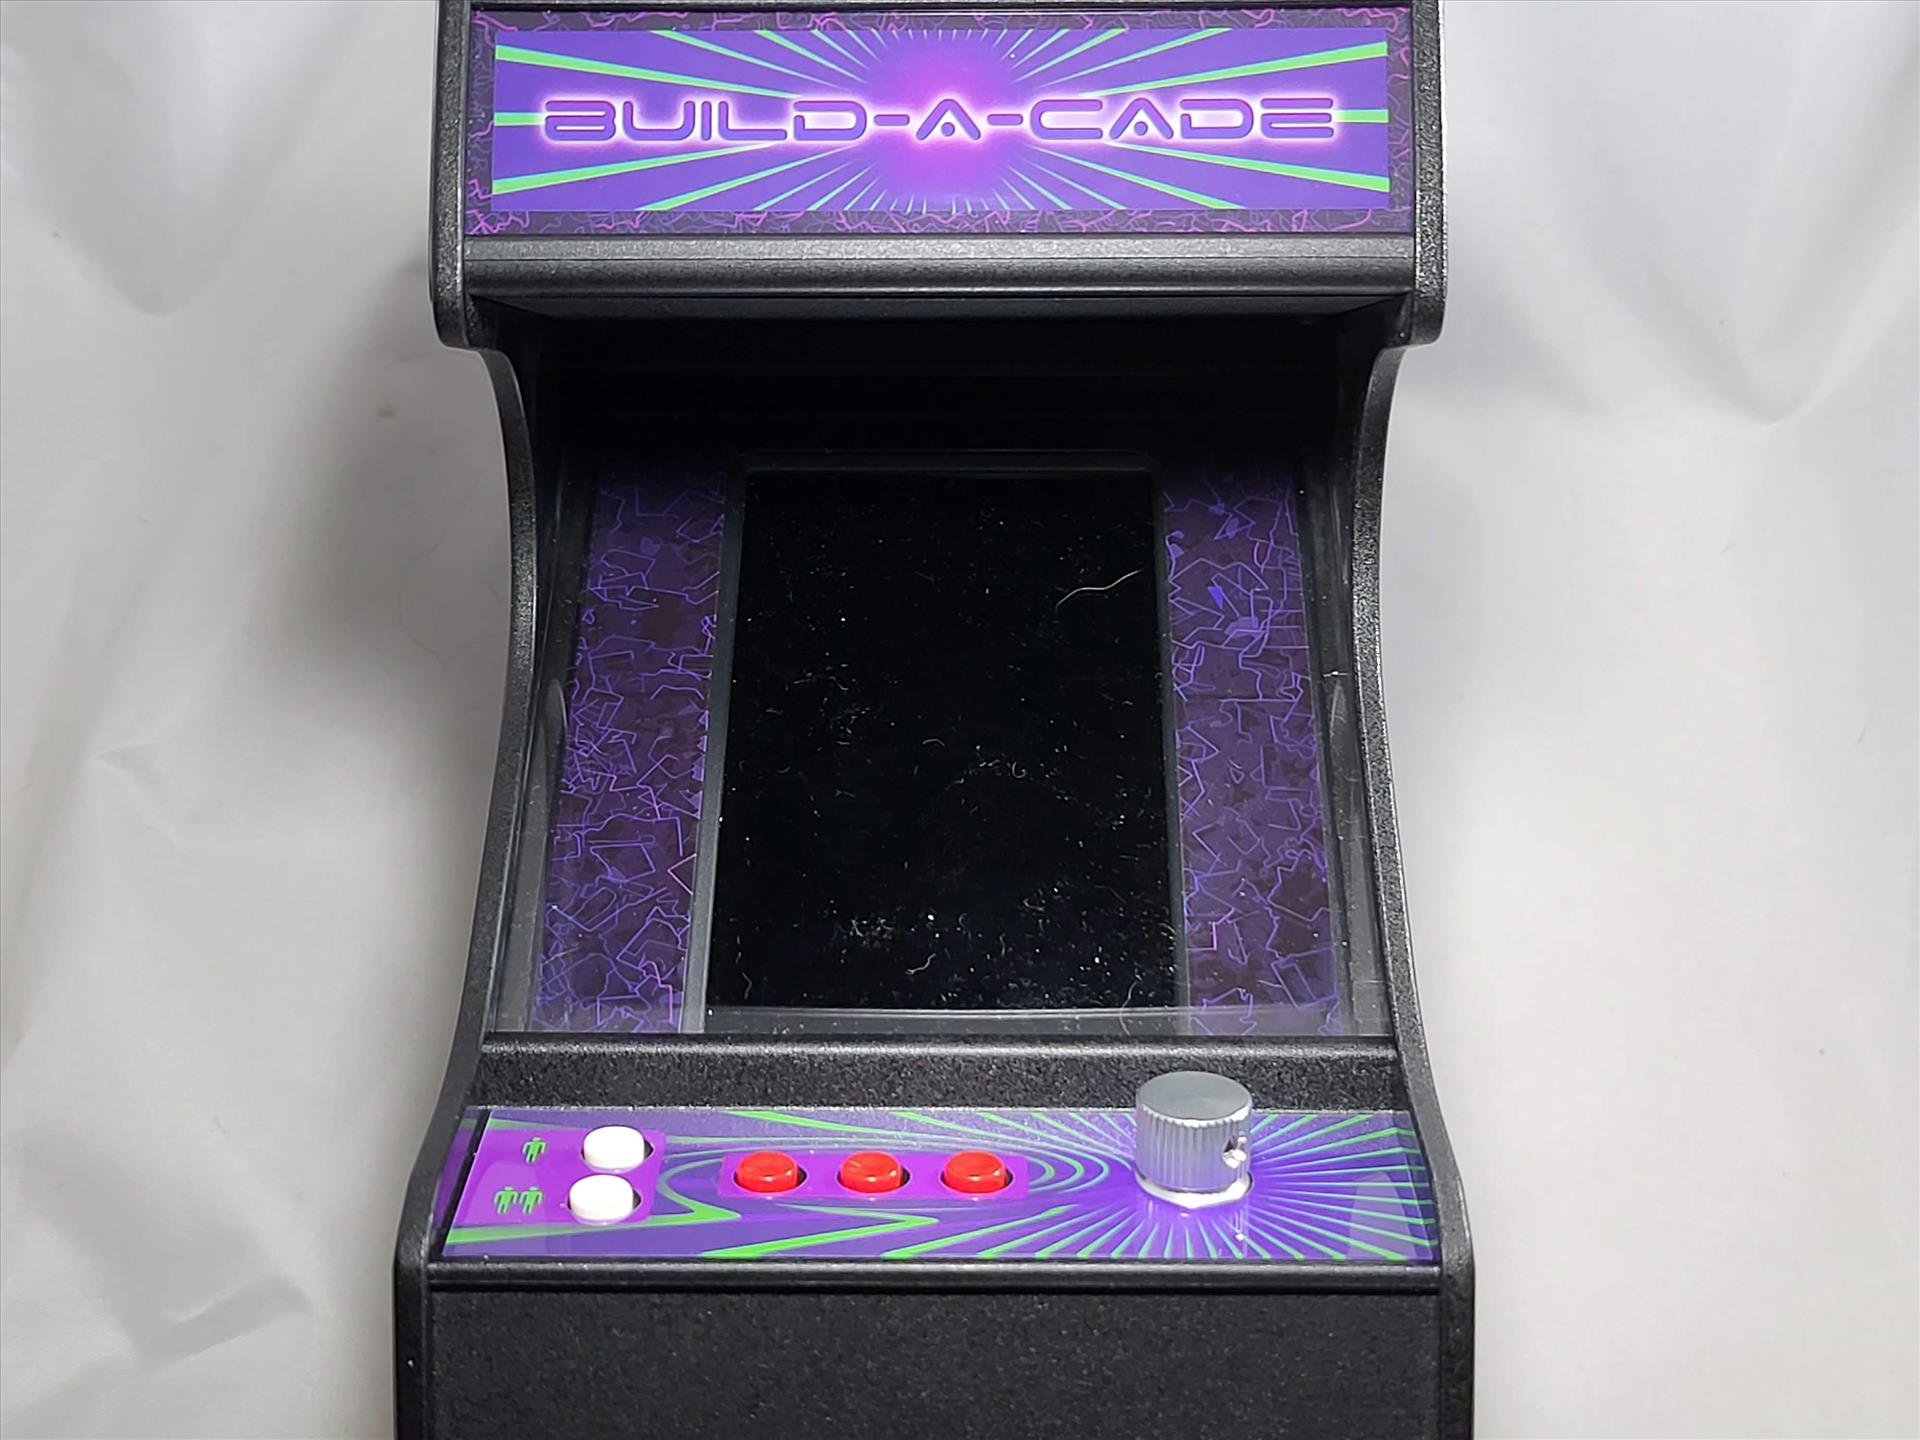
But the spinner was the one that caused the most problems for me. The spinner uses the same hall effect sensor that GRS’ other spinners use and it’s an awesome tech. The problem though is how loose the spinner is. It takes but a small amount of effort to spin and it’ll spin for a very long time. Where this comes into being an issue is when you try to move your fingers into a different position.
For example, I was playing Arkanoid and I was trying to get my paddle from one side to another. Since it’s so small, I have to use my thumb and index finger to hold onto the spinner. As I am spinning it, I have to reposition my fingers since I needed to keep going in one direction and it was becoming uncomfortable to hold. As I let go of the spinner, it spun around the other way causing my paddle to move back unintentionally. As soon as I grasped it again, I was thrown off from where my paddle should have been and I either over compensate or under compensate for the change in position.
To illustrate how freely this can spin and how even the slightest nod can have an unintended effect, I recorded the spinner in action. As you can see even without me touching it, it can spin back. That’s just way too unpredictable to be used in any spinner type game accurately. There definitely needs to be more friction for the spinner, but the one that I had is just way too loose. Putting on the wheel attachment made it slightly better, but I still couldn’t control games like APB or Super Sprint comfortably with it. The spinner attachment was the one I was looking forward to using the most, but it was the one that frustrated me the most out of the four.
Playing on such a small unit can have its ups and downs. As much as I love the fact that you are able to play arcade games in a tiny package, the controls can wear on your hands depending on the game and the view can be hampered by the marquee. I found the marquee extended past the display too much so as to cut off about 1/6th of the screen at the top. It was hard without hunching down more to see the scores and life count on vertical games. For horizontal games, it’s fine as the area that the marquee cuts off is not displaying anything anyways. GRS is coming out with a little base that will let you rotate the BUILD-A-CADE into a position that can let you view the entire screen better, but I think it would’ve been a better choice to recess the marquee a bit so it didn’t extend out as much. I know it wouldn’t have looked as nice, but I think it would have functioned better.
My other small nitpick about the display is that it’s really only suitable for vertical based games. Games like Street Fighter 2 or Robotron are pretty small in the vertical display. A lot of space is unused and I think those games just don’t look as good on the BUILD-A-CADE. But pulling up games like Galaga or Pac-Man, the vertical real estate makes these games look fabulous. Vertical shooters, of course, look really good as well. I really would’ve liked a square display that filled up more of the sides then the top and bottom so that games in either vertical or horizontal have a good amount of space to use, but I was informed that the BUILD-A-CADE was designed with a 1/6th scale of a Donkey Kong machine in mind, hence the vertical orientation. Hopefully, GRS can come out with a kit to update the BUILD-A-CADE with a square LCD to make better usage of the room available on the front.
I had thought my big use case for the BUILD-A-CADE would be as a portable arcade emulator that I can plug into a TV at say a friend’s house and plug a few controllers into it and have some fun playing older games. With the HDMI output and USB ports as well as an option of being battery powered, I could easily transport this around in a backpack without much trouble. Because of the orientation of the display though, using it on a TV via HDMI out will result in a much smaller picture being displayed on the TV. Vertical games will fill out from the top of the TV to the bottom with the requisite black borders on the left and right, but horizontal games will be a a small square in the middle of the TV. I’m not versed in Retropie to know if there’s a way to have it fill out more when connected via HDMI, but I hope there’s a way to address this in software when plugging it into a TV in order to fill out the display much better.
Recently I picked up a pair of Nreal Airs that offer microOLED displays that mimic a 130’ display in front of you and I was hoping I could also use these to play old games when connected to the BUILD-A-CADE. Like the TV, the display for horizontal games was also in a small square floating in front of my eyes and it was harder to see the game this way. When I was using it for vertical games though, it was rather cool to have a much larger display floating in front of me and it really was a complete portable gaming solution for retro games. Again, I hope there can be some software update to help horizontal games will out the screen better when connected via HDMI.
I failed to mention it earlier but the BUILD-A-CADE comes with a 32GB micro SD card that prompts you to install a version of Emulation Station that’s tailored towards the BUILD-A-CADE. Menu options are set up for the various types of controller games from one button to three button to spinner and trackball, which is really nice. When I copied an entire set of roms to the BUILD-A-CADE, the software automatically cataloged all those games into the proper menus making it really convenient to choose a game for a particular controller setup.
I tried to do a few things like download videos but it would always kick me out to the command line. There were a few other options that also seem to kick me to crash Emulation Station, but hopefully the GRS team can come out with an update to address those or someone with better Retropie skills than me can figure out how to fix those crashes.
The GRS BUILD-A-CADE is a very cool little machine that has some great features such as the ability to switch controls, external ports, and a nice little design. Putting it all together was kind of fun and didn’t take too long. Some controller issues, software issues, and design choices do knock the BUILD-A-CADE down a few notches, but I think it’s a very good first iteration of a product that has a lot of potential. For $89.99, it’s a very slick case for a Raspberry Pi 3 or 4. The control panels range from $19.99 to $24.99 or you can get all four for $74.99, which is priced fairly. I look forward to what new control GRS will come out with for the BUILD-A-CADE.
It's a nice little project and a fun little case for a Raspberry Pi. There needs to be some refinement in a few areas, but overall a nice first implementation of a customizable 1/6 scale arcade machine.
Rating: 8 Good
* The product in this article was sent to us by the developer/company.


About Author
I've been reviewing products since 1997 and started out at Gaming Nexus. As one of the original writers, I was tapped to do action games and hardware. Nowadays, I work with a great group of folks on here to bring to you news and reviews on all things PC and consoles.
As for what I enjoy, I love action and survival games. I'm more of a PC gamer now than I used to be, but still enjoy the occasional console fair. Lately, I've been really playing a ton of retro games after building an arcade cabinet for myself and the kids. There's some old games I love to revisit and the cabinet really does a great job at bringing back that nostalgic feeling of going to the arcade.
View Profile