
Atari Ultimate Dual Arcade Fight Stick with Trackball Mod – Light It Up
If you missed the first two articles in my journey in modding the Atari Ultimate Dual Fight Stick with Trackball, you can catch the part where I added an internal battery bank and power switch here and the other mod was adding in external USB ports as well as an HDMI port here.
Today, I’m going to replace the buttons with LED buttons and also put a nice little LED light to let me know if the Raspberry Pi is still drawing power. Let me start by saying the buttons included in the stick feel really good and are responsive. They worked well in my testing of the Fight Stick, but I wanted to add a little flare to the setup.

When I built my bartop arcade unit, I opted for some LED buttons to light up the control panel. For the Atari Ultimate Dual Arcade Fight Stick with Trackball, I wanted that as well so I went searching for some affordable LED buttons.
There are a few places you can pick up and I used Game Room Solutions for my bartop. On Amazon, there are a few kits that you can purchase that really aren’t that expensive. I ordered this set which comes with 22 buttons and two arcade sticks. I won’t be swapping out the sticks, but they’ll be nice as backups in case one of my other sticks need repaired. It even comes with two zero delay encoder boards, but I’m just going to leverage the 2 player Xin-Mo board that’s already in the Fight Stick enclosure.
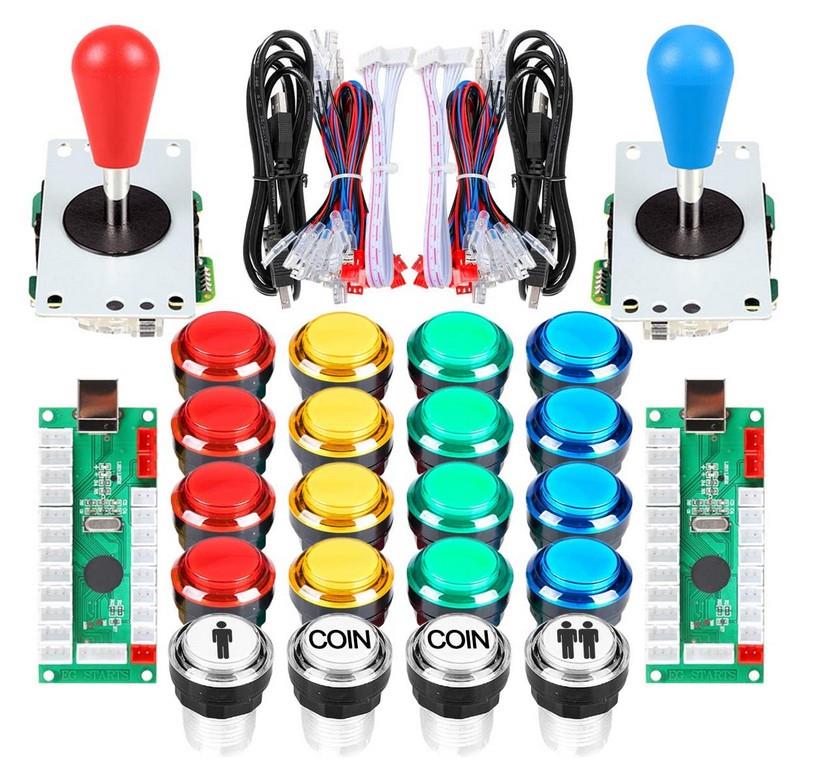
The HAPP-style buttons were easily removable from the housing as all you need to do is remove the switch from the base and then unscrew the locking nut. Out comes the button and in goes the LED buttons from the EG STARTS kit. I decided on a color scheme of red, green, blue, and will save the yellows for pinball flipper buttons in the future.
Now, you could reuse the switches by replacing the ones that are attached to the LED housing from the EG STARTS kit, or you could take the spade connectors off and plug them into the included switches on the LED buttons. They feel different as the click on the EG STARTS ones are more pronounced. I went with replacing all the switches so that means I had to unplug all the spade connectors and plug them into the new switch.
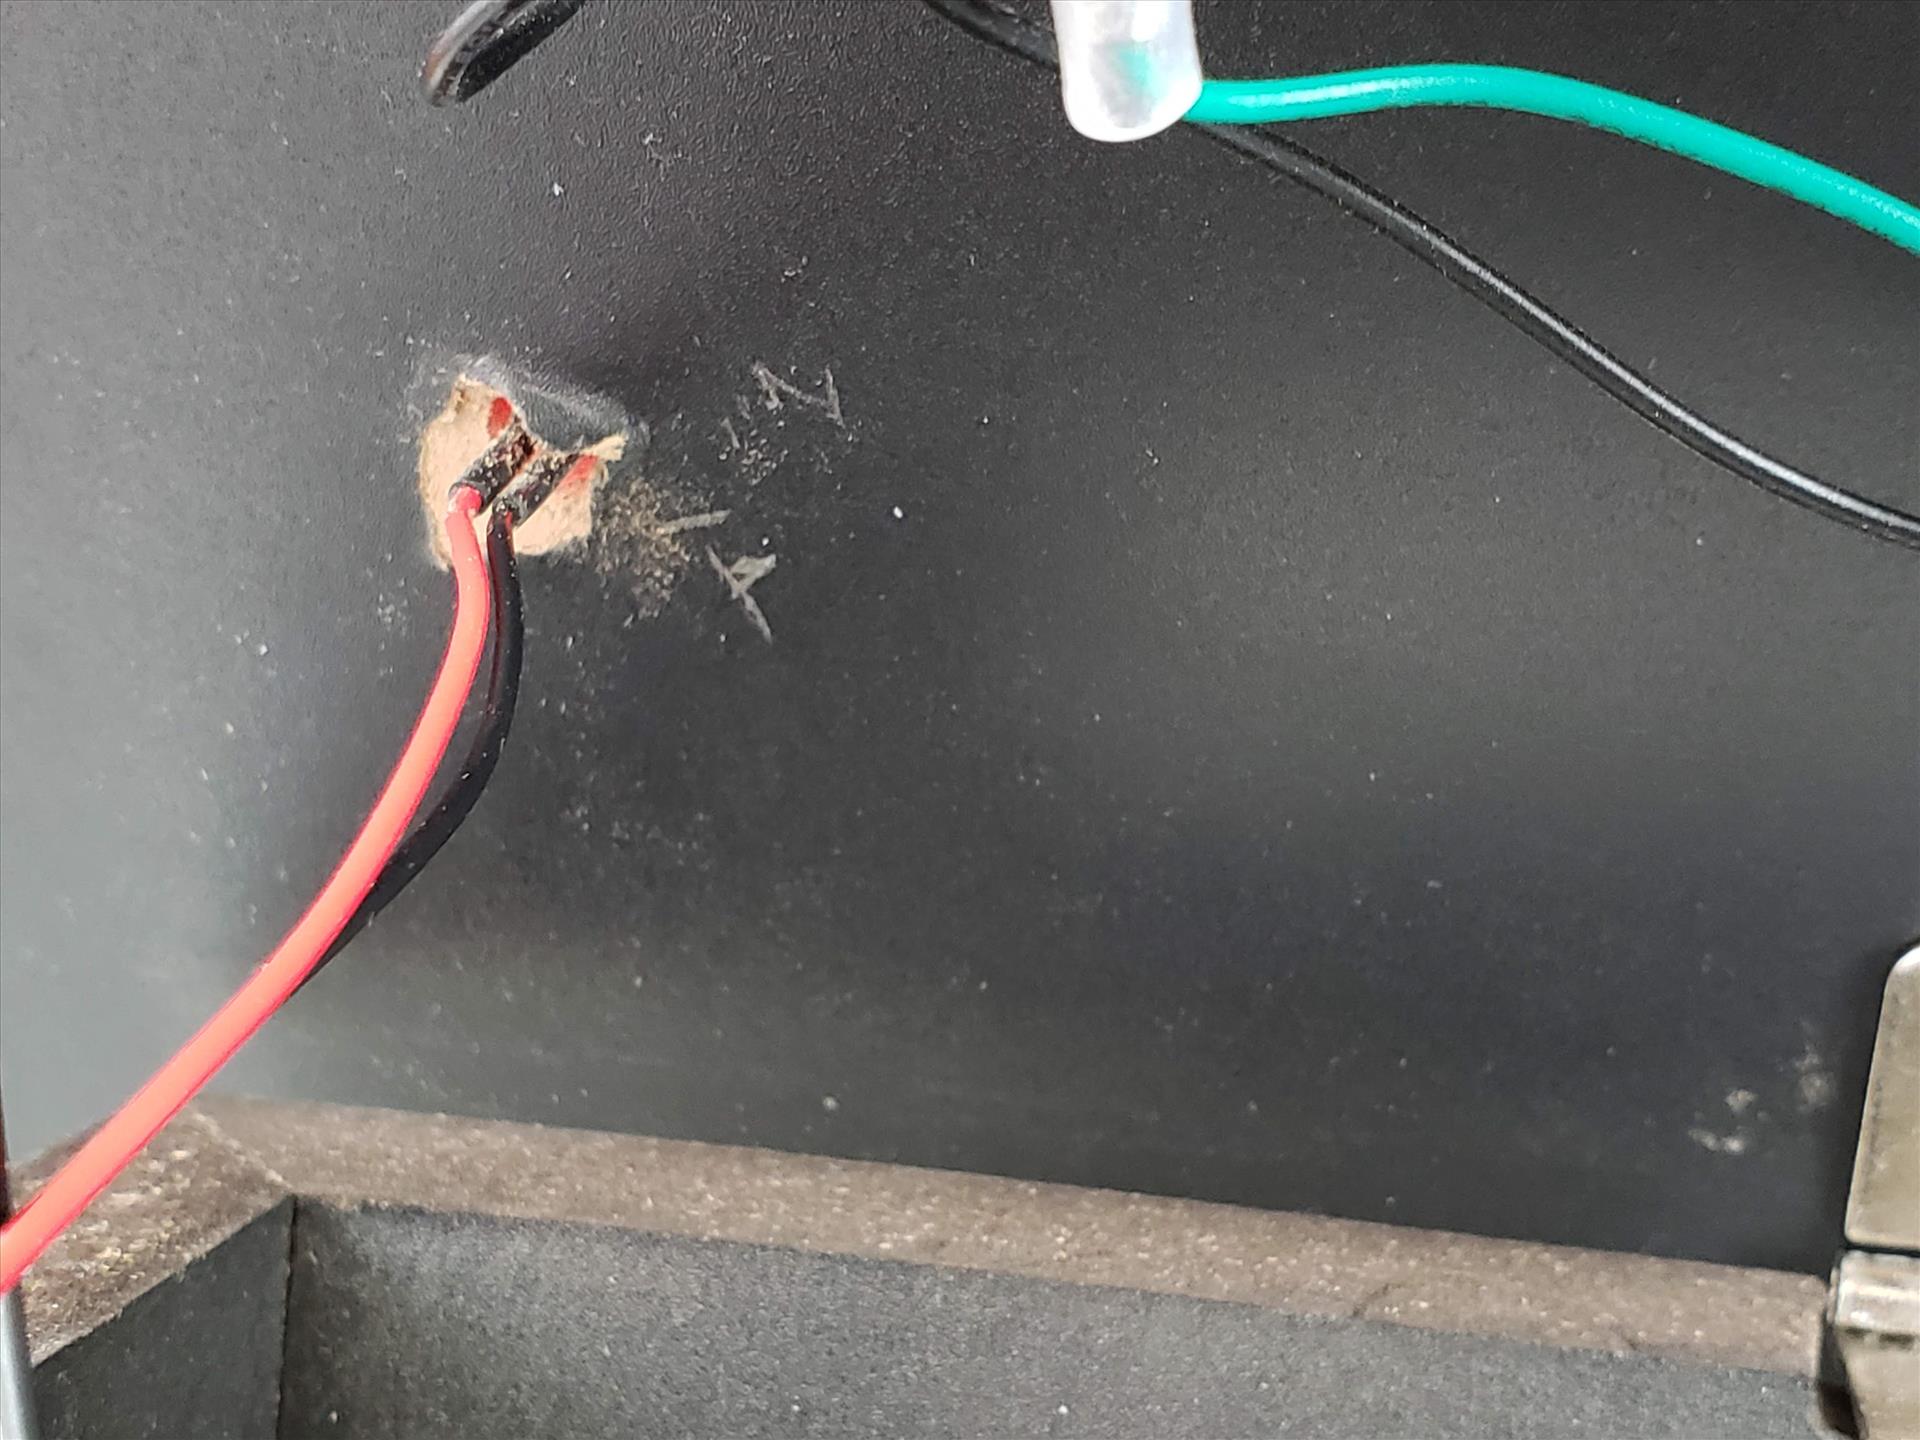
Well, I ran into a slight problem on one of the ground spade connectors. Some of the spade connectors on the Atari switches were really tight and I accidentally pulled out one of the ground cables from the spade connector housing. Oops! I had some extra spade connectors on hand but I was able to take a pair of pliers and un-crimp it, stick the wire back in, and crimp it again to secure it in place. Lesson is, take care when removing spade connectors.
The EG STARTS kit also came with LED Coin and Player buttons so that was a nice replacement. Unfortunately, the decals don’t stay in the right orientation as you can easily spin the button tops to rotate it. Unlike the ones on my bartop which don’t move, these easily rotate out of alignment. So if you’re a stickler for everything to look right, these buttons might not be for you or you could take some glue to lock the button tops in place..
It took longer than doing an entire setup from scratch because I had to work with the little room between buttons to attach and wire up as well as taking time to remove the buttons that were currently in place. I also didn’t want to change up the wiring order that was in place so I mostly replaced one button at a time. All in all, it wasn’t too bad and after all that was done, I tested it to make sure everything worked before attaching the power harness by plugging the control panel into my computer and using the Windows USB controller test program to make sure the joysticks and button still worked.
I wasn’t going to use the included wires that the kit came with nor the encoder boards so I needed to wire up the power to each button to a power source. If I was using the encoder boards, it would have been a piece of cake as the encoders that came with the kit also powered the lights on the buttons.
I went on Amazon and picked up a wire harness kit but, truth be told, I had the wires and spade connectors to make one if I really wanted to by daisy chaining the wires together. But for $12, I decided to just spend the money rather than fighting with tiny wires myself.

So how will I power this up? I’m going to use whatever is using the stick at the time whether it be the Raspberry Pi 4 or the PC. I saw from this video of a person splicing in a USB cable and plugging it into a USB power plug to power his LED buttons. I wondered if the Pi 4 could do this and it would save me from adding a power strip. I also had the option of plugging it into one of the USB ports on the Zendure SuperTank if I really needed to. This process will only work with 5V LED buttons so make sure your kit is that instead of 12V LED buttons that are also available for arcade buttons. I have read you could power 12V LED buttons with a 5V connection and that it’s just not going to be as bright though.
If you’re not comfortable with splicing cables, you could pick up a barrel plug to USB connector and do it that way. Since I have spare USB cables laying around out the wazoo and I have no problems splicing and heat shrink wrapping cables, I’m going to just make my own.
So what you need to do is daisy chain the ground on all the connectors which will be one one side of the LED housing and then daisy chain the power on the other side. Depending on how the LED bulb is inserted into the housing, you won’t know if it’s the right polarity until you test it out. Wiring them wrong won’t kill the bulb so it’s OK if you don’t get it right the first time. What I like to do is plug the cable into a power source and touch the metal leads to the spade connectors to see if the bulbs light up. If it does, insert the connector in. If it doesn’t switch and touch to see if it lights up. Most of the time it will, but if it still doesn’t light up then it’s probably a bad bulb.
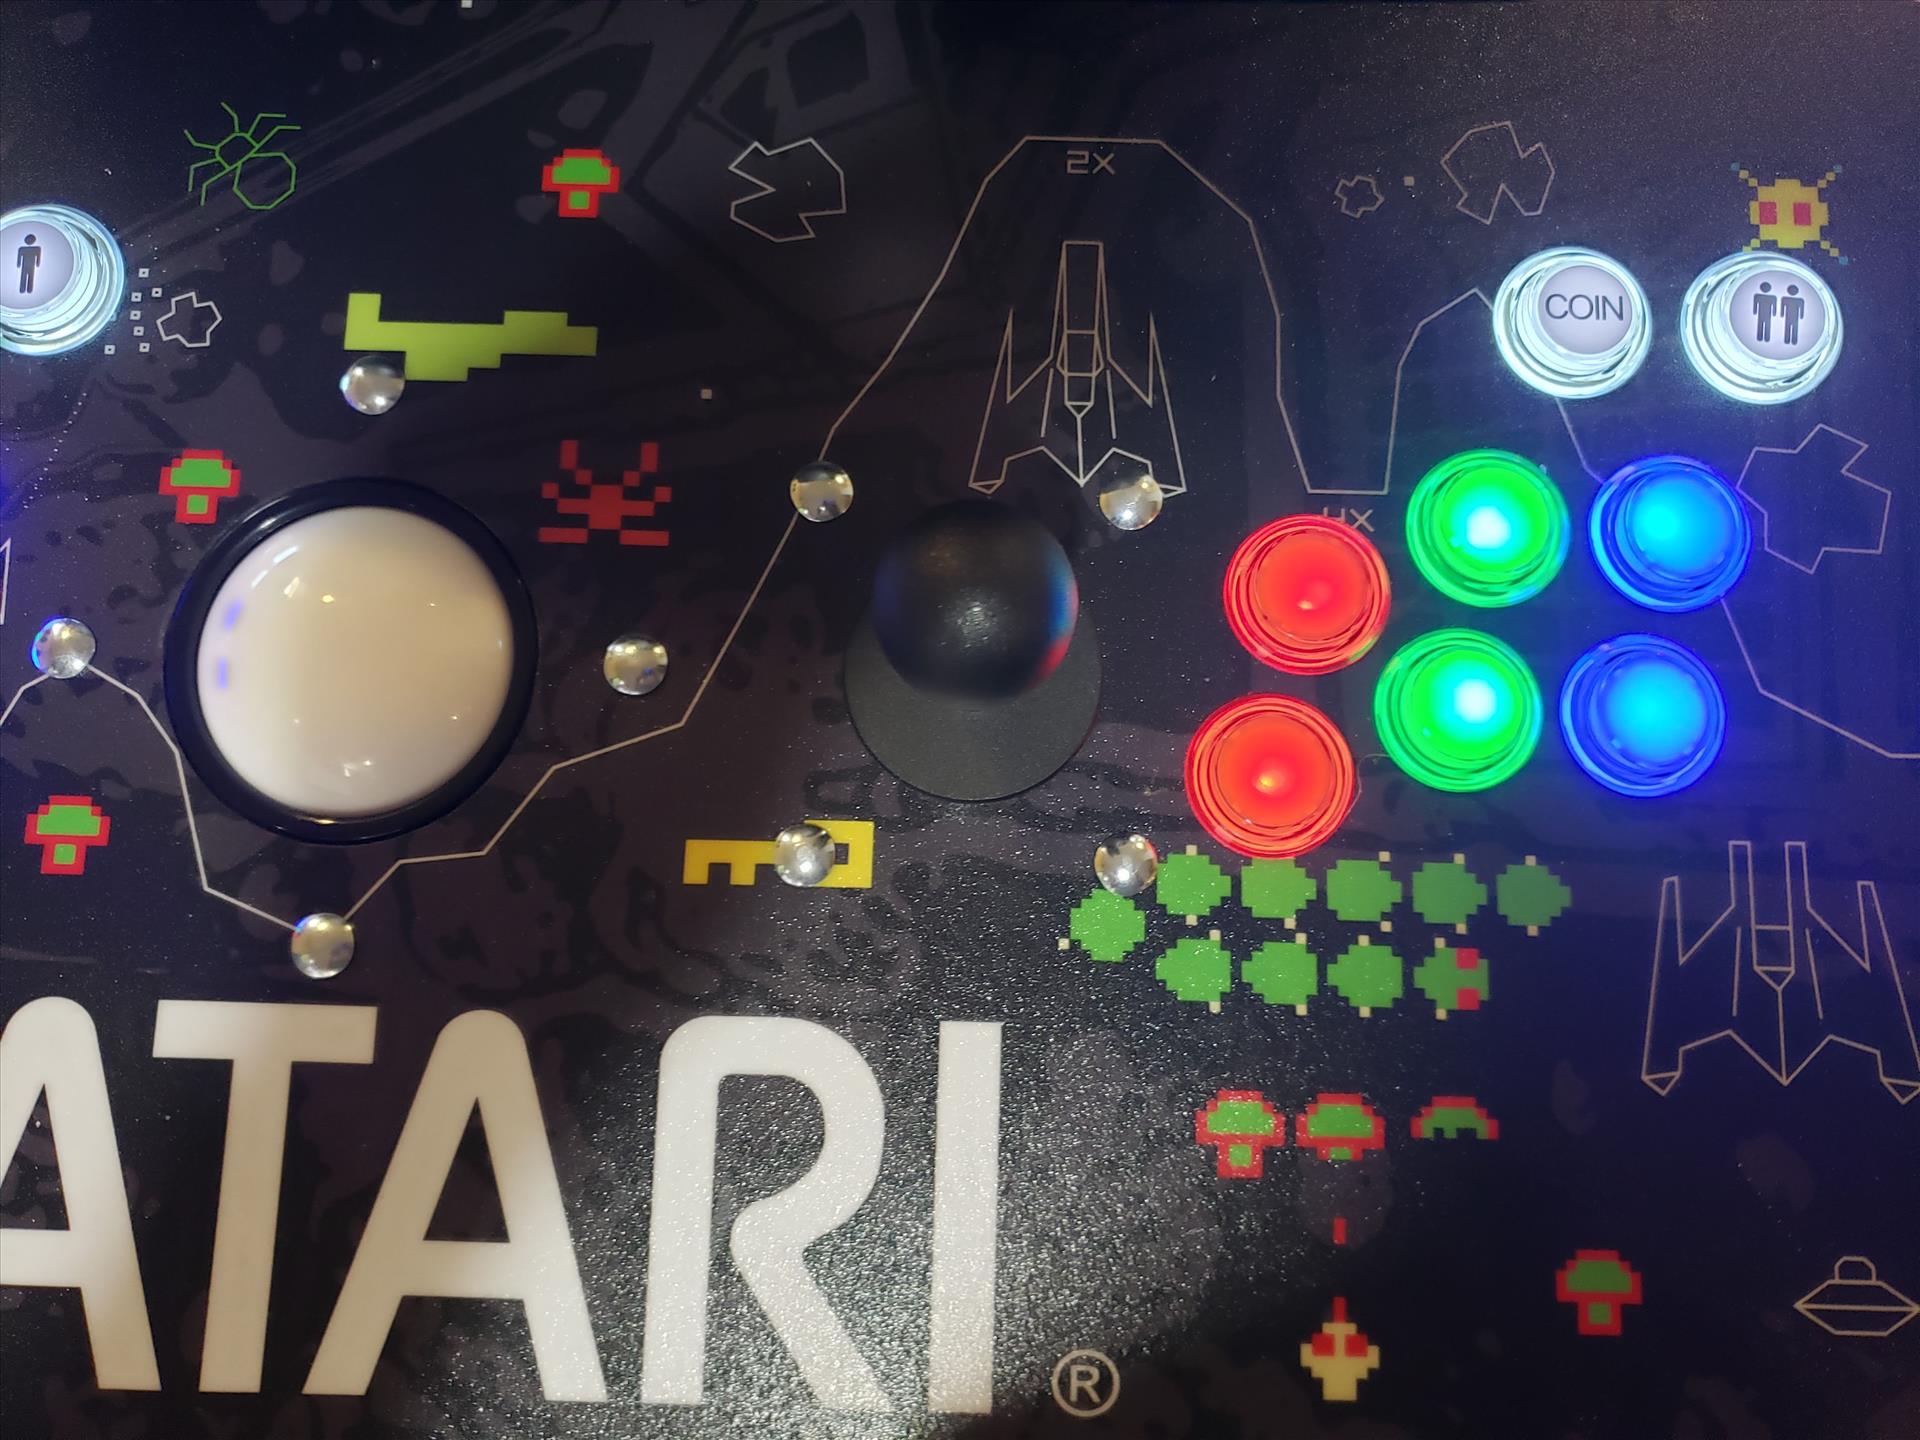
So, taking the time to route the power harness around to each button, I then plugged the cable into a USB port on the Raspberry Pi 4. I was greeted with the sweet, sweet display of multi-colored LED buttons being lit up.
I then thought about when I plugged this into the PC. The buttons won’t light up because as is, it will only do so when I use it with the Raspberry Pi 4. In my previous article, I added in a USB switch and I wondered if it would be possible for power to go from the PC or the Pi 4 depending on which device the USB switch is using.
So I removed the buttons’ USB power connector from the Pi and plugged it into the USB switch. Sure enough, the buttons lit up now whether I’m using it in the stand alone mode of the RetroPie or if I had it plugged into the PC. Perfect!
My last mod was putting in a small little red LED to let me know if the Raspberry Pi 4 was still drawing power. When you turn off the Pi 4 in the menu, it doesn’t completely turn off. There’s still a small power draw and if you have the Pi 4 plugged into a wall outlet, that’s fine. It’s a pretty small power draw but I made this setup so it can all run off a battery. Granted, the Zendure battery is huge with 27,000 mAh worth of power, but I need to make sure it’s completely off so it doesn’t drain the battery. In a previous mod, I made a hard switch cut off so it disabled any power going to the Pi 4, but I had no indicator that it was off on the outside in case I forgot to hit the power switch in the back.
I picked up some little LEDs and LED holders from Amazon. The pack comes with multitude of colors so you can choose whatever you want. I chose red to stand out. Now, the LED holders I picked up only holds the LEDs in place by friction instead of having a little extra piece to lock it in place. It’s not ideal and by the time I got around to this project, it was too late to exchange it. That said, you can use a little glue from a glue gun to keep the LEDs in place, but I found that with the hole I drilled into the control deck, it was just the right size to lock the LED in place. Still, I would find one that doesn’t use friction to keep the little light inside.
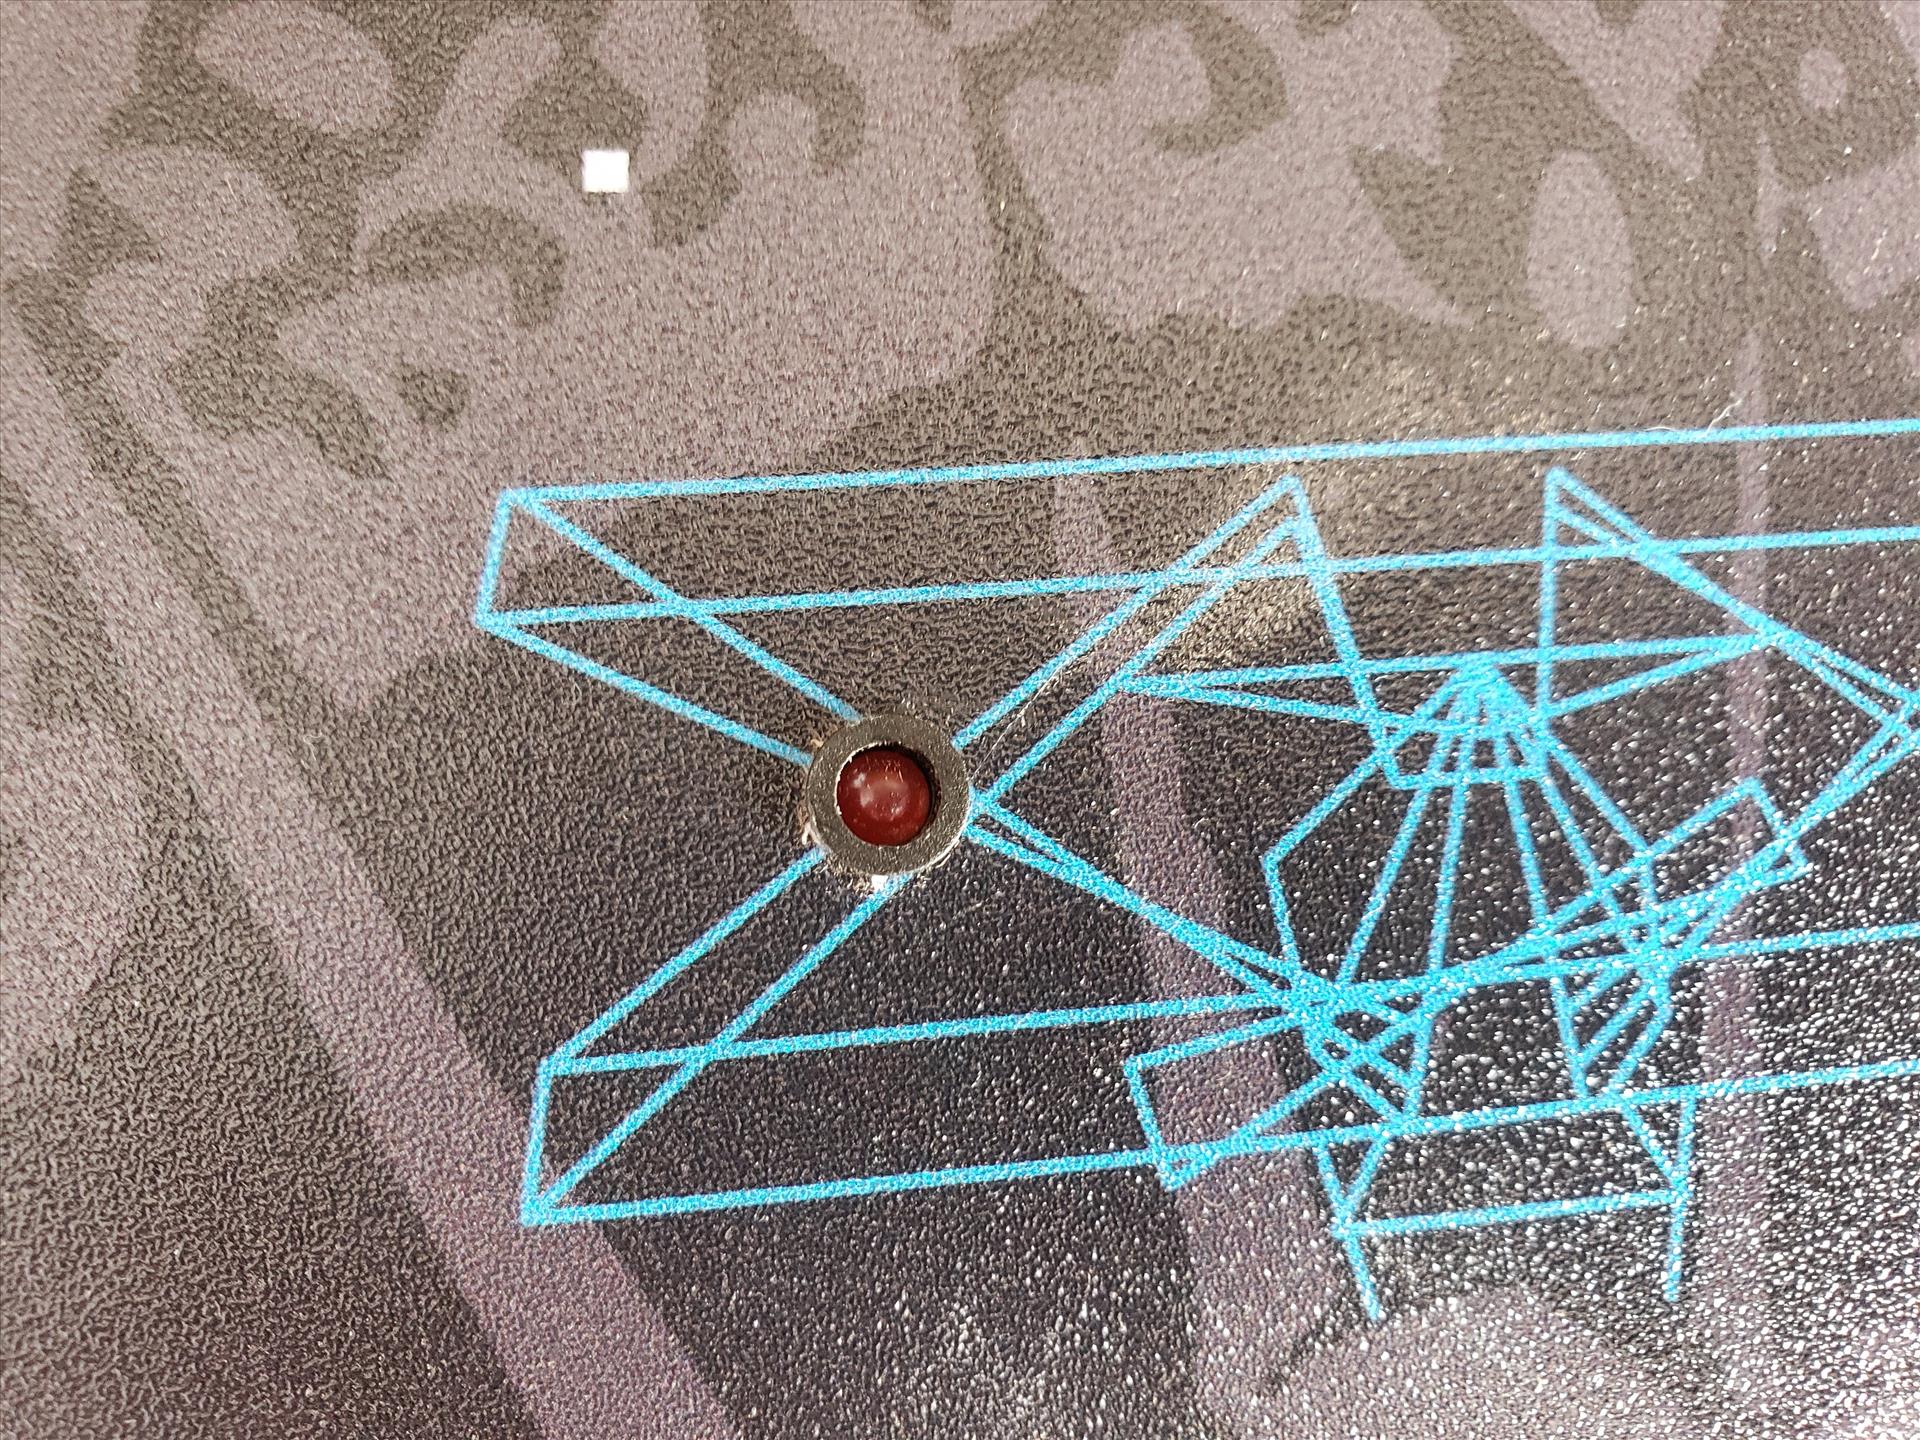
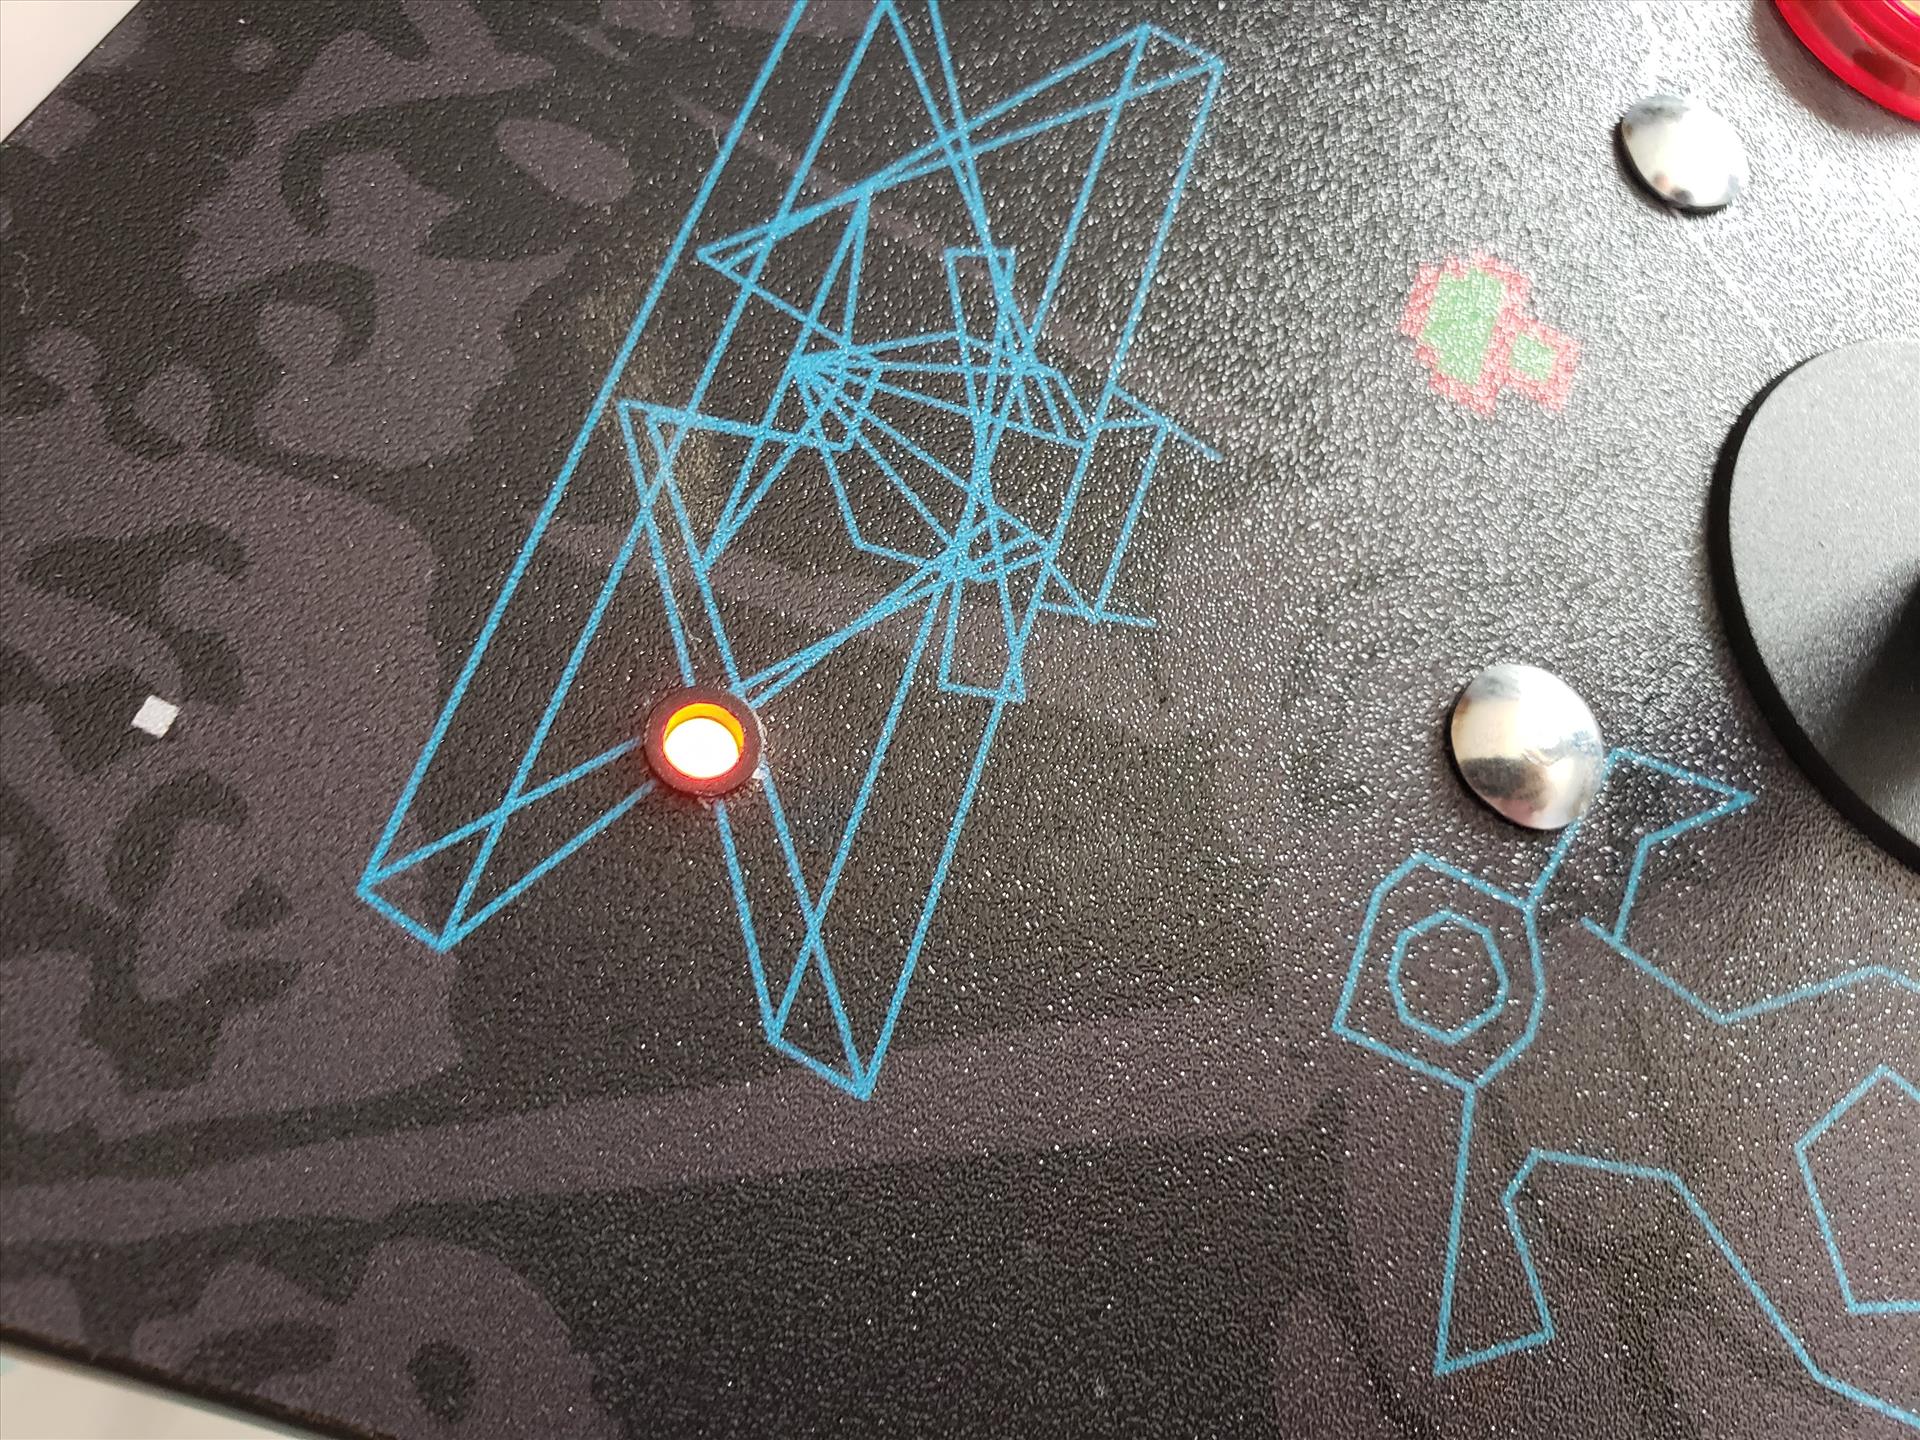
I decided to place the LED in the upper left corner of the control deck so it’s easily seen. I extended the wires of the LED with some female jumper wire connectors that I soldered onto the ends of the LEDs.
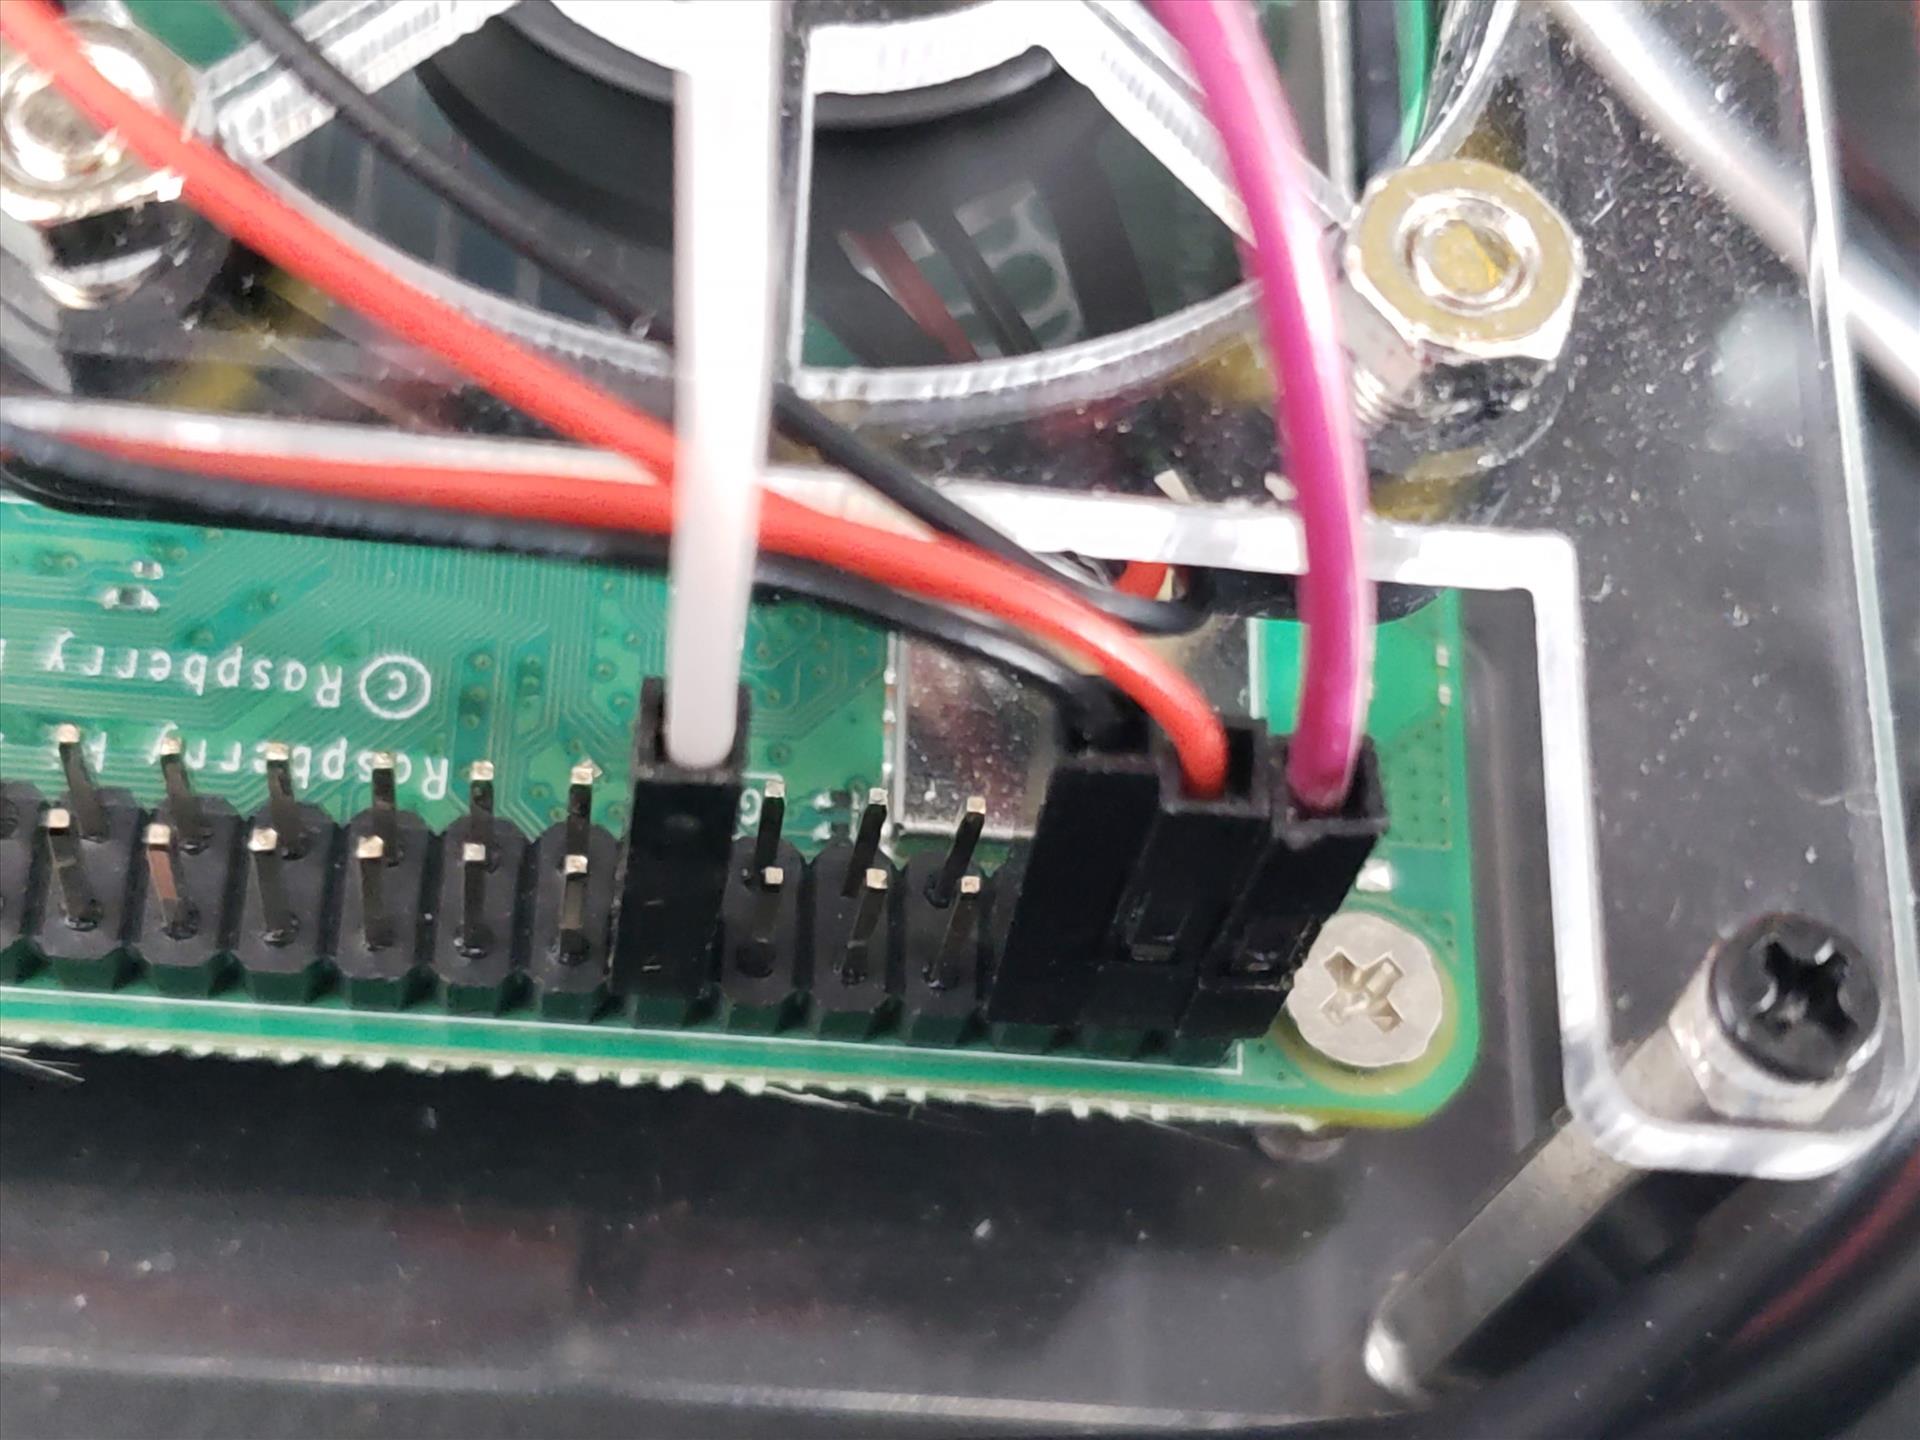
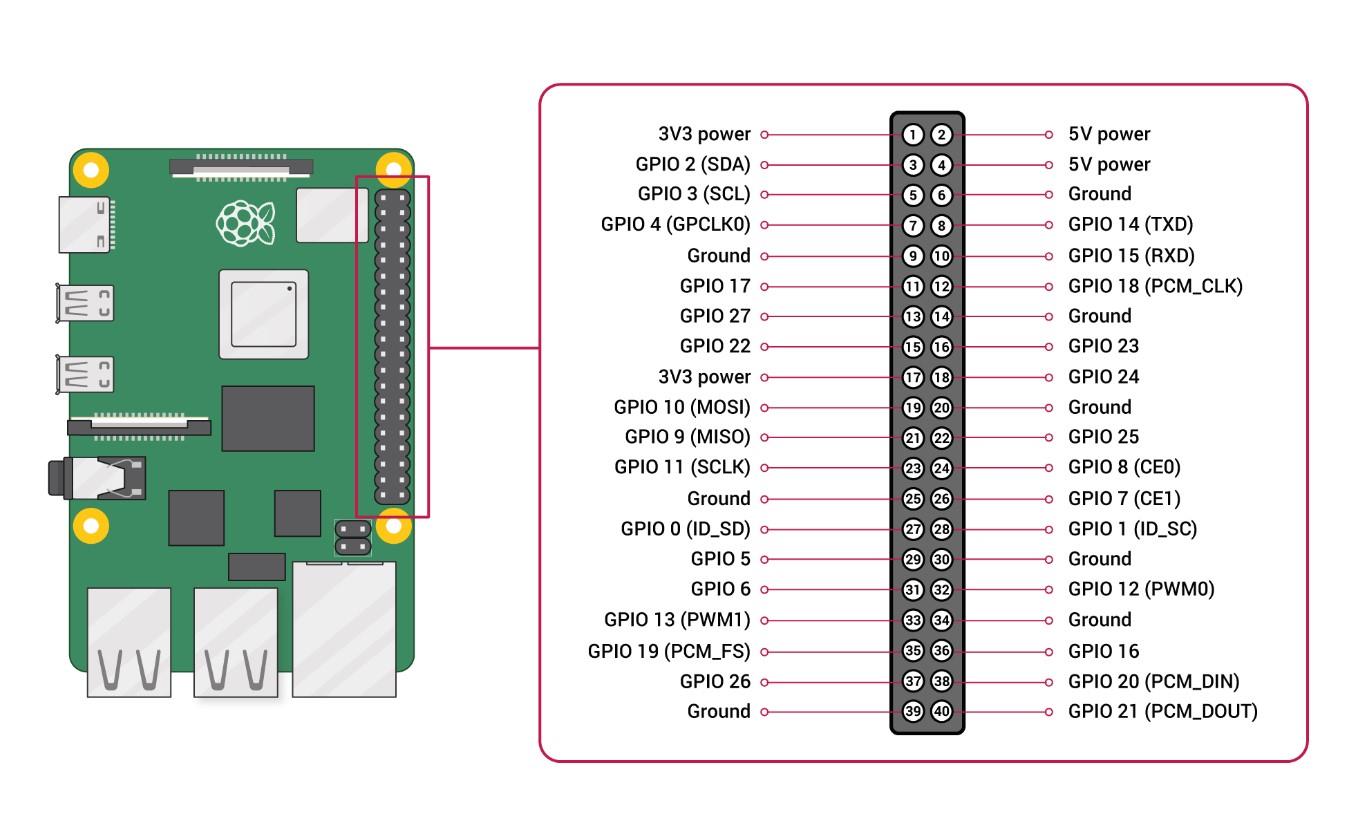
For wiring, I plugged the power into pin 2, which is a 5V pin and pin 14, which is the ground. The reason I didn’t use pins 4 and 6 is because they are currently taken up by the fan to cool the Raspberry Pi 4.
So turning on the unit, the LED lights up bright red letting me know the Pi 4 is being powered. And, of course, my buttons light up as well. When I go into the Emulation Station menu to shutdown the system, it goes through the shut down process and the LED buttons turn off. What’s left on though is the little RED led in the upper left corner letting me know the Pi 4 is still drawing power from the battery. With a press of the power button, the LED goes out letting me know that the Pi 4 is completely powered down.
If you forgo wanting the PC to light up the buttons then you could write the power and ground for the buttons to the Pi 4’s 5V and ground pins so the buttons will let you know if the Pi 4 is still drawing power. But since I wanted the flexibility of using it on the PC as well, so I went this route of adding the small LED indicator.
And that’s it. About the only things I think I would want to do left are add a spinner and pinball buttons. The problem I’m running into with the pinball buttons is I would want nudge buttons on the sides as well, but the gas struts in the unit would prohibit the secondary buttons on each side. There’s only room for one pinball button on either side and while I could remove the gas struts, I do like them. And there’s not much room left with all the extra wires I’ve put in there so we’ll see if there’s anything else I want to do, but I think I’m calling it quits on doing anything else.
I’ve been really, really happy with my purchase of the Microcenter Atari Ultimate Dual Arcade Fight Stick with Trackball and what I’ve been able to do to it. I’m able to take around and with just an HDMI cable, plug it into any TV or monitor and play. I can plug it into a PC to use as an arcade stick for fighting games. It’s also gotten me to look at other control deck configurations so if I ever decide to do another one, I have a lot more experience on doing the mods I want to one. It also reignited my love for retro-games so I have to say, it’s one of the best purchases I’ve made in recent years and if you have a chance to pick one up at Microcenter or Amazon, don’t hesitate to get one.


About Author
I've been reviewing products since 1997 and started out at Gaming Nexus. As one of the original writers, I was tapped to do action games and hardware. Nowadays, I work with a great group of folks on here to bring to you news and reviews on all things PC and consoles.
As for what I enjoy, I love action and survival games. I'm more of a PC gamer now than I used to be, but still enjoy the occasional console fair. Lately, I've been really playing a ton of retro games after building an arcade cabinet for myself and the kids. There's some old games I love to revisit and the cabinet really does a great job at bringing back that nostalgic feeling of going to the arcade.
View Profile