
Atari Ultimate Dual Arcade Fight Stick with Trackball Mod - Connections
In my previous mod, I added a battery and a power button to turn the Raspberry Pi on or off without having to open it up as well as make it a more portable solution. Today, I’m going to make it easy to use, whether by itself or plugged into a PC.
One of the great things about these arcade control decks is their versatility. You can plug it into many devices and have a working arcade controller for your games.
With Microcenter’s Atari Ultimate Dual Arcade Fight Stick with Trackball, there are two USB connectors that allow for the control deck to work. One is for both joysticks and buttons. The other is for the trackball. When plugged into a PC, the trackball is detected as a mouse and the two joysticks come up as Xin-Mo controllers.
In its default setup with an internal Raspberry Pi 4 (the product originally came with a Raspberry Pi B3+), I would have to open the control deck, unplug the two USB connections from it, and route the cables out the notch in order to plug it into a PC. Once I am done I would have to unplug it, and then open the control deck again to plug it all back into the Pi 4.
I admit, I’m lazy. I want to be able to easily plug it into a PC and press a button to switch between using it on an external device or the internal Pi 4. That’s where a USB switch comes in.
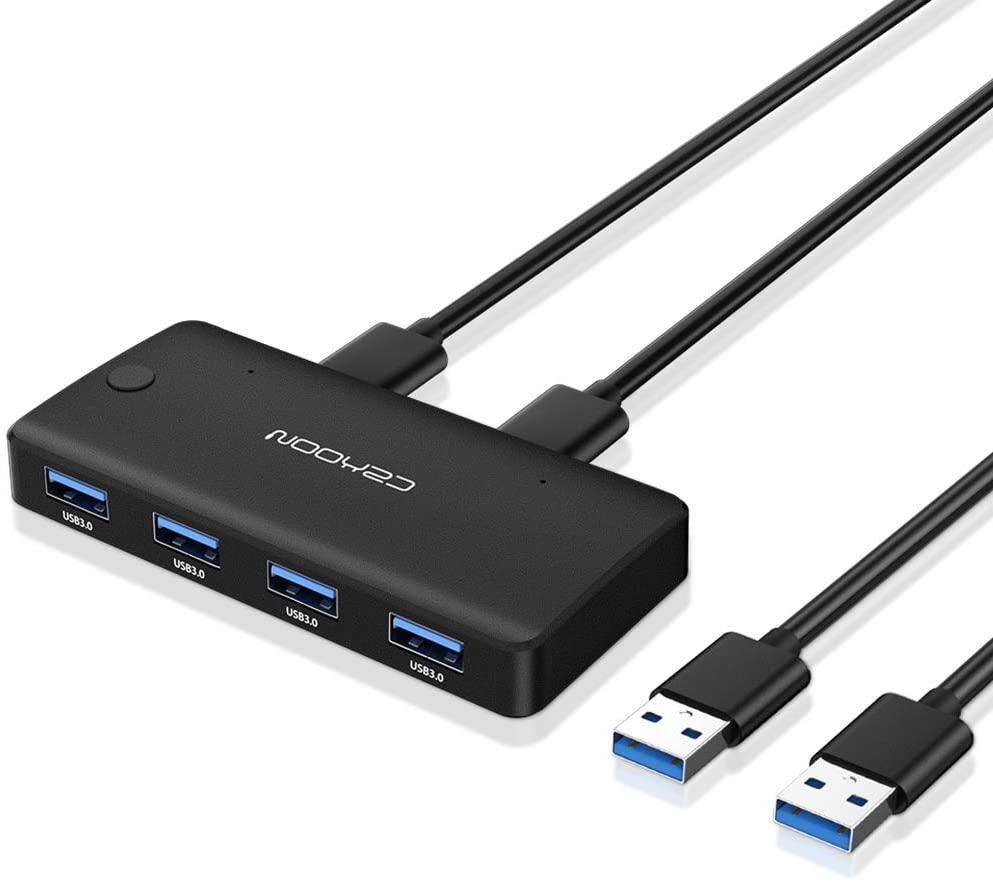
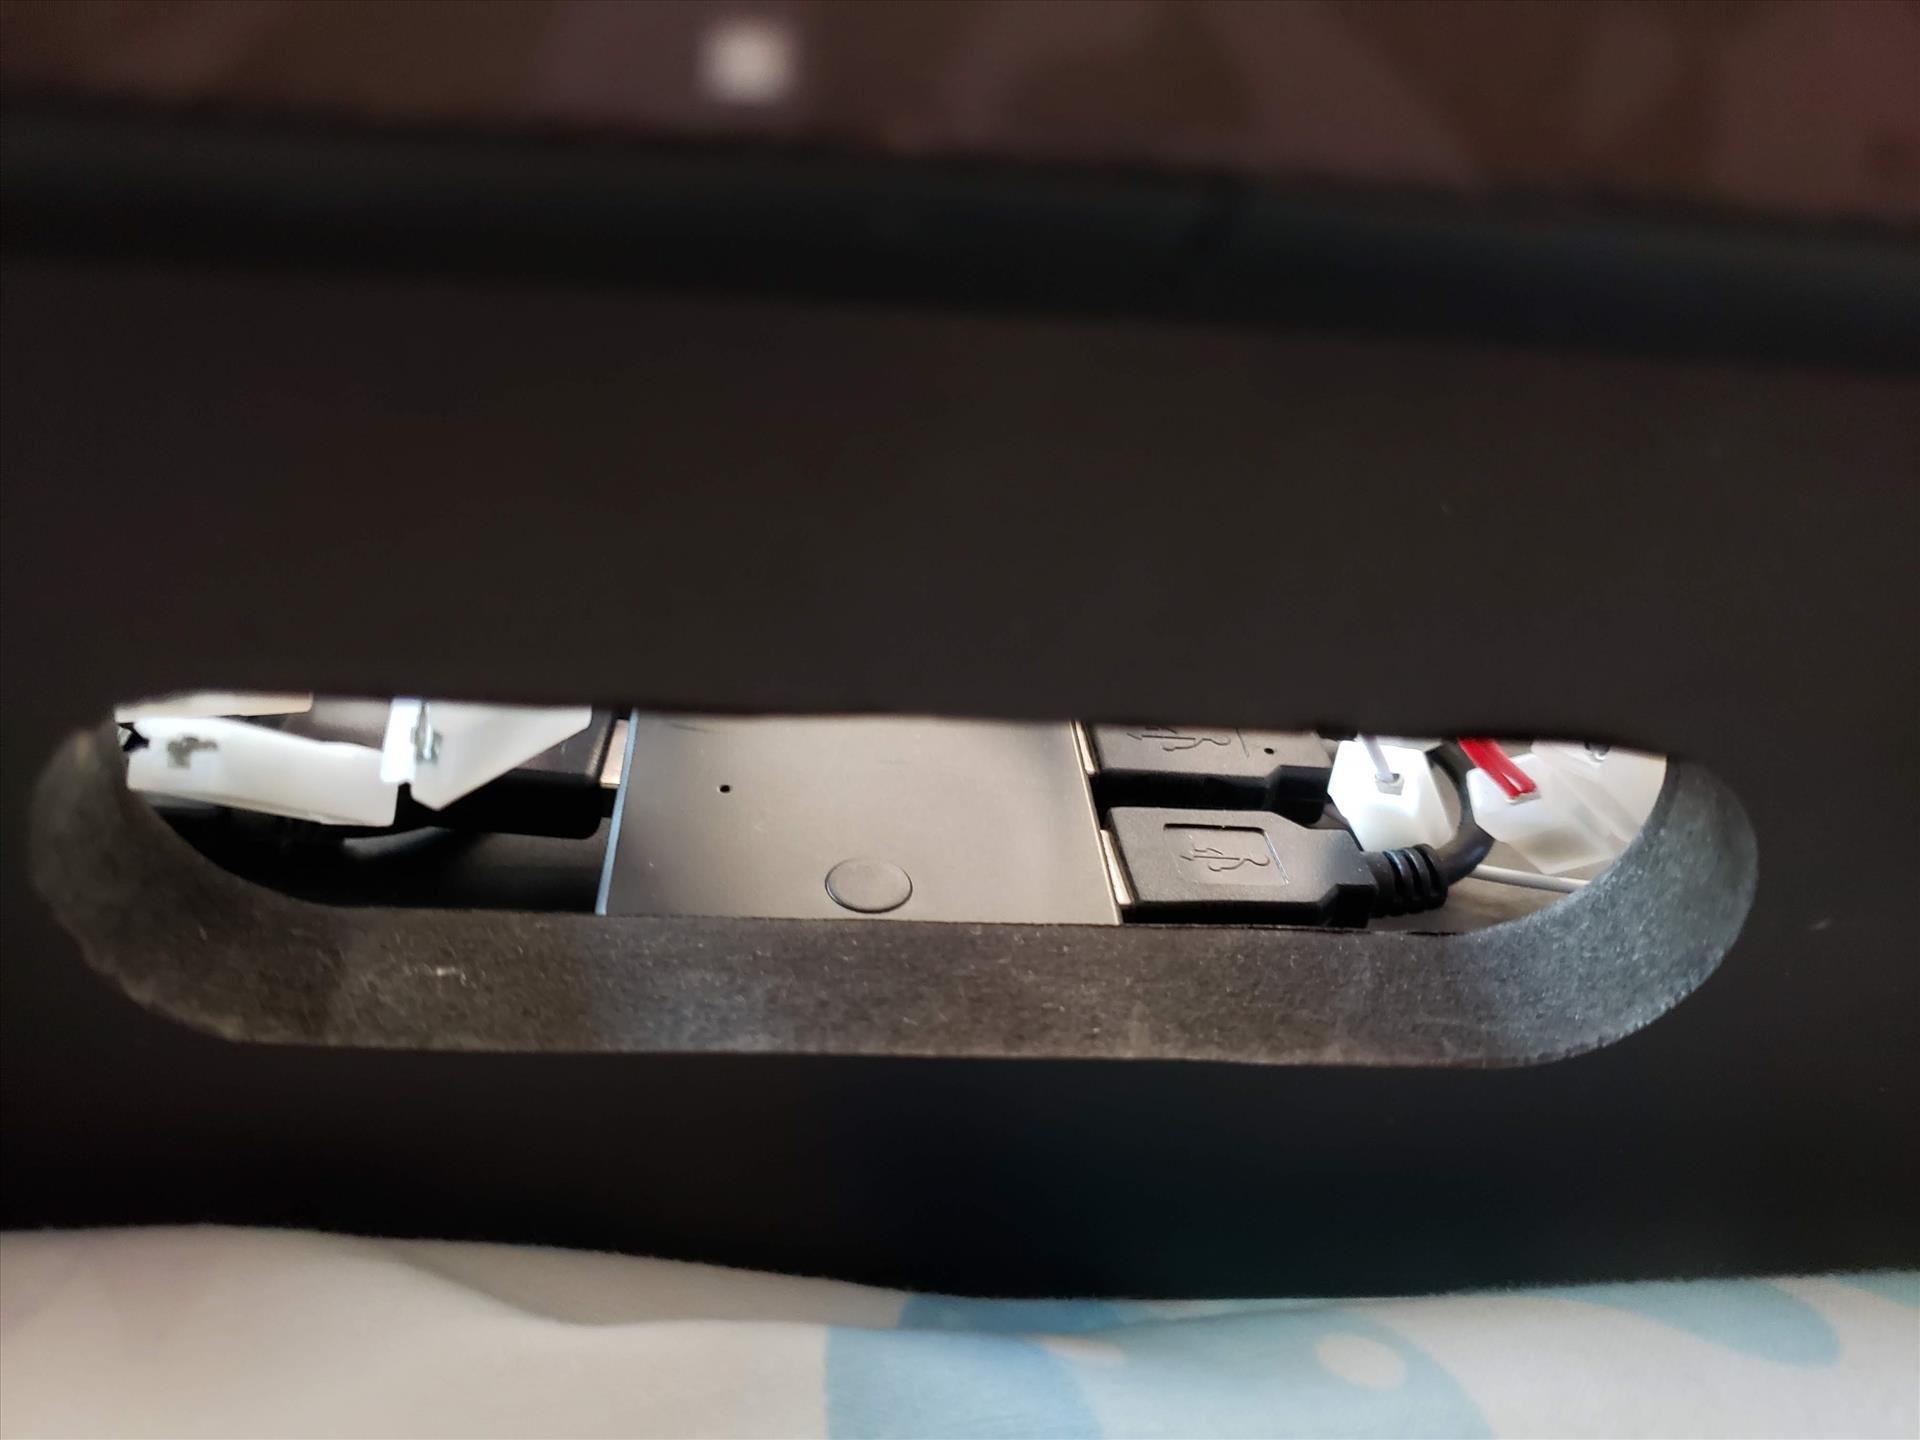
I picked up a USB 3.0 switch that allows for four devices to be connected to it and the ability to connect two hosts with a button to switch between the two. This is one of the few additions I have that I don’t have a good idea on how to add an external switch on the panel, so I was going to take advantage of the notch cut out for this one.
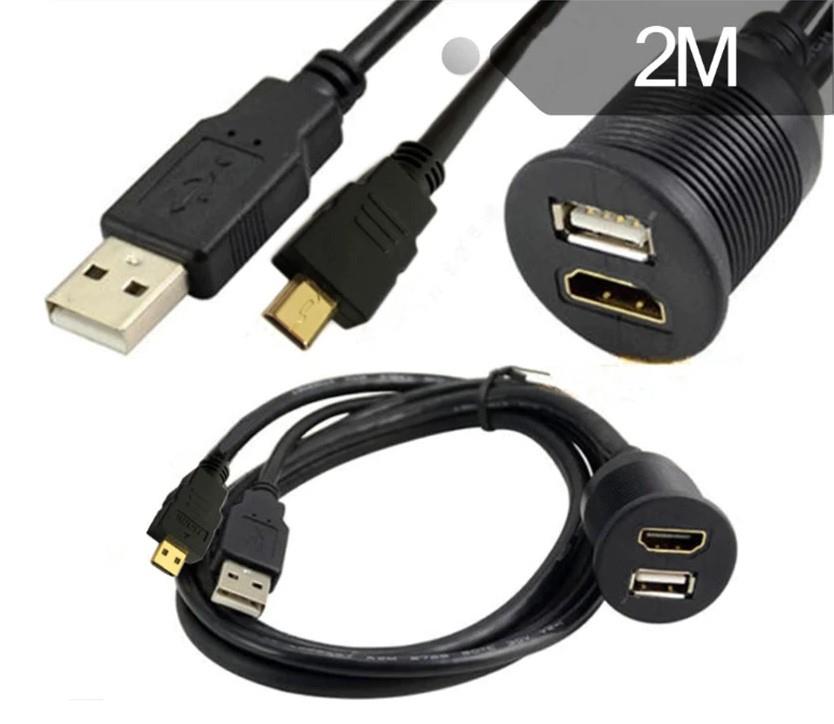
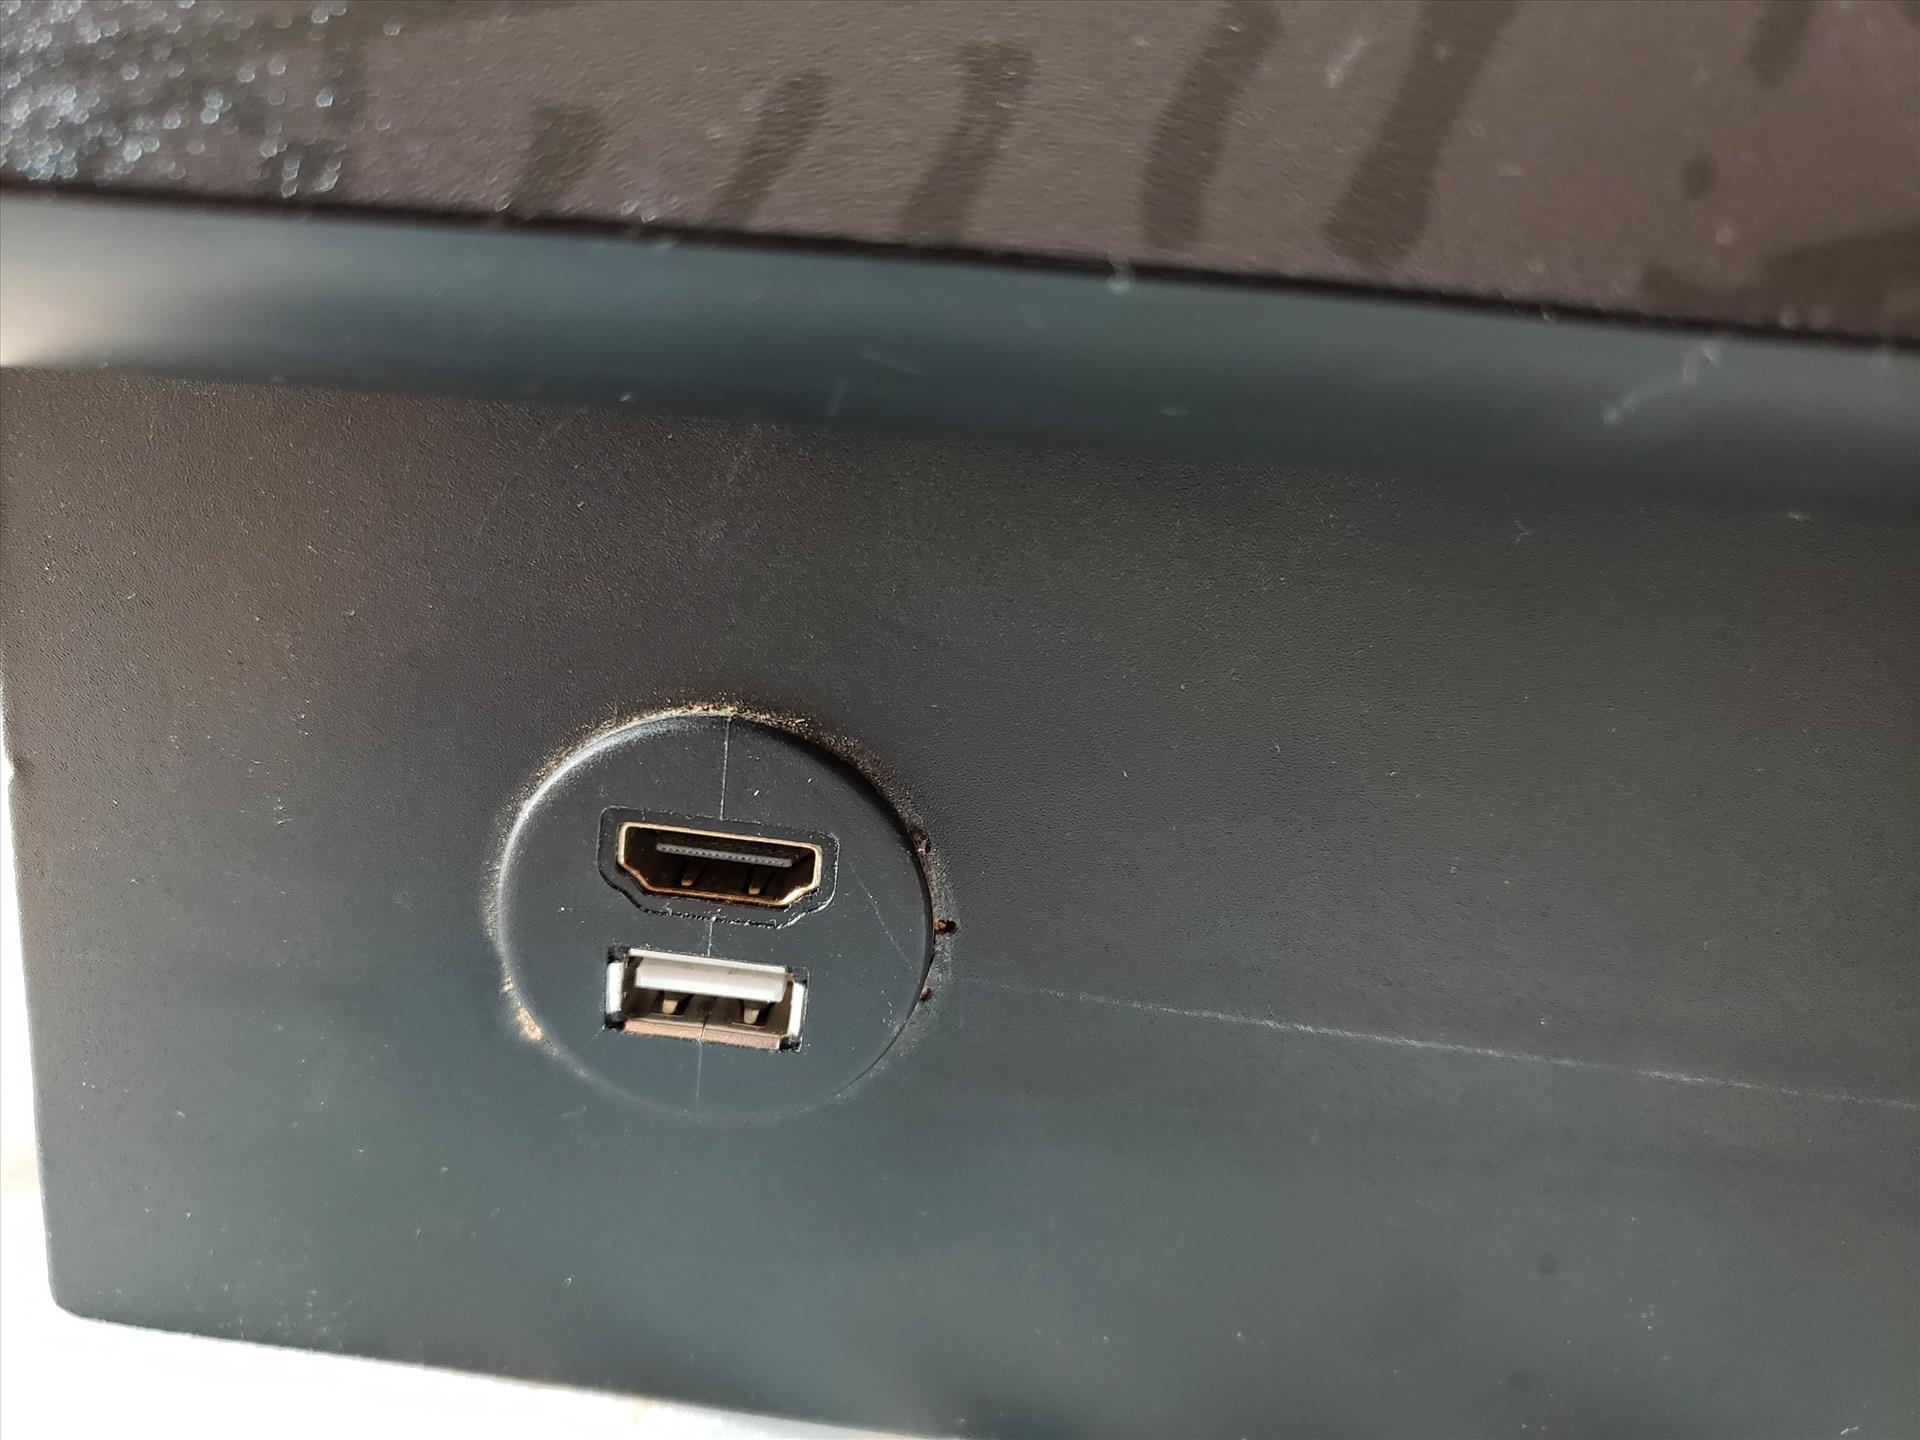
Inside, I plugged the Xin-Mo controller and trackball to two of the four USB ports and then plugged a single input connector to the Raspberry Pi 4. The second input connector was then connected to a USB panel mount. Now, there are plenty of USB panel mounts out there so choose the one that you would want. I finally found one that had a USB connector with an HDMI connector that terminated into a micro HDMI plug. If you’re using a Pi 3B+, it has a full-sized HDMI connector, but Pi 4’s have micro HDMI. It took me a long time, but I bought this one from Aliexpress that took a few weeks to get to me.
I had to position the USB switch so the button was easily accessible from the large notch in the back of the control deck. But I swore when I initially did this, I could just plug the control deck into the PC and it would automatically switch so I didn’t have to press the button for my PC to see the Xin-Mo board. So this is the one thing I wish I could figure a way for it to either automatically switch to my PC if I have it plugged in or create another panel mount button to manually switch from the Pi 4 to the PC and vice versa. For now, having the button accessible from the notch will have to do and to be honest, this control deck will mostly be used as a standalone retro gaming device anyways and probably won’t be used with the PC that much.
With the USB switch in place, I have the ability to use it with my more powerful PC to play games like Street Fighter V or Mortal Kombat 11. When I’m done, I just unplug it and it’s now back to being an all-in-one control deck and emulation station. It seems to default to the Raspberry Pi 4, which is my preference anyways. Also, because of the trackball and how little clearance it has with the bottom of the base, you're going to have to maneuver some of the extra cables around so you can close the lid properly. I had some trouble with the lid closing completely because the internal wires were in the way of the large trackball mount.
There’s also the issue of connecting a keyboard to the Raspberry Pi 4 in order to do a few things that would just be easier than trying to use the control deck. I could pair up a Bluetooth keyboard and I have a few of those portable ones laying around, but the Pi 4 has some extra USB ports that I can take advantage of.
Again, in comes a panel mount and this time I decided to go with the USB and 3.5mm connector to be placed on the left side. This will give me access to both the audio connector on the Pi 4 along with USB so I can plug in peripherals as well as a headset if I wanted to.


I drilled a hole on board facing me and plugged the panel mount into the 3.5mm connector on the Pi 4 and the USB connector into one of the available USB connectors on the Pi. By the way, I picked up this set of hole saw bits to make holes easier but some folks use a step bit as well. One tip that was shown to me on how to easily test which size bit to use for the panel mount or button you want is to take a cardboard box and drill some holes in it using the various bits. Then, you can easily test if the button or panel mount will fit into the various holes without having to try it out on the thing you want to drill first.

Now with the USB and 3.5mm combo panel mount in place, I have the ability to connect a set of headphones, go into RetroPi to change the audio output from HDMI to headphone jack, and I can play my games without disturbing anyone with the arcade sounds from a TV. Or, if the monitor I’m plugging the stick into doesn’t have speakers, here’s a way to either use headphones or plug in some computer speakers easily.
As you can see, there are plenty of things you can do to upgrade the Microcenter's Atari Ultimate Dual Arcade Fight Stick with Trackball and I have a few more things in mind before I’m completely done with upgrading it. Next time, I’ll be replacing the buttons with LED buttons and power it via the Raspberry Pi 4 with a simple hack I saw that I’m currently using with my bartop arcade.

About Author
I've been reviewing products since 1997 and started out at Gaming Nexus. As one of the original writers, I was tapped to do action games and hardware. Nowadays, I work with a great group of folks on here to bring to you news and reviews on all things PC and consoles.
As for what I enjoy, I love action and survival games. I'm more of a PC gamer now than I used to be, but still enjoy the occasional console fair. Lately, I've been really playing a ton of retro games after building an arcade cabinet for myself and the kids. There's some old games I love to revisit and the cabinet really does a great job at bringing back that nostalgic feeling of going to the arcade.
View Profile