
GRS Panel Pod
Thunderstick Studios produces some great DIY arcade products and their Build-A-Cade is a fun “case” for a Raspberry Pi. The miniature recreation of an arcade machine with full working controls, display, and onboard battery makes it a pretty cool project if you’re into arcade machines.
You can grab different control setups for the Build-A-Cade ranging from trackballs, spinners, and different joystick setups. Unfortunately, you can only have one installed at a time unless you buy a bunch of Build-A-Cade setups and have a different control scheme on each one. What if you bought the box of four controllers and want to use them without having to swap it out of the main setup?
Enter the GRS Panel Pod. The GRS Panel Pod is designed to hold those extra Build-A-Cade controllers in a nice portable and handheld friendly design, which you can use to display next to the Build-a-Cade and plug into it when you want to use them. For example, my Build-A-Cade has the single joystick with three action buttons so if I want to play games that specifically use the spinner or trackball, it’s a long process of unscrewing the back, pulling it apart, removing the current controller, attaching the desired controller, re-assembling the panels, and screwing it all back together. It’s not something you can do quickly. But with the GRS Panel Pod, all I have to do is plug it in via a USB-port in the back of the Build-A-Cade and after a one time setup, I’m using it to play my game instead of the currently installed control scheme.
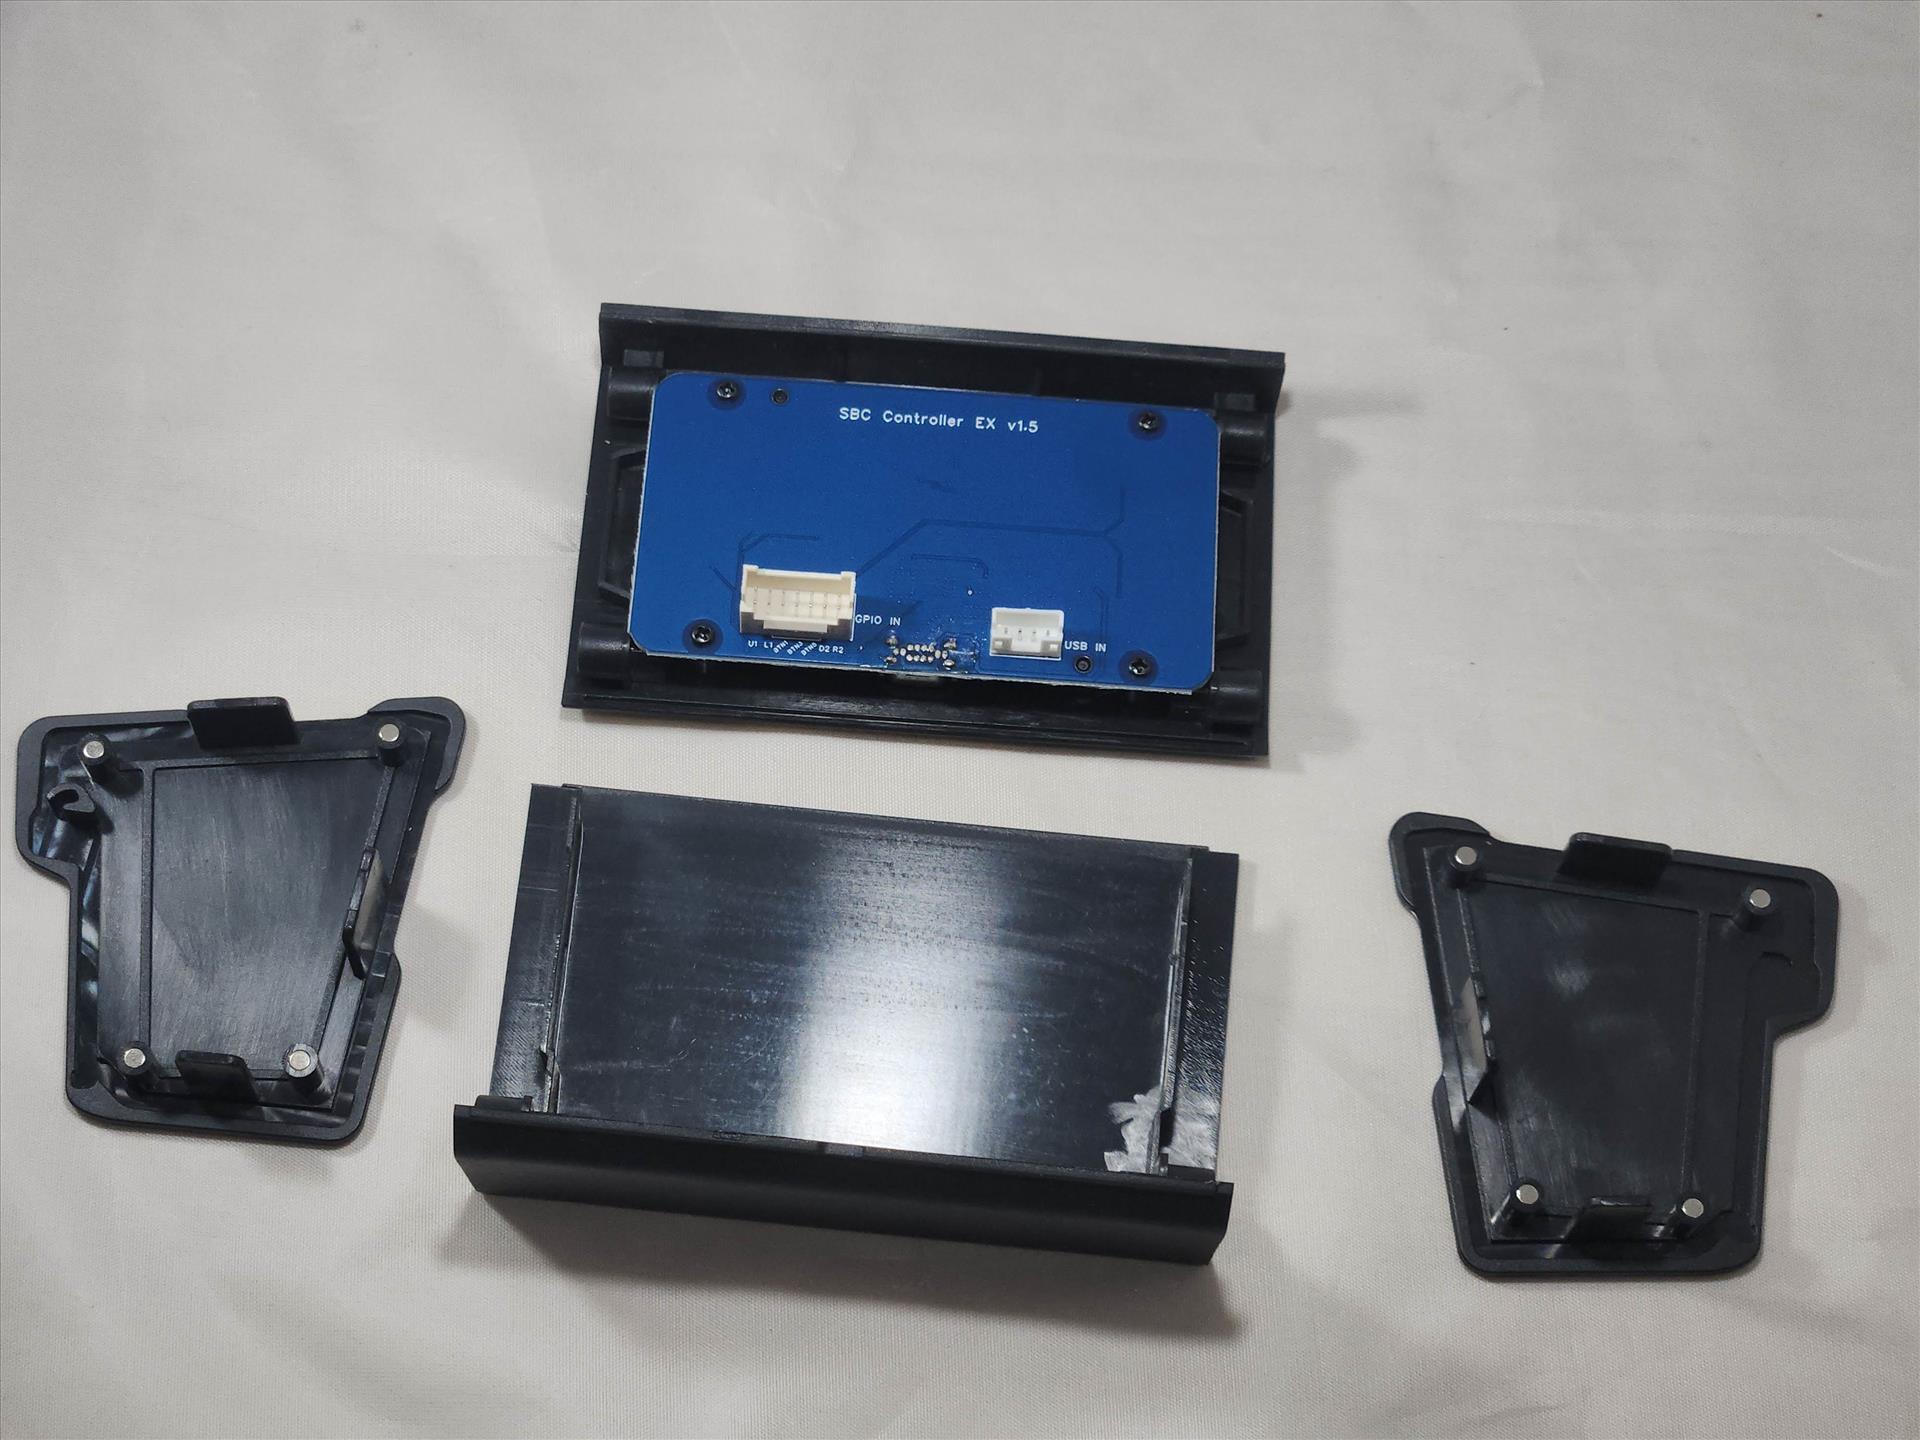
The GRS Panel Pod is pretty simple in design really and also what makes this peripheral useful for those with multiple Build-A-Cade controllers. It consists of four panels: left, right, bottom, and back where it houses a D-Pad, three buttons, and a USB-C connector. Thank you Thunderstick Studios and GRS for making it USB-C. The buttons feel the same as the Build-A-Cade buttons themselves meaning they have a nice clicky sound to them and it doesn't take much force to actuate them.

Everything is held together by magnets so there’s no need to pull out a screwdriver. You would think that magnets wouldn’t be strong enough to keep it all together, but from my week’s usage of it, it never fell apart and even some dropping of it from desk height onto my carpeted floor when put together couldn’t separate the panels.
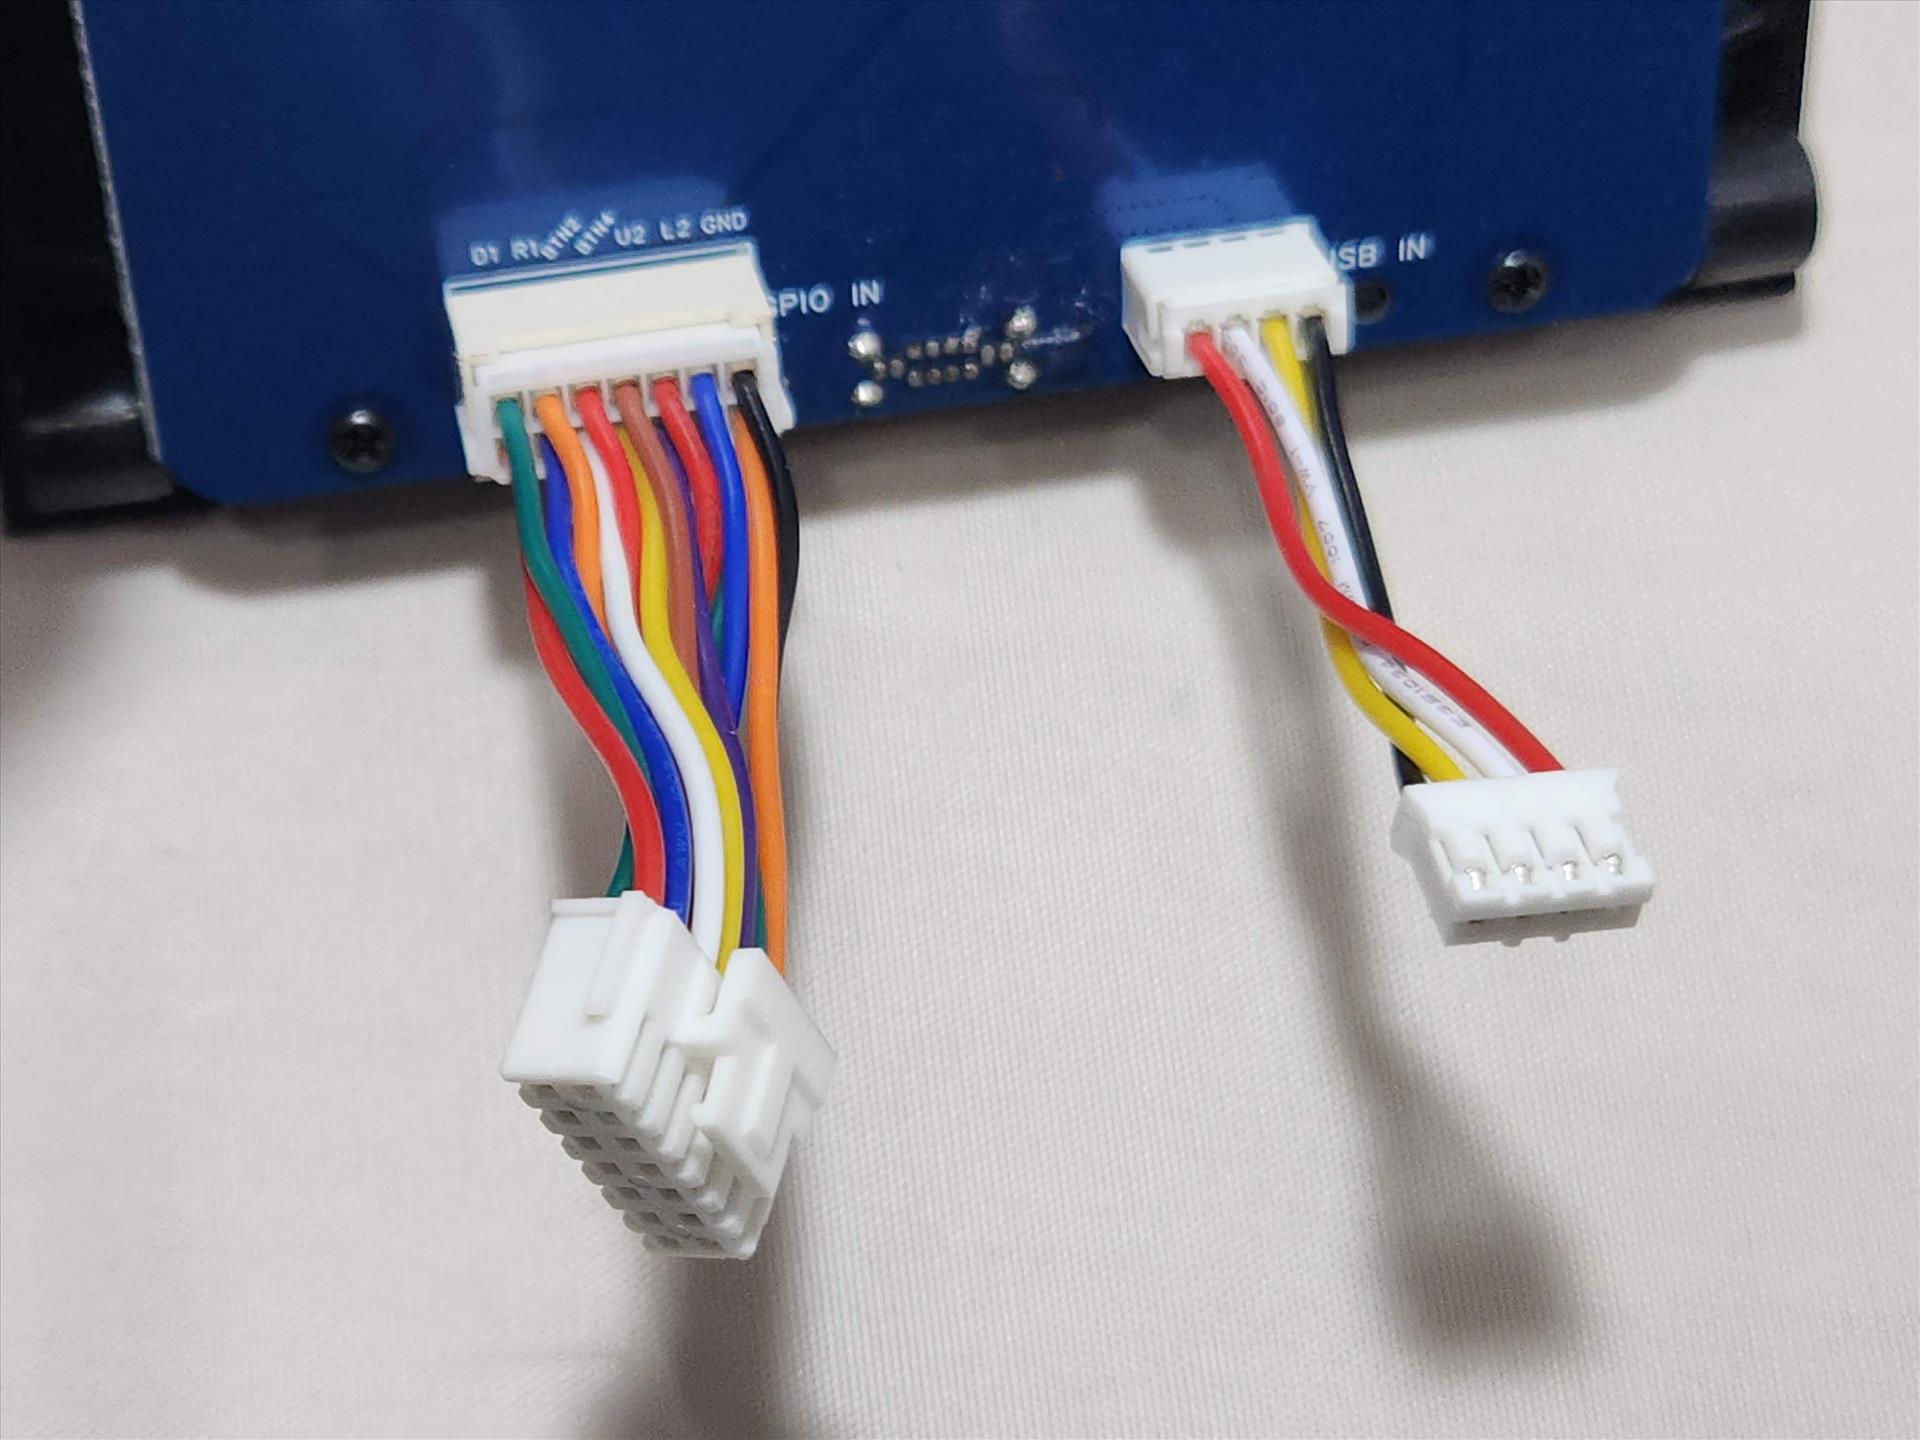
Inside of the back panel houses the control board for the D-Pad and three buttons as well as two JST connectors, one for USB and one for GPIO. You won’t need to use both for all of the control boards as only the spinner and trackball have USB connectors on them. The rest are just GPIO.
Putting a control panel in a Panel Pod is pretty easy after a few tries. You just plug the needed JST connectors, put the back panel, bottom panel, and left panel on. After those three are secure, you slide the control panel on and then slide the right panel to lock it all in place. It takes roughly half a minute or so to change out controllers once you have the hang of it. It did take me a bit the first few times, but that was because I tried to have the control panel connected to the back and bottom panel before sliding on the magnetic sides. This process was a lot harder than just having the back, bottom, and one side panel on before sliding the control panel in and then the final side panel.
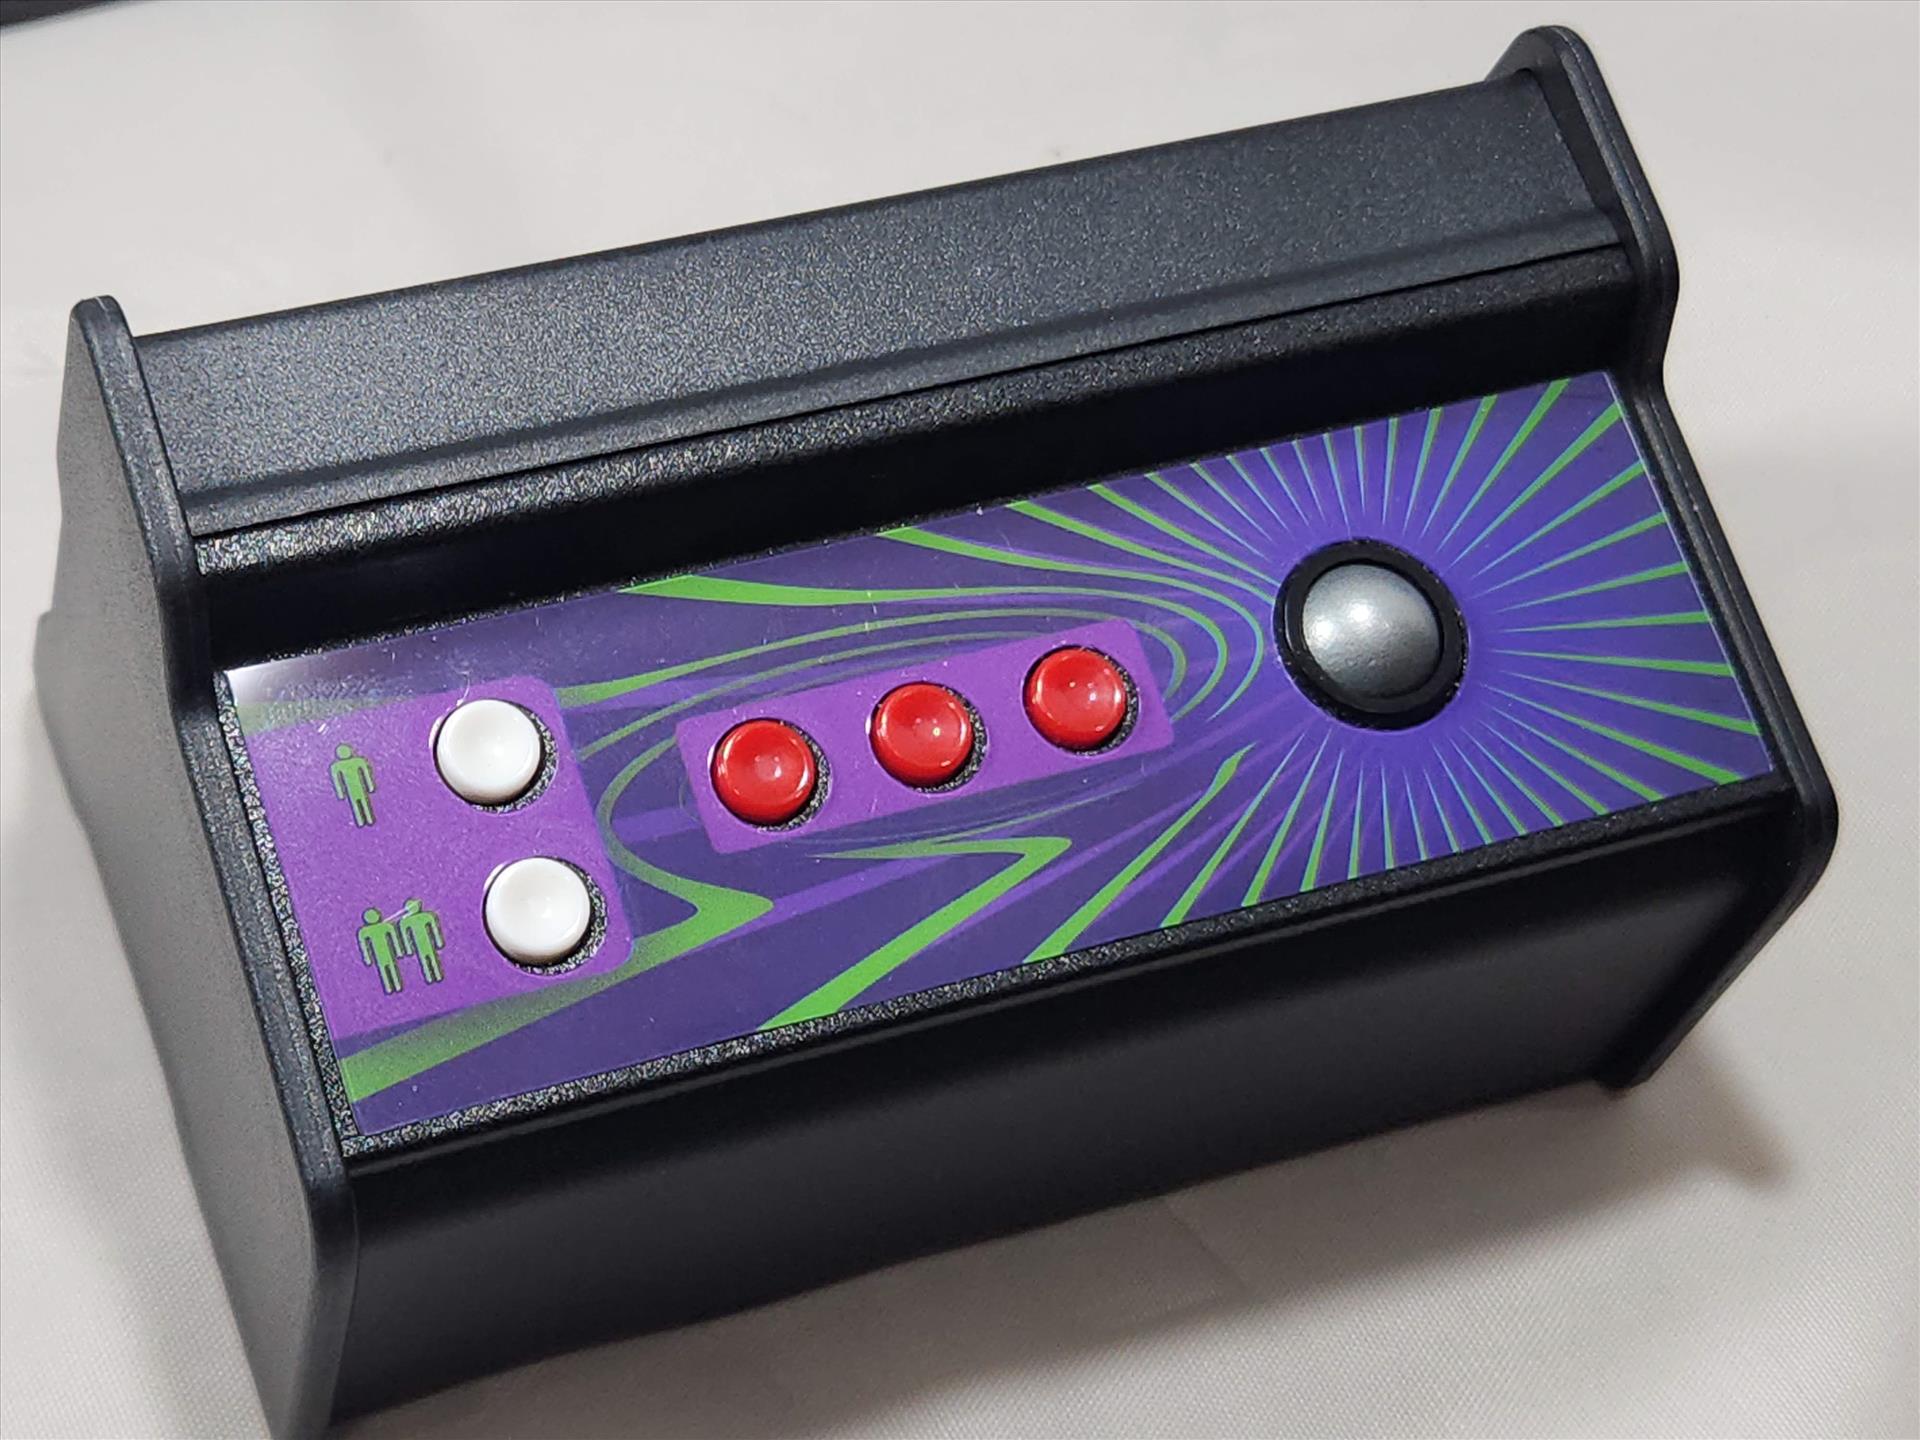
The materials that the Panel Pod are made out of are the same as the color and texture as the control panels for the Build-A-Cade so when everything is put together, it looks and feels the same throughout. The bottom and the back of the side panels feature an indentation that not only gives it a nice little look, but also lets you comfortably rest your index finger and middle finger should you hold the Panel Pod like a console controller.
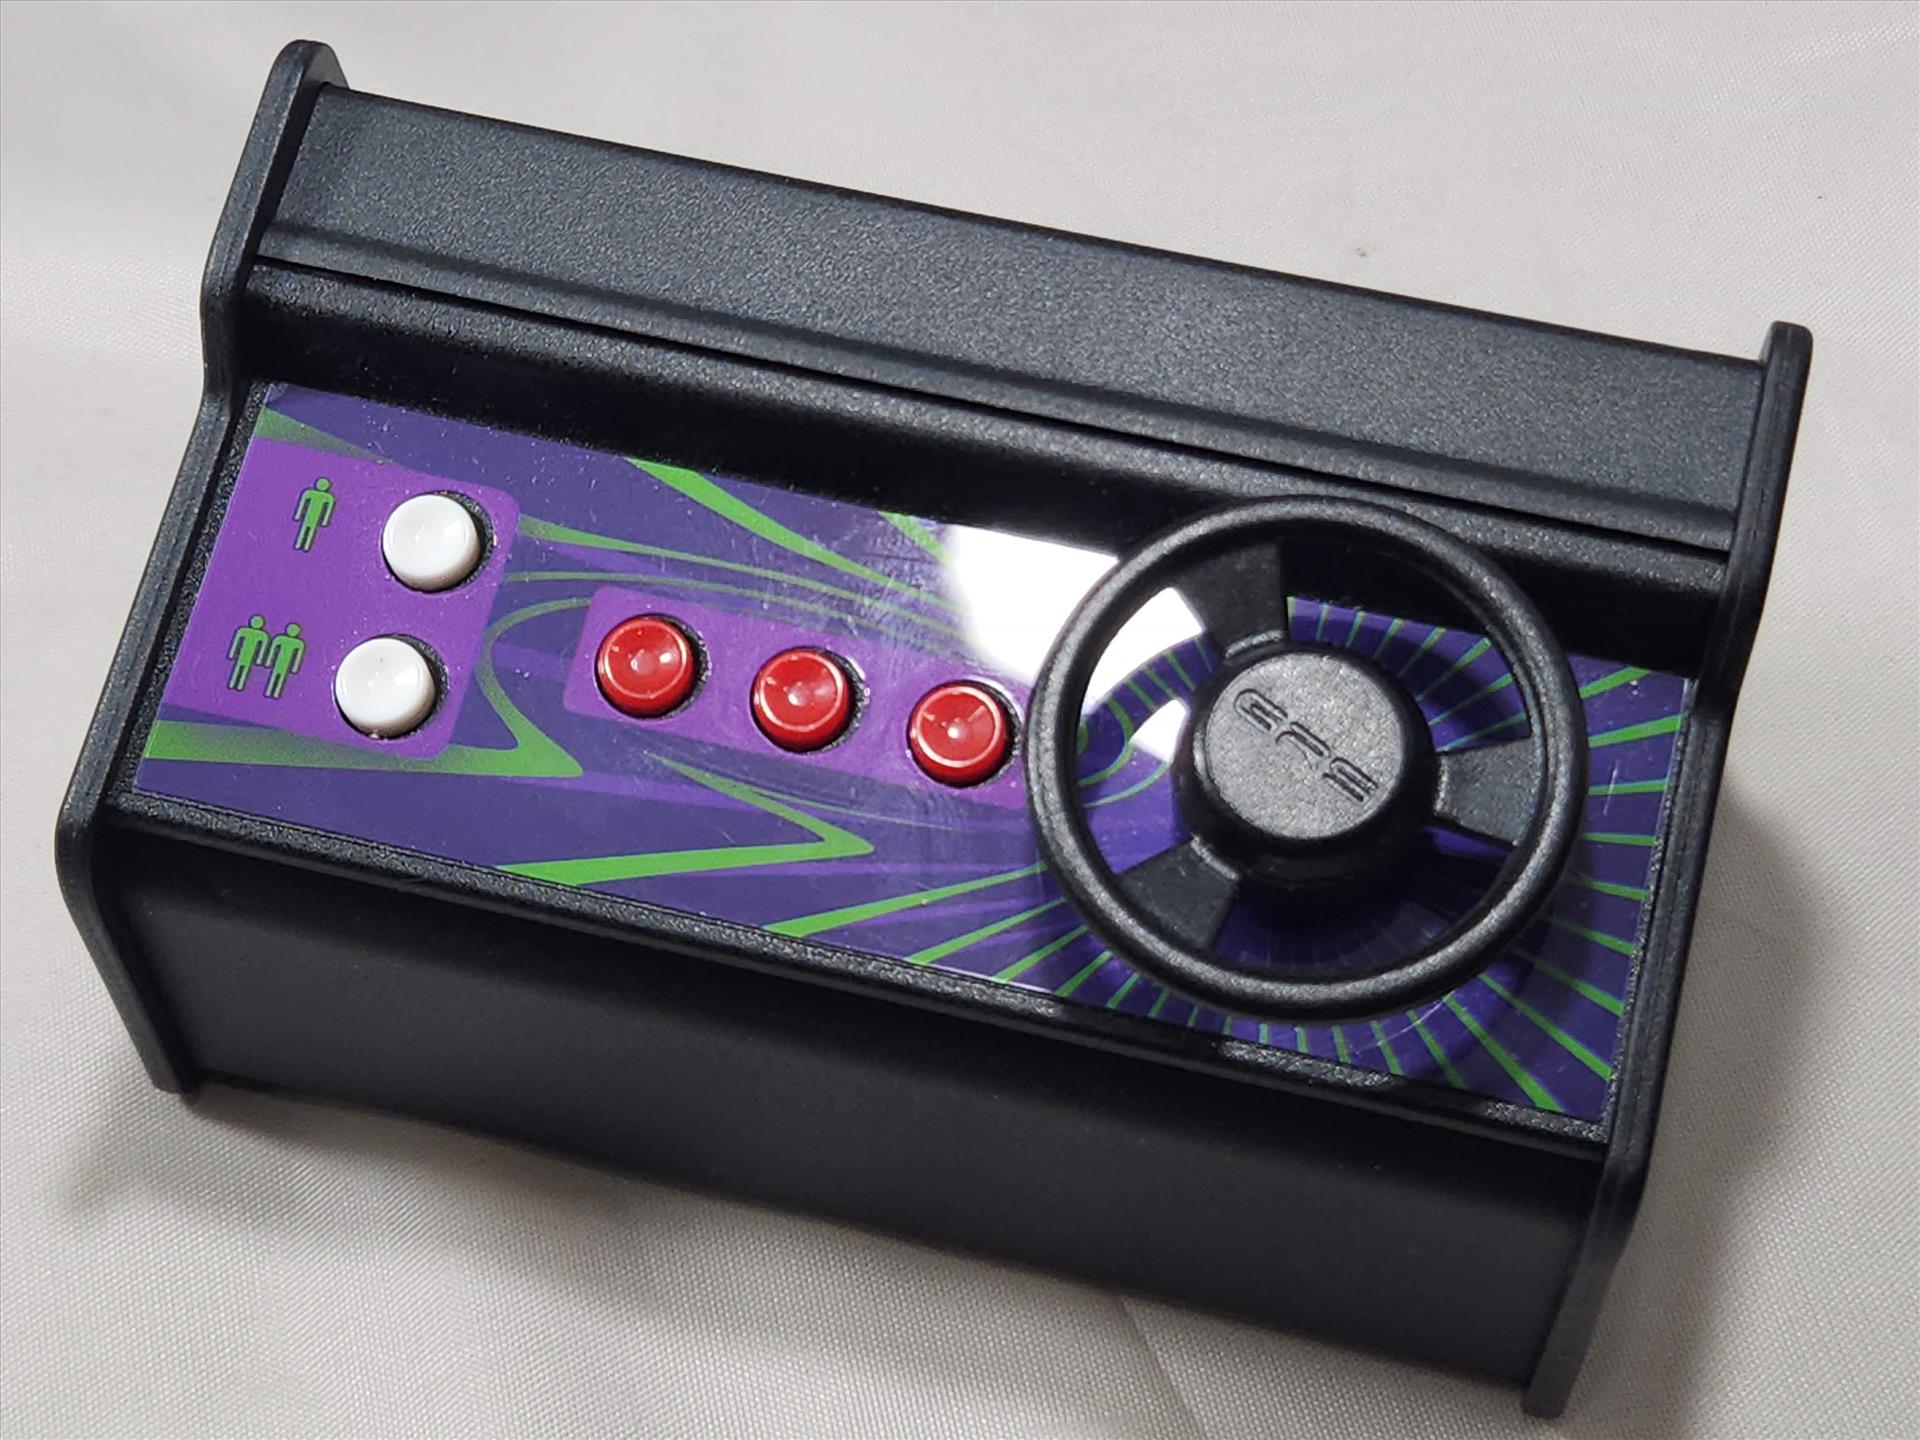
Holding the entire Panel Pod when fully assembled was a lot more comfortable than I thought it would be. As I mentioned before, those indentations on the side panels really help keep your fingers comfortable when they are wrapped around the Pod. All the buttons and D-Pad on the back panel are easily accessible with my two index fingers so if you need to navigate the menus when a control panel without a joystick is attached, the D-Pad will do just fine. On the trackball and spinner with the wheel attached, my right thumb was in a pretty comfortable position to use them and my left thumb was able to access all the buttons on top without any trouble as well.
Using the dual joystick setup for games like Robotron and Smash TV, my thumbs rested on top of the joysticks pretty easily making it a comfortable way to use the dual stick setup over having it installed on the Build-A-Cade. The ball tops felt OK on my thumb, but I’d love to see something more thumb friendly like a large thumbstick topper that I can put on the joysticks since the ball tops are easily removable.
Connecting to the Build-A-Cade is pretty simple as you take the included USB-A to USB-C cable and plug the Panel Pod to the back of the Build-A-Cade. By the way, the cable is really long, which is much appreciated for things like this. There’s a setup you’ll have to do and the Panel Pod includes instructions on how to set the Panel Pod up with the likes of RetroPie, Retroarch and Mame. If you do have two though, which Thunderstick Studios was kind enough to send for me to test, you will have to set them each up. For example, I was able to plug one in and have my trackball work, take it out and plug the one with the spinner in and have it work. When I plugged both of them in at the same time, only one of them worked without needing additional setup on the main controls. Both back panels with the D-Pad and three buttons worked fine with both plugged in at the same time.
For those that are curious, yes this does work on other arcade setups such as a PC. I have a full size machine with Launchbox installed that launches games using Mame. I was able to plug a Panel Pod with a trackball installed and use it without any issues on my full size machine after setting up the controls in Mame. It shows up in the computer as a BAC Controller, which allows you to use it in most other games if you so desire.
If you plan on putting the Panel Pod on a surface for long periods of time, the package includes four rubber feet that you can stick on the bottom of the Panel Pod. These textured rubber feet should help keep it from sliding around.
For those that have a Build-A-Cade set with multiple control panels, the GRS Panel Pod is a nice way to have them neatly stored, displayed, and usable as a controller for the unit. It goes together pretty easily and is completely toolless. Coming in at $19.99, it does help make some control panels easier to use by holding it comfortably in your hand rather than being on the Build-A-Cade itself.
For storing, displaying, and using extra control panels for the Build-A-Cade, the GRS Panel Pods are a nice addition to the mini arcade setup.
Rating: 8.5 Very Good
* The product in this article was sent to us by the developer/company.


About Author
I've been reviewing products since 1997 and started out at Gaming Nexus. As one of the original writers, I was tapped to do action games and hardware. Nowadays, I work with a great group of folks on here to bring to you news and reviews on all things PC and consoles.
As for what I enjoy, I love action and survival games. I'm more of a PC gamer now than I used to be, but still enjoy the occasional console fair. Lately, I've been really playing a ton of retro games after building an arcade cabinet for myself and the kids. There's some old games I love to revisit and the cabinet really does a great job at bringing back that nostalgic feeling of going to the arcade.
View Profile